

For enablement teams that want full control over a course’s structure, content, assessments, and AI tutor.AI generation and SCORM imports get you a course fast, but a flagship certification, a tiering path, or content that has to follow a specific narrative is worth building by hand. Building manually lets you decide the module order, how lessons break down, what each chapter teaches, where you test understanding, and how the in-course AI tutor greets learners. This guide takes you from an empty course all the way to one partners can take.
What you’ll achieve
A complete partner course built from scratch: ordered modules, ordered chapters with rich content (text, images, video, embeds) and assessments, a configured AI tutor, course-wide rules (due date, passing score, button labels), and the course made available so partners can enroll and start learning.Before you start
1
Confirm Courses is on your plan
Courses are a plan feature. If the Courses area shows an upgrade prompt instead of the builder, it is not on your plan yet - check what yours includes at introw.io/pricing.
2
Confirm access
You need a team role with write access to Courses. For the AI tutor and the in-builder AI assistant, AI features must be enabled for your organisation.
3
Have your material ready
Gather the lessons, images, and videos you want to include. You can also paste a rough outline and let the in-builder AI assistant draft chapters for you.
Watch it
- Video
- Click through
Steps
Create the course
1
Create an empty course
Go to Courses and select Create course, then choose Start from scratch. Give the course a name (you can refine the title, description, and banner later) and create it. Introw opens the new course in the builder, ready for you to add content.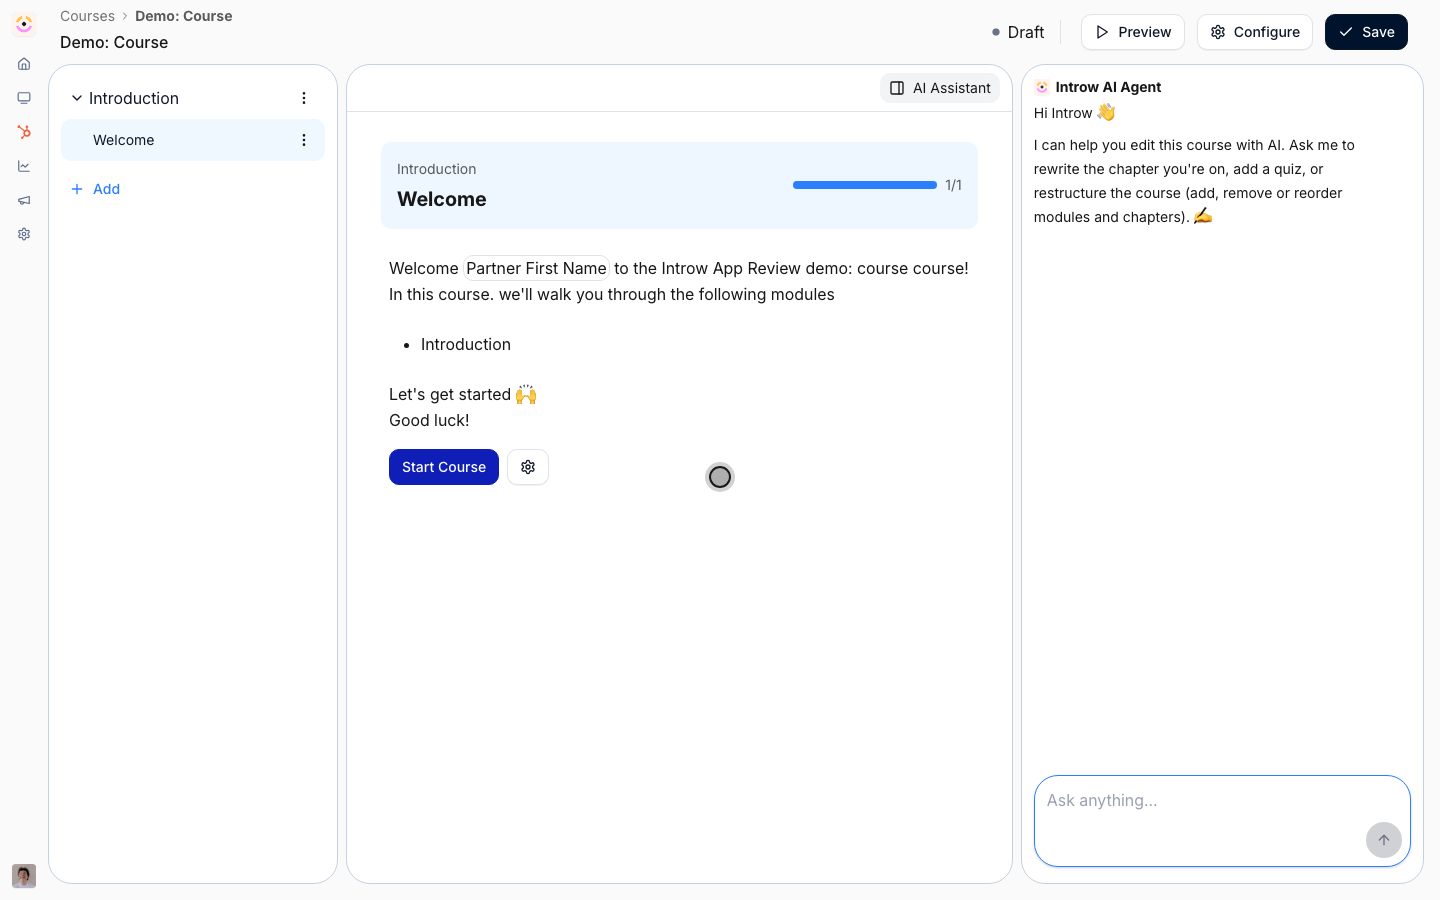
Build the structure and content
1
Add modules for each major topic
In the builder, use the Add button in the left rail and choose Add module for each major topic. Modules are the top-level chapters of the course: learners finish a module by completing all of its chapters, and finish the course by completing all modules.
- Module name - the topic title learners see in the course outline. Name modules around outcomes (for example, “Position the product”, “Run a demo”) so the path reads as a journey. Drag modules to set the order learners progress through.
2
Add chapters within each module
From the Add button choose Add chapter (or use a module’s row menu), then pick a content type in the Create chapter dialog. A chapter is a single lesson; keep each one focused so it is easy to complete and easy to attach a relevant assessment. The dialog groups content into three categories:
- Content - text, image, collapsible content, product overview, columns layouts, and a call to action button. Use these to write the lesson itself.
- Video - embed a Loom, YouTube, or Vimeo video, or upload your own. Use video for demos and walkthroughs where showing beats telling.
- Assessment - add a quiz to test understanding (see Assess learners with a quiz).
3
Fill each chapter with content
Open a chapter to edit it in the content editor. Type to write, or use the slash command to insert blocks (headings, images, columns, callouts, video). Mix a short lesson with a question at the end to keep learners active rather than just scrolling. If you enabled AI features, open the AI Assistant panel on the right to draft or expand a chapter’s content from a prompt, then edit what it produces.Images inside a chapter are shown at whatever ratio you upload, so match the slot: a 3:1 landscape image (around 1536×512) for one that spans the full content width, and a square image (around 1024×1024) for one sitting next to text in a columns block. Those are the sizes the AI assistant generates too, so hand-made and generated visuals line up.
Add assessments (optional)
1
Add a quiz where it matters
From the Add button choose Add quiz, or add a quiz chapter from the Assessment category. Within a quiz you can mix multiple-choice, open-ended (AI-graded), and upload (reviewed) questions. Assessments are what turn “watched every chapter” into a real signal of competency, and they are what a passing score and certificate are built on. The full setup, grading, and review flow is in Assess learners with a quiz.
Configure the course
1
Open Configure
With the course open in edit mode, select Configure to open the Update course dialog. Its left navigation holds every course-wide setting, grouped into tabs. Walk each tab so the course behaves the way you want before partners see it.
2
Set the basics, branding, and AI tutor
Work through the tabs that shape the learner experience:
- Basic - the Thumbnail banner (artwork on the course card and header), Name (the course title), and Description (the short summary shown on the course). These are the first things a partner sees, so make them clear and on-brand. The thumbnail banner is cropped to 3:1, so upload a wide image - 1200×400 is a good size - and you get a crop-and-zoom step to pick the part that shows. Generate with AI under the banner creates one instead, from the course name, description and module list plus your brand colors.
- AI Agent - Enable AI Agent is on by default and gives the course an in-course AI tutor that answers learner questions from the course material and coaches them on quizzes with hints instead of answers. Edit the welcome message (the first thing the tutor says) to set the tone and point learners at what to do first. Turn the tutor off only for a course that should run without help, such as a short policy acknowledgment.
- Advanced - Due date sets a completion deadline (off by default) and Minimum score to pass sets the bar a learner must reach (off by default). Both are covered in depth in Configure enrollment rules and Assess learners with a quiz.
- Button Labels - customize the wording learners see on the course buttons: Next Section (default Continue), Finish Course (default Finish), Next Question (default Next), Answer Question (default Submit), and View Certificate (default View Certificate). Change these to match your voice or to translate them.
- Enrollment - Enable automatic enrollment and pick the segments to auto-enroll. See Configure enrollment rules.
- Certificate - attach a certificate so it auto-issues on completion, or generate one with AI. See Create and auto-issue a certificate.
Make it available to partners
1
Preview as a partner
Use Preview in the course header to experience the course exactly as a partner will: chapter by chapter, with the AI tutor and any assessments live. Fix anything that reads awkwardly before partners see it.
2
Enroll partners to take it live
A course shows as Draft until it has its first enrollment or automatic enrollment is turned on, at which point it automatically becomes Active. There is no separate publish button: enroll a cohort by hand (see Manually enroll partners) or turn on auto-enrollment by segment (see Configure enrollment rules) to make the course live and start partners learning.
Verify it worked
The course shows the expected module and chapter counts, every chapter renders its content in Preview, the AI tutor greets learners with your welcome message, and once a partner is enrolled the course status flips to Active and the partner can work through it.What your partners experience
Once the course is published and surfaced in a partner experience, partners open it from their portal, work through the modules and chapters, take any quiz, and - on passing - receive their certificate to view, download, and share. They see their own progress and pick up where they left off, so the enablement you author here becomes a self-serve learning path partners complete without waiting on you.Related
Assess learners with a quiz
Add questions, set a passing score, and review uploads.
Configure enrollment rules
Auto-enroll segments and set a completion deadline.
Create and auto-issue a certificate
Reward completion with a branded credential.
Implementation reference
Full configuration options.