

What you’ll achieve
The right companies show up as partners in Introw, new matching companies arrive on their own, and every partner-influenced deal is credited to the partner behind it. That last one is what partner revenue reporting and commissions run on.Before you start
1
You can authorize a HubSpot app
HubSpot grants access at portal level, so you need an account that can approve an app and accept every permission it asks for.
2
No other CRM is connected
Introw holds one CRM at a time. If Salesforce is connected, disconnect it first, and check you have permission to manage integrations in Introw.
Watch it
- Video
- Click through
Steps
Sign in to HubSpot
1
Open Integrations
Go to Integrations and stay on CRM & Data, where the HubSpot and Salesforce tiles live.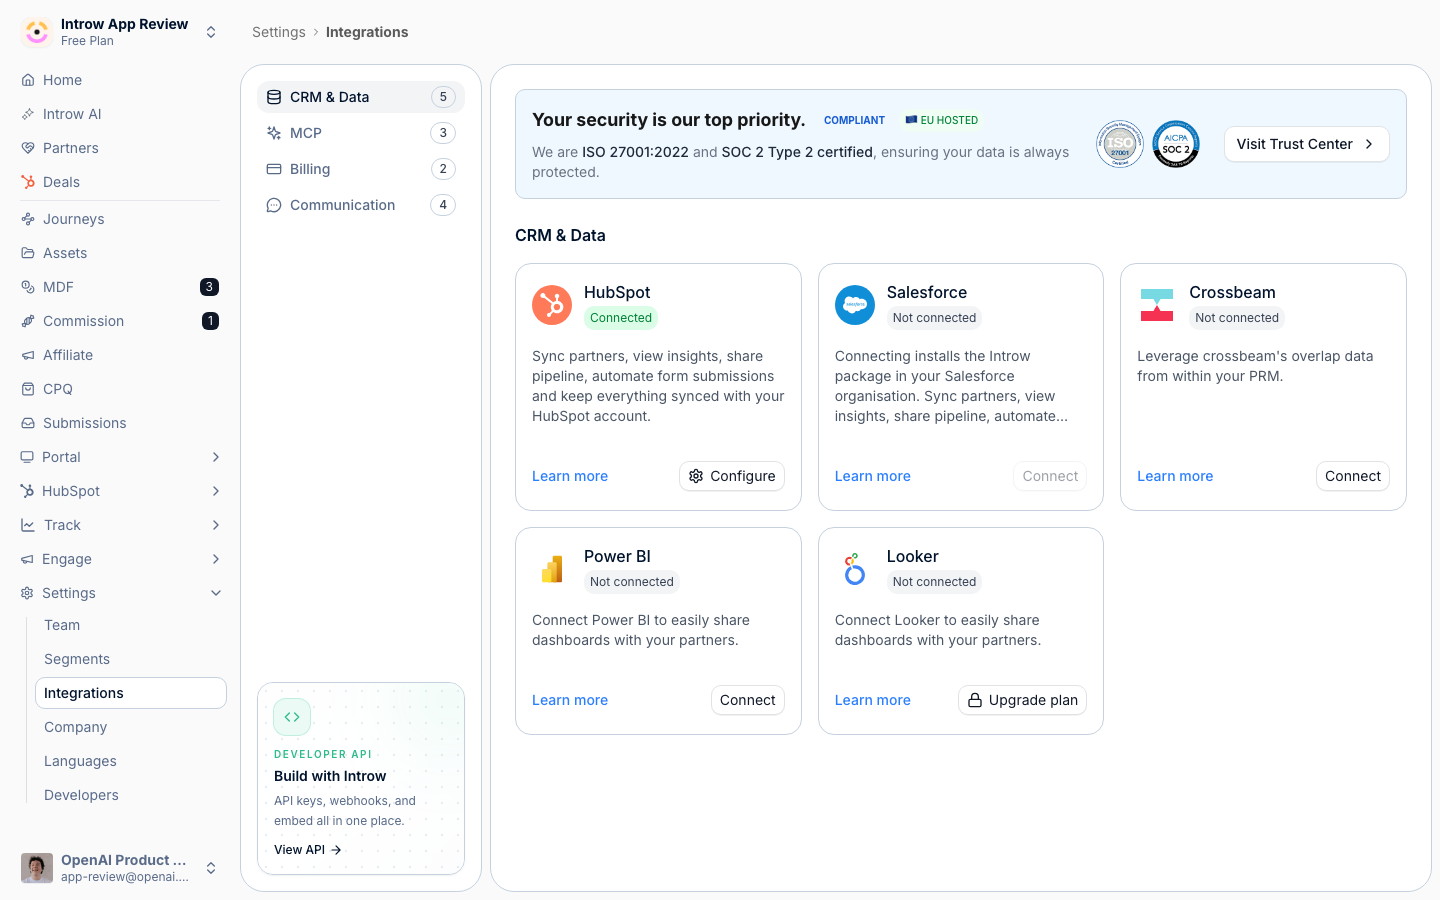
2
Select Connect on the HubSpot tile
A greyed-out tile means another CRM is already connected. Once HubSpot is connected the same tile reads Configure, which is how you come back to any of the answers below.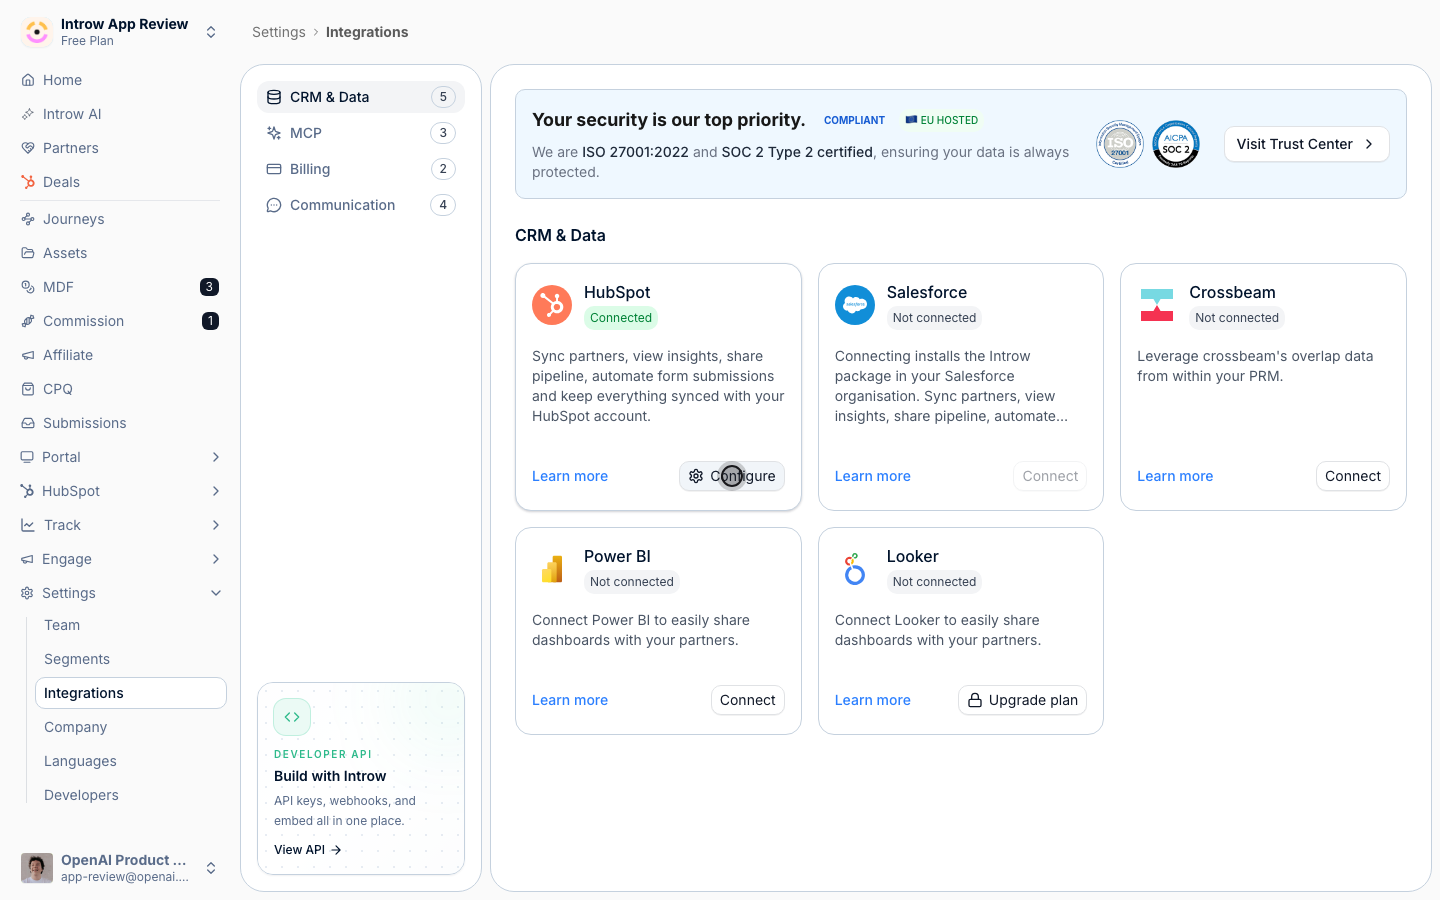
3
Approve the connection in HubSpot
Sign in, pick the HubSpot account, and accept every permission. Decline one and HubSpot sends you back with a message that all permissions are required, and nothing connects.Your security team can review the list first in HubSpot permissions and scopes.
Set up the two steps
HubSpot is connected and the setup opens with three items down the left: Connect HubSpot, which is done, Import partners and Attribute objects. The pane for the one you are on sits to the right. Work down in order the first time. After that, select either item to change your answers.Nothing here is permanent. You can widen a filter, add another object, or come back through Configure on the HubSpot tile whenever your program changes.
Import partners: who are your partners?
1
Pick the object your partners live on
Partner object is the one answer everything else hangs off, because it tells Introw what a partner is.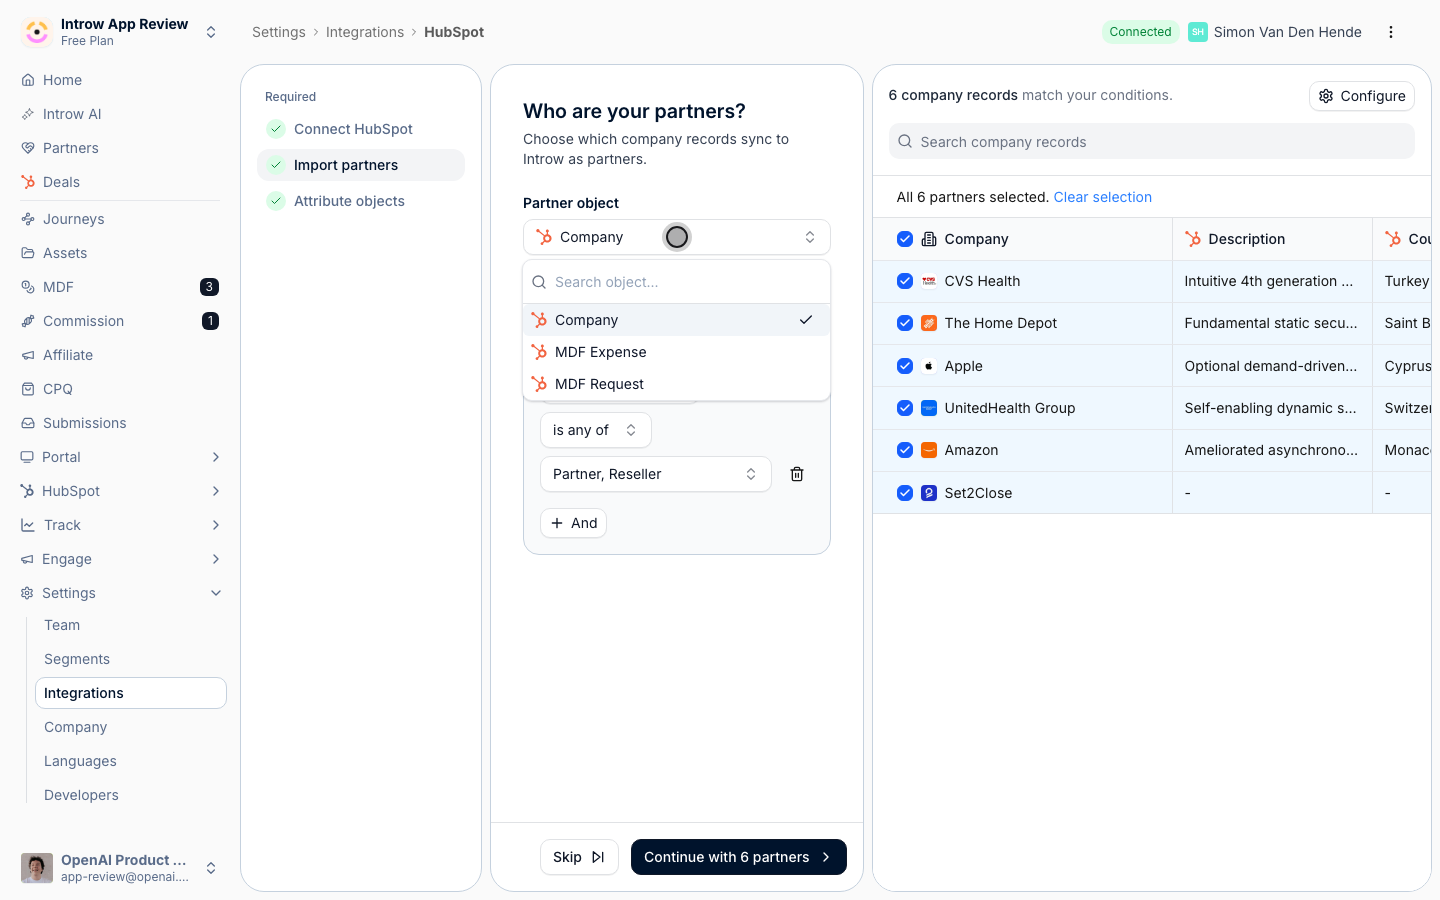
- Company is right for almost every program. Your partners are companies in HubSpot alongside your customers, and a filter separates them in the next question.
- A custom object is right when you already run partners on their own object. Pick it and Introw never mistakes a customer company for a partner.
2
Filter down to the partners
Not every company in HubSpot is a partner, so narrow the list here. Under When…, pick a property, an operator and a value, and use And for a second condition. The line under the conditions reads, for example, “6 company records match your conditions”, and with no conditions every record is included.The property list shows every property on the object, searchable, so filter on whatever you already use to mark partners. Most programs land on the obvious one, such as Type is any of Partner or Reseller. Lifecycle stage, country, owner, and your own custom fields all work too, and on a custom partner object the Partner pipeline and pipeline stage properties are offered as filters. A second filter lets you import one program at a time: resellers now, referral partners later.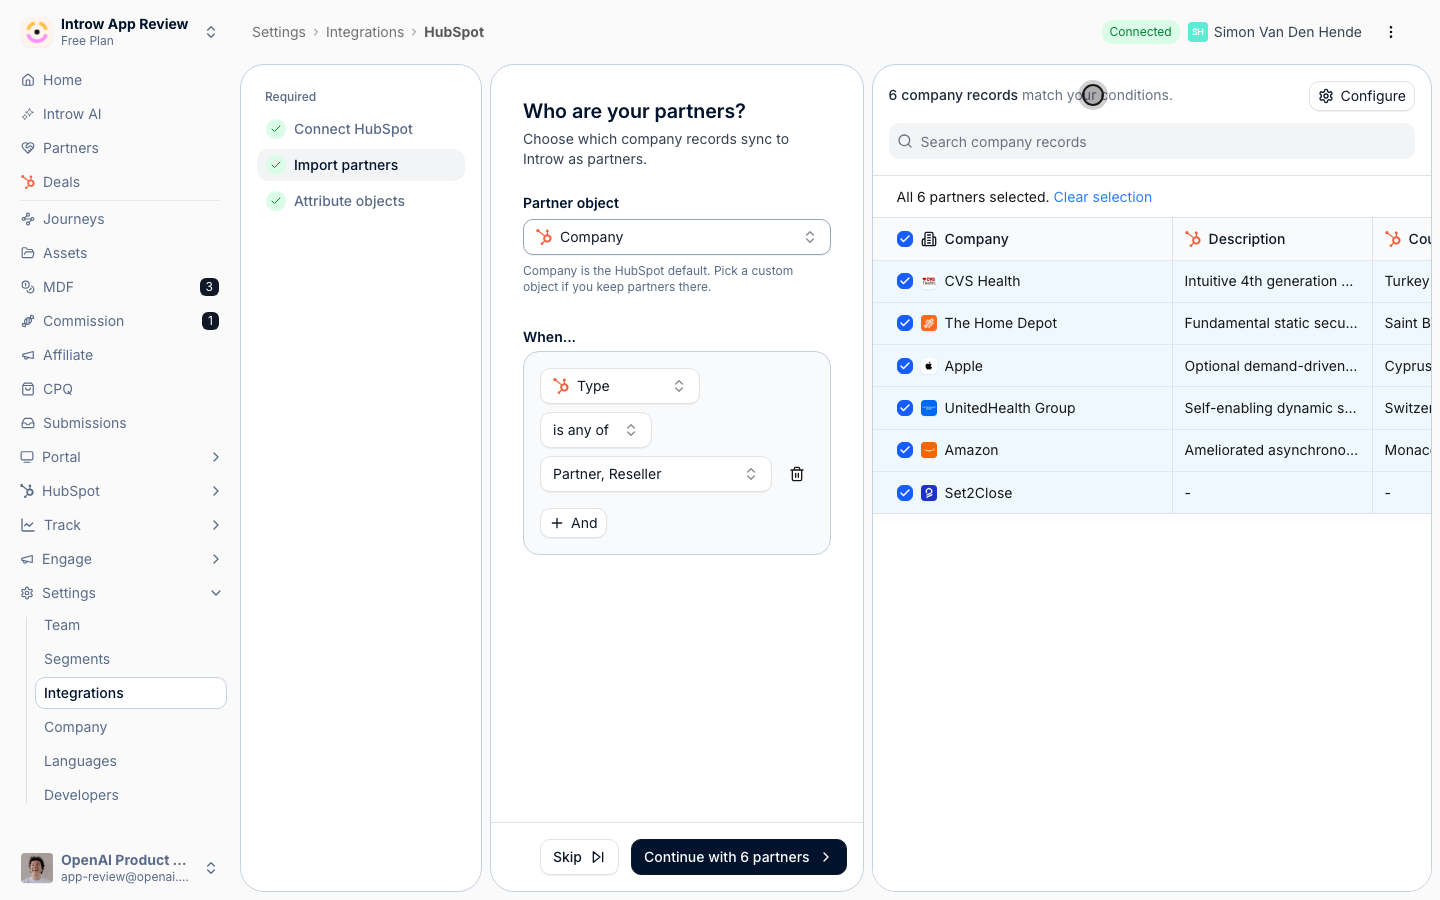
3
Select the partners to import
Everything the conditions found is selected by default, and the banner reads “All N partners selected”. Tick individual rows instead to start with a pilot group. Search narrows the visible rows without touching your selection, and Skip moves on without importing.
4
Import them
Select Continue with [N] partners and confirm with Yes, that is correct. If you changed the partner object, the dialog also warns that changing how partners are stored resets your object attribution and partner property mappings. Introw creates the partners, then starts a full sync for their contacts, deals, and mapped properties. Larger selections take up to a minute.Two things to know about this dialog:
- Automatically sync new partners appears when a filter is set and every matching record is selected. Turn it on and any company that later matches the filter becomes a partner on its own, with nobody re-importing. This is the setting you want.
- If Introw says you have exceeded the maximum number of partners, tighten the filter and try again.
Attribute objects: which objects do you link with partners?
This question is why the connection is worth making. Linking says this deal came through this partner, and it is what partner revenue reporting, goals, and commissions read.1
Open Object Linking
Select Attribute objects in the left nav. The pane lists the links you have. Select Add object to create one.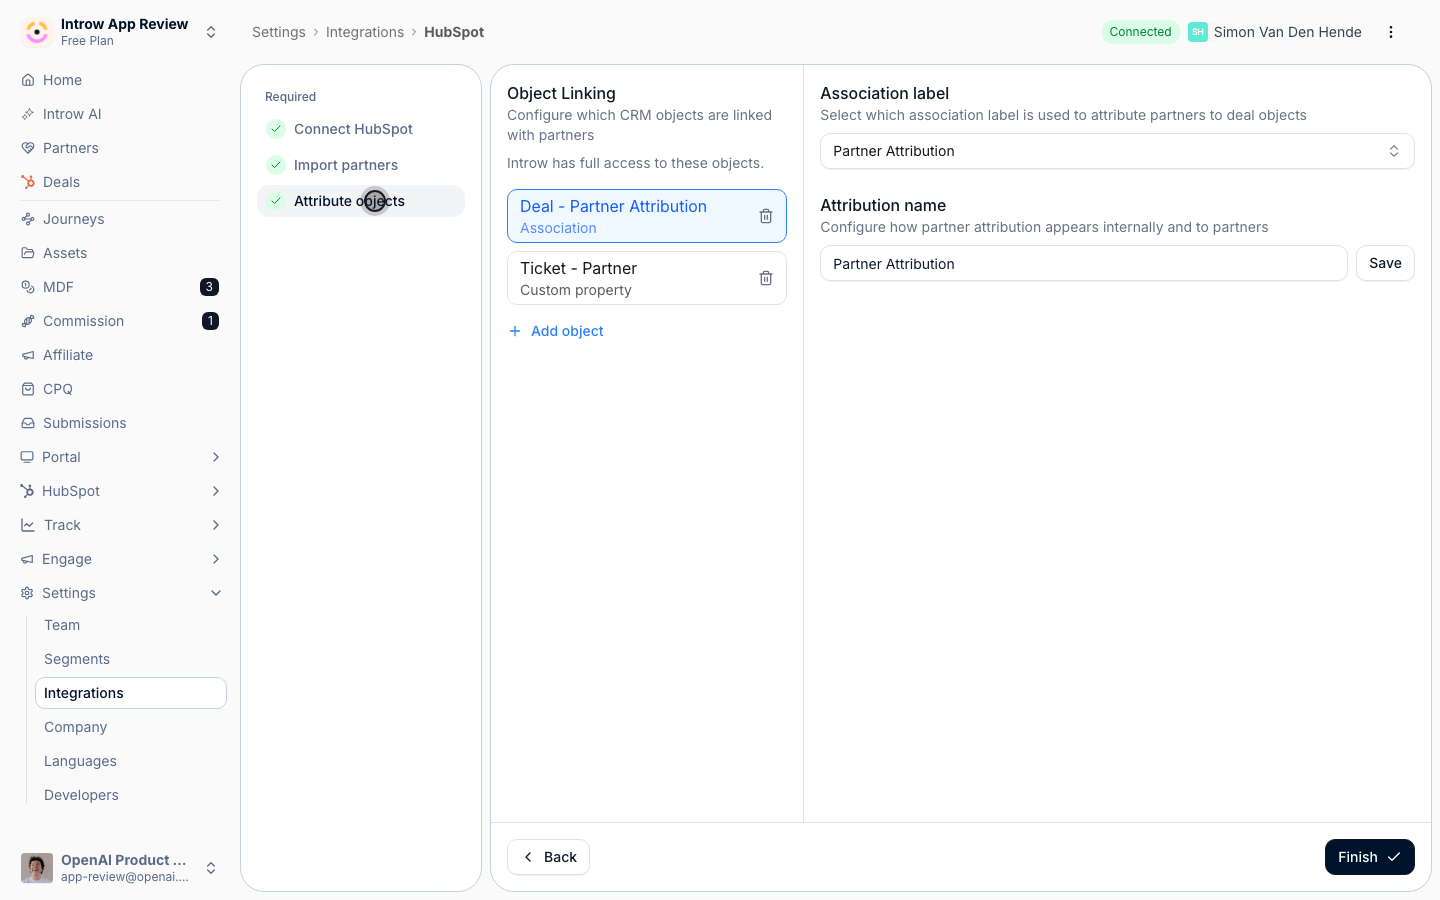
2
Choose the object to credit
Start with Deal. It is the object reporting and commissions run on, and the setup treats it as the one that completes this question. Come back for Contact, Company, Ticket, or Lead afterwards.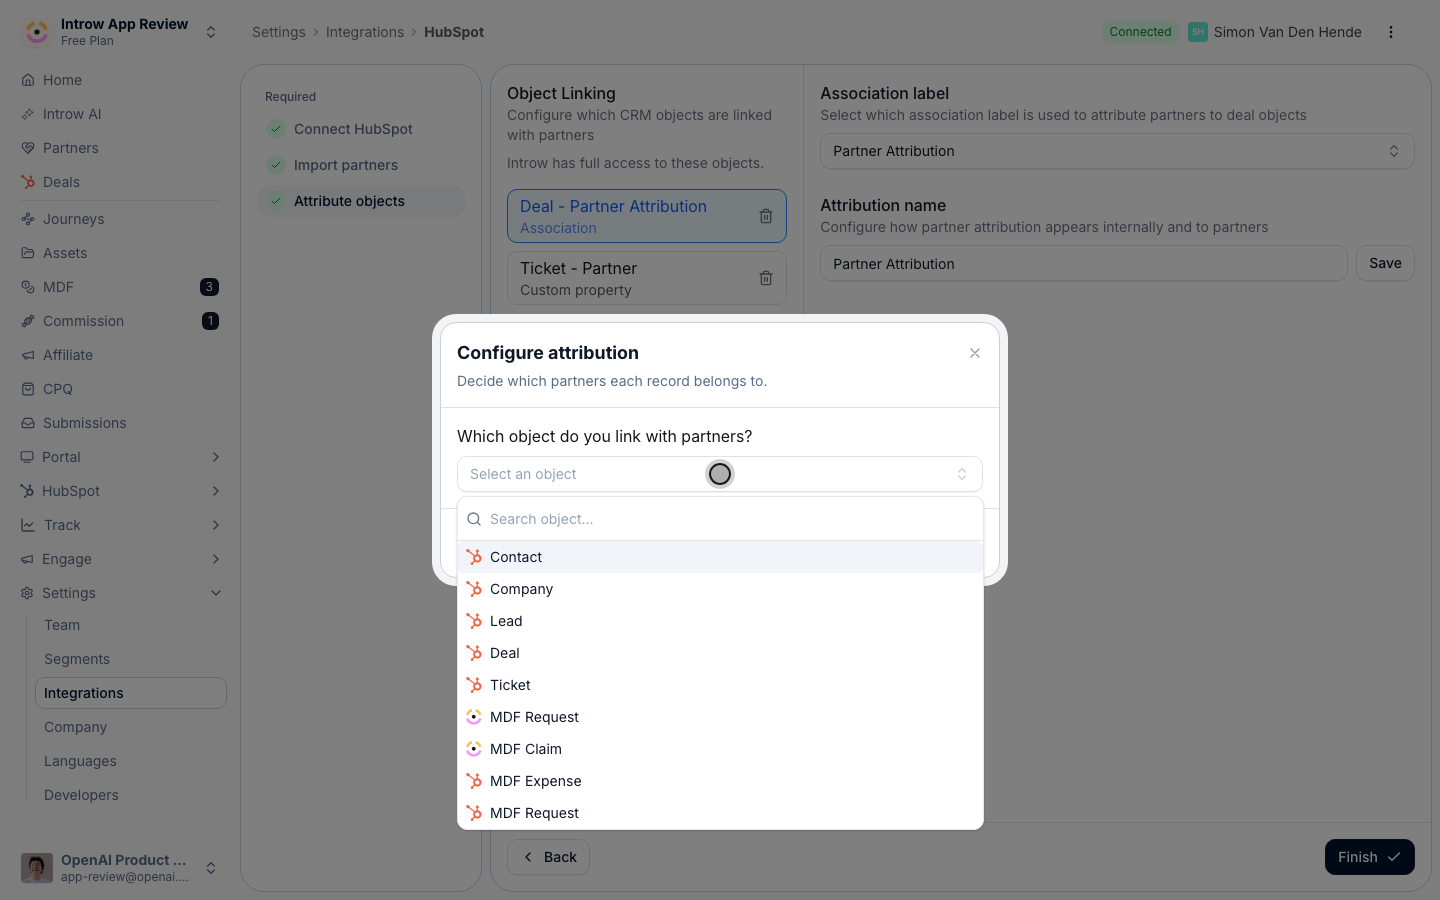
3
Choose how partners attach to it
Three ways, and the right one is whichever matches what your team already does in HubSpot: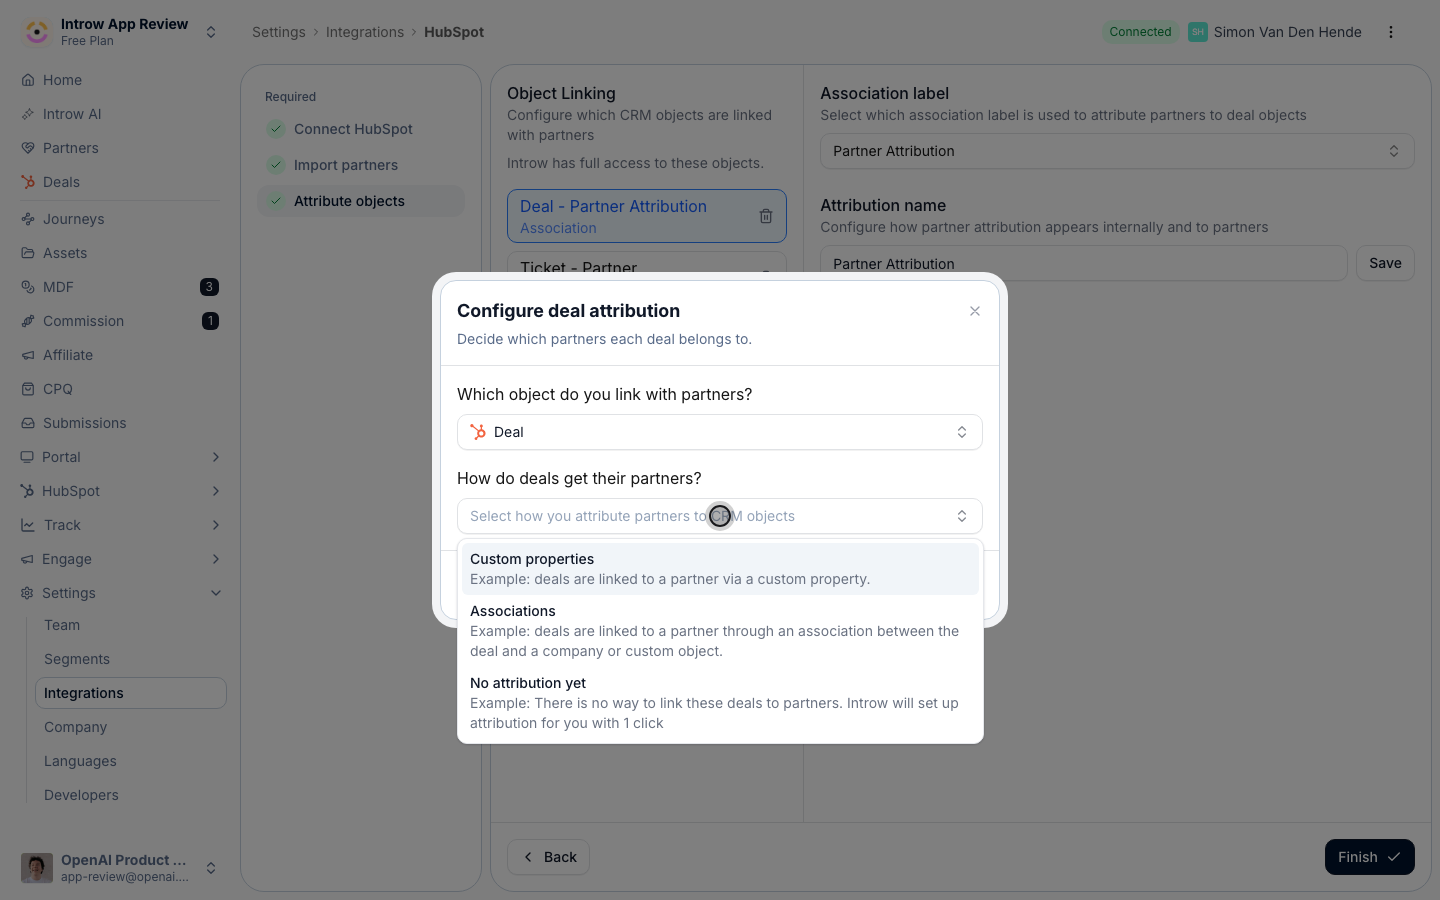
- Custom properties reads the partner off a property on the deal. Pick this when you already tag deals with a partner, usually a dropdown.
- Associations reads a HubSpot association between the deal and the partner company. Pick this when your team already associates partners to deals, and choose the association label on the next screen.
- No attribution yet is for starting fresh. Introw creates a partner property on the object in HubSpot for you, in one click, and links your partners to its values.
4
Name it and add it
What name do you want to use for this attribution? is the label your team and your partners read on the deal, so write it the way you’d say it: “Influencing partner”, “Reseller”. Then select Add deal attribution.Repeat Add object for every other record you want credited. A program that shares support work links Ticket too; one that runs on referrals links Contact.
Finish
1
Select Finish
With a Deal link in place, select Finish. Introw starts pulling your partner data and lands you on your home view.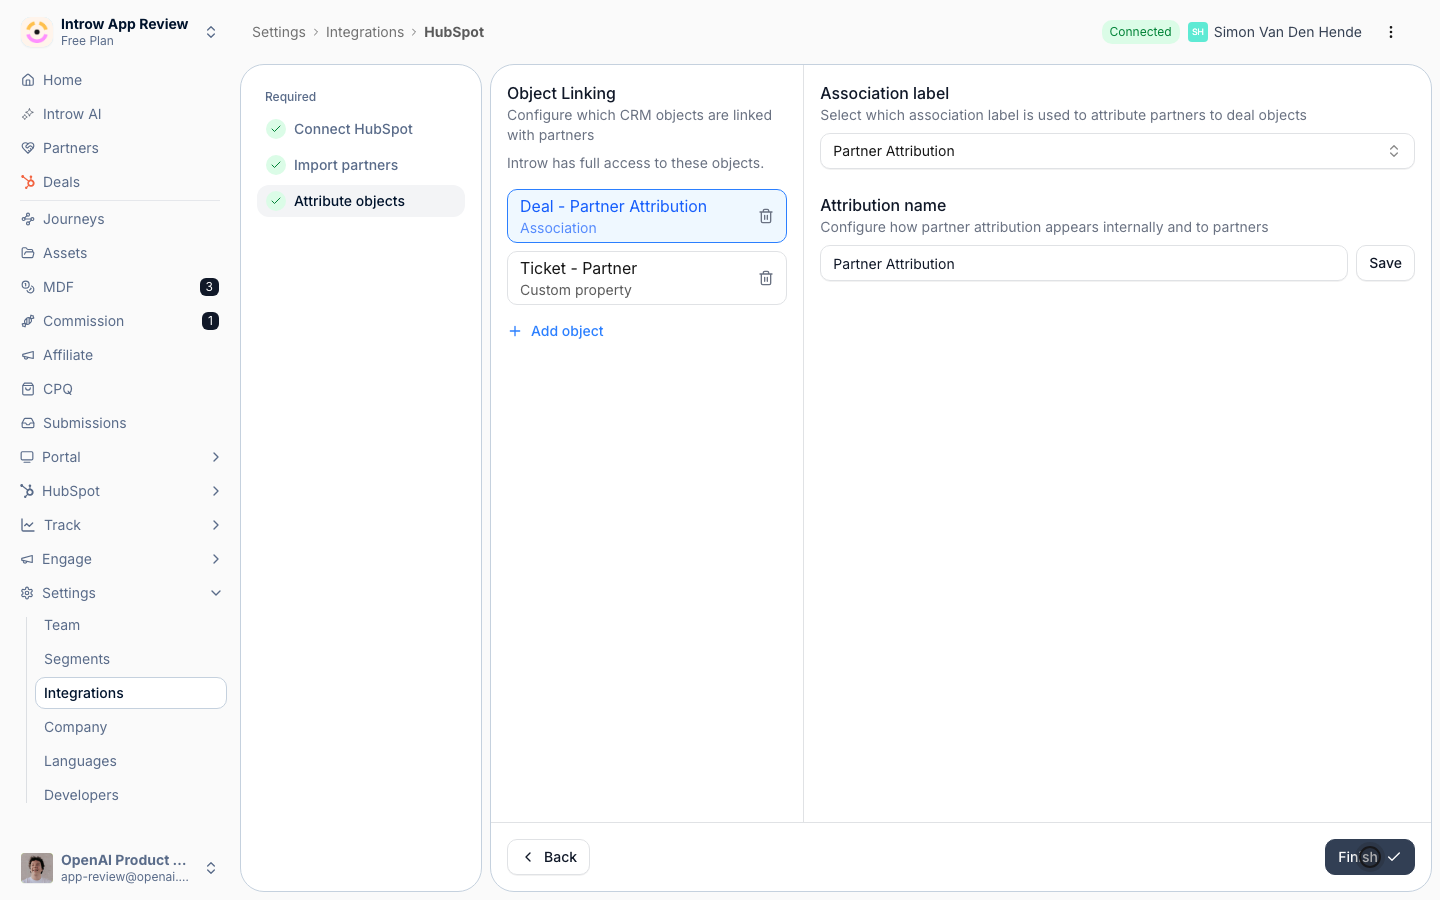
Verify it worked
The HubSpot tile reads Connected, and your filtered companies are in Partners. Open a partner and its deals are there, credited through the link you configured. The sync runs both ways once you say what should go back: map tiers and managers to a CRM property pushes a partner’s tier, program, and manager onto the company in HubSpot, and Introw can create those properties for you in one click. If the tile shows a status other than Connected, troubleshoot a CRM connection covers every state, including the Install update prompt HubSpot raises when it needs new permissions.Related
Partner attribution in HubSpot
Compare every attribution method - property, association label, custom object - and its trade-offs before you choose.
Embed Introw in HubSpot
Add the Introw cards so reps work with partners from the record.
Sync partners & contacts
How the sync keeps partners and their contacts current after setup.
HubSpot permissions & scopes
Every scope Introw requests, and what happens when one is missing.
Troubleshoot a CRM connection
Fix a sync that shows a needs-attention status.
Connect Salesforce as your source of truth
The same two steps, for Salesforce.