

What you’ll achieve
A live reseller registration form whose accepted submissions become CRM deals attributed to the reseller, with channel conflict surfaced before acceptance and an approval gate (optionally AI-assisted) governing what auto-accepts versus what a human reviews. Resellers submit, the right deals flow through fast, and every registered deal lands in your CRM credited correctly.Before you start
1
Connect your CRM with partner attribution
A CRM connection with partner attribution configured is required, or registered deals cannot be credited to the reseller. Attribution is what locks in a reseller’s claim.
2
Confirm write access to Forms
You need access to build a form and edit its Automation tab, and access to the Submissions inbox to review registrations.
Steps
Build the registration form
1
Create the form
Go to Forms and create a new form. This is the front door resellers fill in to register a deal, so give it a clear name and a short intro that tells resellers what registering does for them.
2
Add the fields resellers fill in
In the form builder, open the Add field dialog and add the inputs you need to qualify and create the deal. Walk each input you add:
- Input field / Text area - single-line or multi-line text for details like the end customer name, deal description, or expected value. Use these for the qualifying detail your team needs to judge a registration.
- File upload - lets the reseller attach supporting documents (a proposal, an email thread). Add it when evidence helps you approve faster.
- CRM Object - lets the reseller pick an existing CRM record (for example their own company) so the deal links to it instead of creating a duplicate. Add it when resellers should choose from records they already own.
- Checkbox - for terms acceptance or a yes/no qualifier; mark it required when it must be agreed before submitting.
3
Add the Deal automation
On the Automation tab, add a Deal automation (choose Deal from the add-automation menu). This is what turns an accepted submission into a real CRM deal. Configure each section:
- Enrich or create deal - Introw scans your CRM for a deal matching the submitted fields and enriches it, or creates a new one when none matches, so you avoid duplicates. If you added a CRM Object picker, you can also turn on Create a new deal when one is selected to always create a fresh deal even when the reseller picks an existing record.
- Auto-link your partners - keep this on so the deal is attributed to the reseller. Under Submitting Partner, choose which attribution mapping(s) credit the submitter. If you see a notice that no partner attribution is configured, set it on the CRM connection first, or registered deals will not be credited.
- Form fields - map each form field to the CRM property it should write to, using the Add field mapping rows (CRM Property, Form Field, Write Mode). The write mode controls whether the value overwrites or only fills empty properties.
- Default values - use Add default value for fixed values the submitter never sees, such as a deal type, lead source, or the pipeline and stage a registered deal should land in.
- Advanced - turn on Disable net new deal creation only when you want Introw to attach to an existing deal and never create a new one. Leave it off for standard registration where new deals are expected.
Protect the claim with channel conflict checks
1
Enable Channel Conflict Analysis
On the Automation tab, open Channel Conflict Analysis and turn it on. Each submission is then cross-referenced against your existing pipeline before any CRM automation runs, so a reseller’s claim cannot quietly collide with the direct team or another partner. The assessment and suggested next steps are visible to your team only, never to the submitter.
2
Scope what counts as a conflict
Conflict analysis runs against deals by default. Narrow it with the filters so it only compares against the records that matter:
- Filters - add conditions (for example a stage, owner, or deal type) so the check looks only at relevant pipeline. Leaving it broad checks everything; scoping it cuts false positives.
- Context - in the additional-context box, describe how your team defines a conflict (for example “an open deal on the same account within 90 days”). This guides the assessment so it matches your channel rules.
Gate registrations with approvals
1
Enable the Approval Gate
Open Approval Gate and turn on Enable Approval Gate. Registrations now wait for review before their CRM automation runs, so you keep control of what becomes an attributed deal. With it off, conflict-free registrations that need no review can flow straight through.
2
Add Introw AI validation
Optionally turn on Enable Introw AI validation to have Introw AI assess each submission against your rules before it reaches a person. Configure it:
- Instructions - tell the agent your policy, risk tolerance, and must-have criteria (for example “decline submissions missing a timeline, return submissions without target-account fit”). Use Generate with AI to draft instructions from the form’s fields, then refine.
- Allow Introw AI to execute confident decisions autonomously - when on, the agent can accept, decline, or return a submission on its own once it is confident enough. Set the certainty threshold with the slider: the default is 90%, lower is more autonomous, higher is more cautious. Anything below the threshold still escalates to your approval steps.
3
Set the approval steps
Under Approval steps, build the ordered chain that must sign off. Submissions are approved sequentially: each step approves before the next is asked.
- Use Add approval step to add a step, then choose the approver: a specific team member, a partner team role, or Anyone (any team member can approve). A new gate starts with a single Anyone step.
- Order steps from first reviewer to final sign-off; remove a step to simplify the chain.
4
Personalize the submitter's accept and decline messages
Still on the Approval Gate, set the Accept and Decline context so the reseller gets a clear next step either way: write what an accepted reseller should do next, and how to guide a declined one. You can always edit these per submission at review time.
5
Notify your team on every submission
Add the Notify your team automation so the right people hear about new registrations as they land. Keep the partnership manager included and add any extra recipients (a deal desk, a regional lead) so no registration sits unseen.
Confirm, share, and go live
1
Set the submission confirmation
Open Submission confirmation to customize the screen a reseller sees after they submit. Replace the default thank-you with a message that sets expectations (for example “We review registrations within two business days”), so the reseller knows their claim is in.
2
Share the form with resellers
Save and publish, then get the form in front of resellers. You can share it by link or embed, drop it into their portal, or let them register off-portal by email, Slack, Microsoft Teams, or an AI assistant. See the channel guides below for each method.
Review and approve submissions
1
Work the Submissions inbox
Open Submissions to see registrations by status. For each one you can Accept to run the deal automation and attribute the reseller, Decline to reject it, or Return it to the reseller for more information. Conflict cases show the overlapping records so you can decide with full context, and you can tailor the accept or decline message before sending.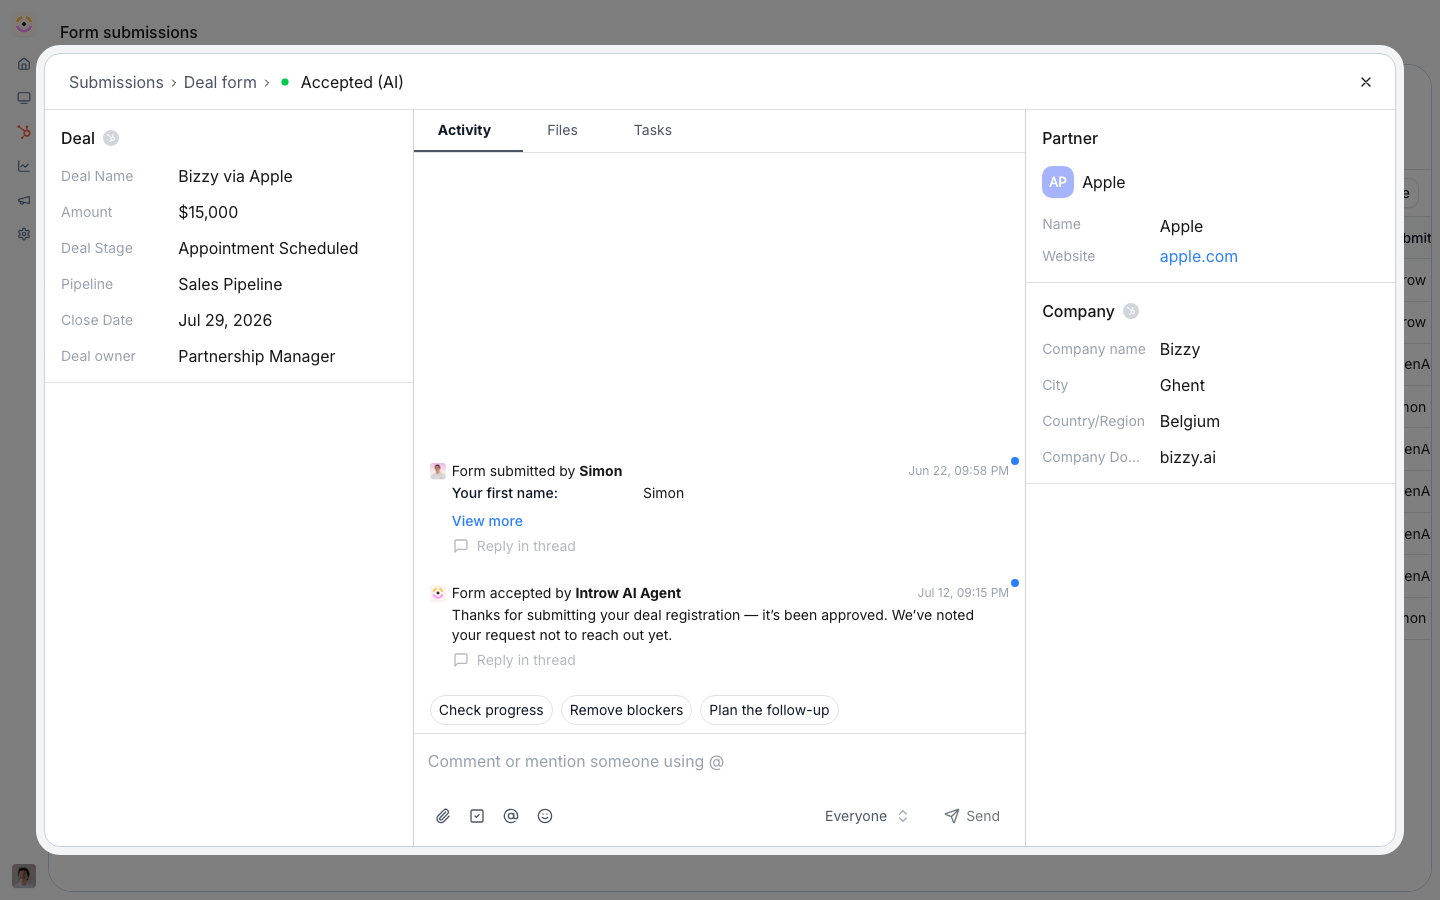
Verify it worked
Submit a test registration. Confirm it appears in Submissions with the right status: held for approval if the gate is on, flagged if it overlaps existing pipeline, or auto-accepted when it is conflict-free and needs no review. On accept, open the CRM and confirm a deal was created or enriched and attributed to the reseller, and that the reseller received your confirmation message.Related
Ways to register
Every channel a reseller can register from - link, embed, email, Slack, Teams, or AI.
Channel Conflict
How each registration is screened for overlap.
Run a submission approval workflow
The full approval configuration.
Implementation reference
Full configuration options.