

What you’ll achieve
A partner support agent connected to your MCP server, with its tools tested and live. When a partner asks something the server can answer, the agent calls the right tool and responds with real-time data, on top of everything already in the knowledge base, and still scoped to what that partner is allowed to see.Before you start
1
Confirm the MCP connection module
Connecting your own MCP server requires the MCP connection module on your plan. If the MCP Server tab shows an upgrade prompt instead of a connection form, the module is not enabled.
2
Have the server URL and token ready
You need the HTTPS endpoint of your MCP server and a bearer token it accepts for authentication. The server must be reachable over HTTPS with a valid certificate.
3
Check your access
You need AI agent write access to add or remove a connection.
Watch it
- Video
- Click through
Steps
1
Open the MCP Server tab
Go to Knowledge base and switch to the MCP Server tab. This is where you connect external tools to the agent. If the tab shows an upgrade prompt, the MCP connection module is not on your plan and you cannot connect a server yet.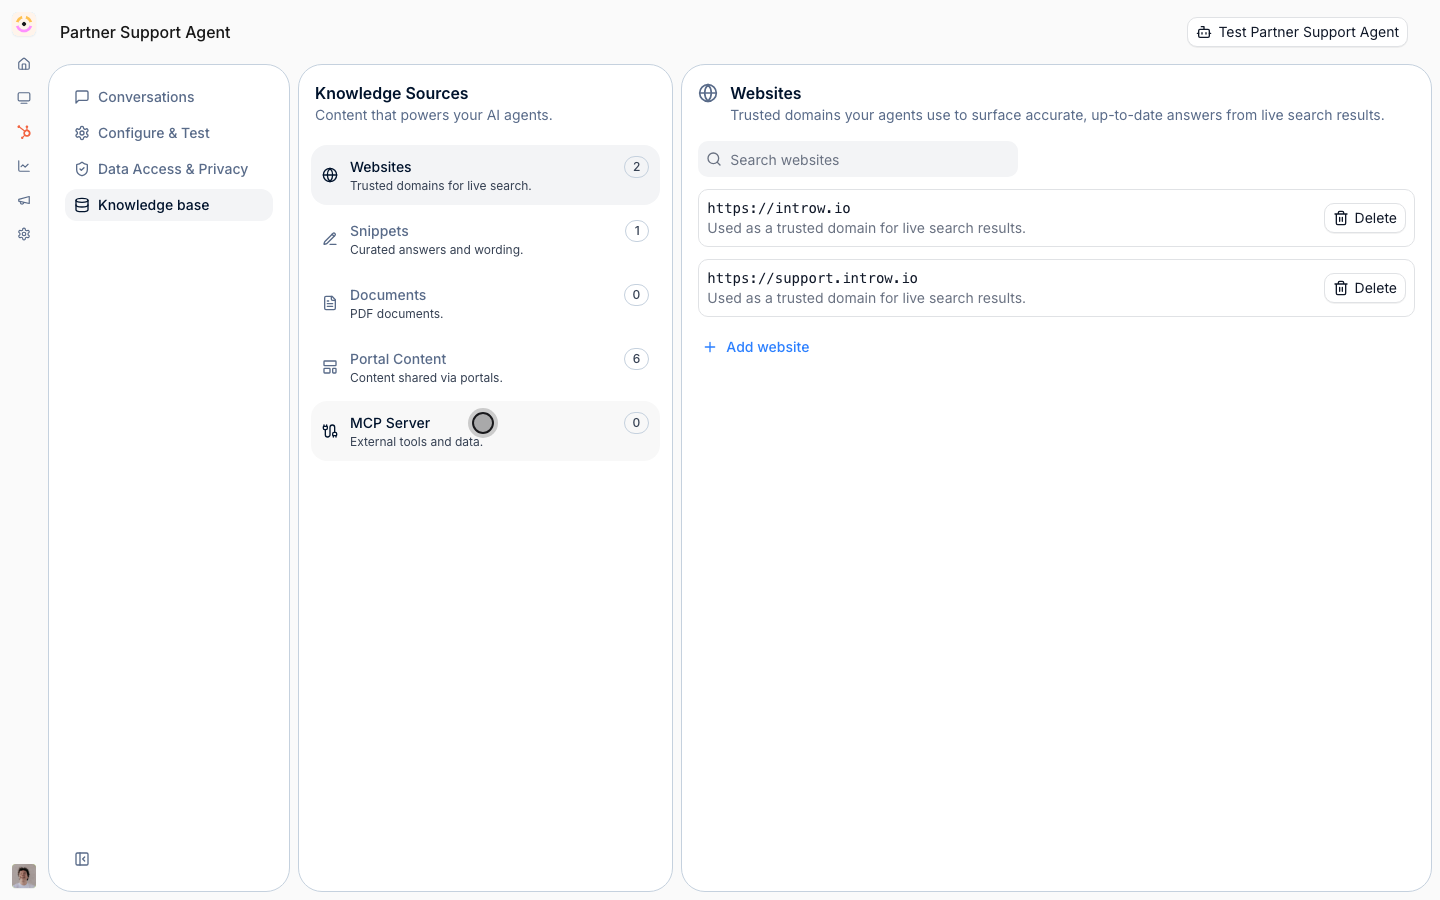
2
Start a new connection
Select Add MCP Server to open the connection dialog. At the top, the authentication method is a choice between Bearer Token and OAuth: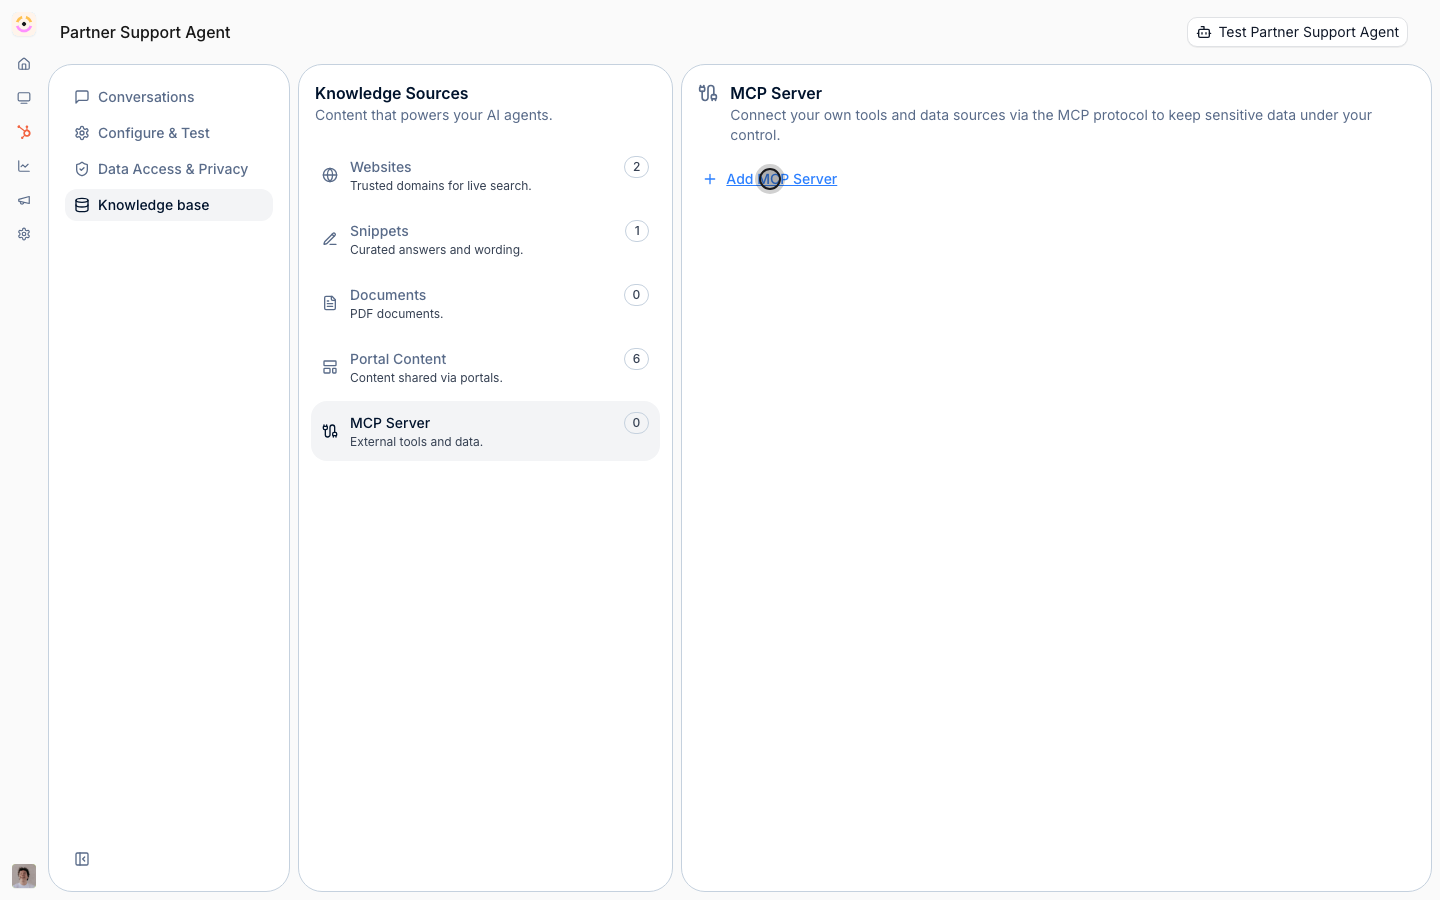
- Bearer Token is the available method, use it. You authenticate the agent to your server with a token your server issues.
- OAuth is shown but listed as coming soon, so you cannot complete an OAuth connection today; stay on Bearer Token.
3
Enter the server details
On the Bearer Token tab, fill in both fields: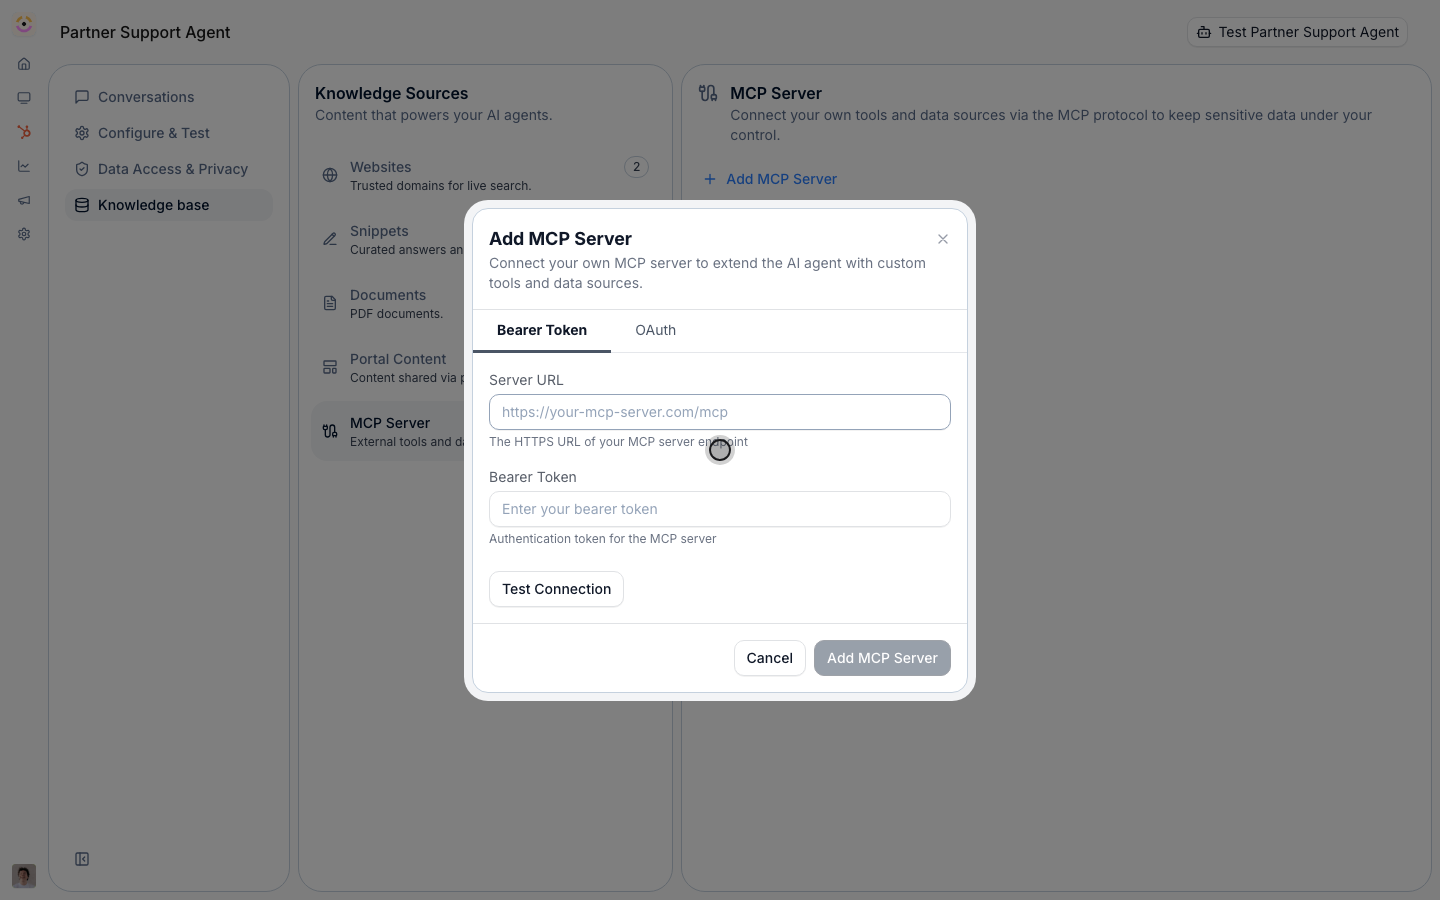
- Server URL - the HTTPS endpoint of your MCP server (for example
https://your-mcp-server.com/mcp). This is where the agent sends tool calls, so it must be the live, reachable endpoint over HTTPS. - Bearer Token - the authentication token your server accepts. It is sent with every call so your server can verify the request is from Introw and authorize it. Treat it like a secret; it is masked as you type.
4
Test the connection
Select Test Connection. Introw connects to the server and lists the tools it exposes. A successful test shows how many tools are available, and Show available tools lets you confirm the agent is seeing the right ones. If it fails, the error tells you what to fix (an unreachable URL, a rejected token, or an endpoint that is not a valid MCP server). You must pass this test before you can save, the Add MCP Server button stays disabled until the connection succeeds.
5
Add the server
Once the test passes, select Add MCP Server. The connection is saved and its tools become available to the agent. The connected server now appears in the list on the MCP Server tab with its URL and the date it was connected; use Delete there to disconnect it, after which the agent loses access to its tools.
Verify it worked
The connected server shows in the list on the MCP Server tab with its URL and connection date. Then open the agent’s test panel on Configure & Test and ask a question that needs a live answer the server provides, the agent should call the tool and respond with real-time data rather than a static or “I don’t know” answer.Related
Fill the knowledge base
Add websites, snippets, and documents as the agent’s static sources.
Launch the partner support agent
Turn on and test the agent that uses these tools.
Implementation reference
Source types, portal content, the MCP module gate, and limits.