

What you’ll achieve
A reusable role that grants a specific set of permissions, optionally limited so its users only ever see their assigned partners, with notifications configured and the right people assigned to it.Before you start
1
Have Team access
You need Team access to create and edit roles. Roles live on the Roles tab of Team settings.
2
List the areas this role needs
Decide which parts of the program the role should reach (for example Partners, Commissions, or Integrations) and whether its users should be limited to their own assigned partners.
3
Plan partner assignments (if scoping)
If you will use the Partner manager access type, make sure partners are, or will be, assigned to the right people so scoped users actually see their book.
Watch it
- Video
- Click through
Steps
Create the role
1
Open Roles
Go to Team and open the Roles tab.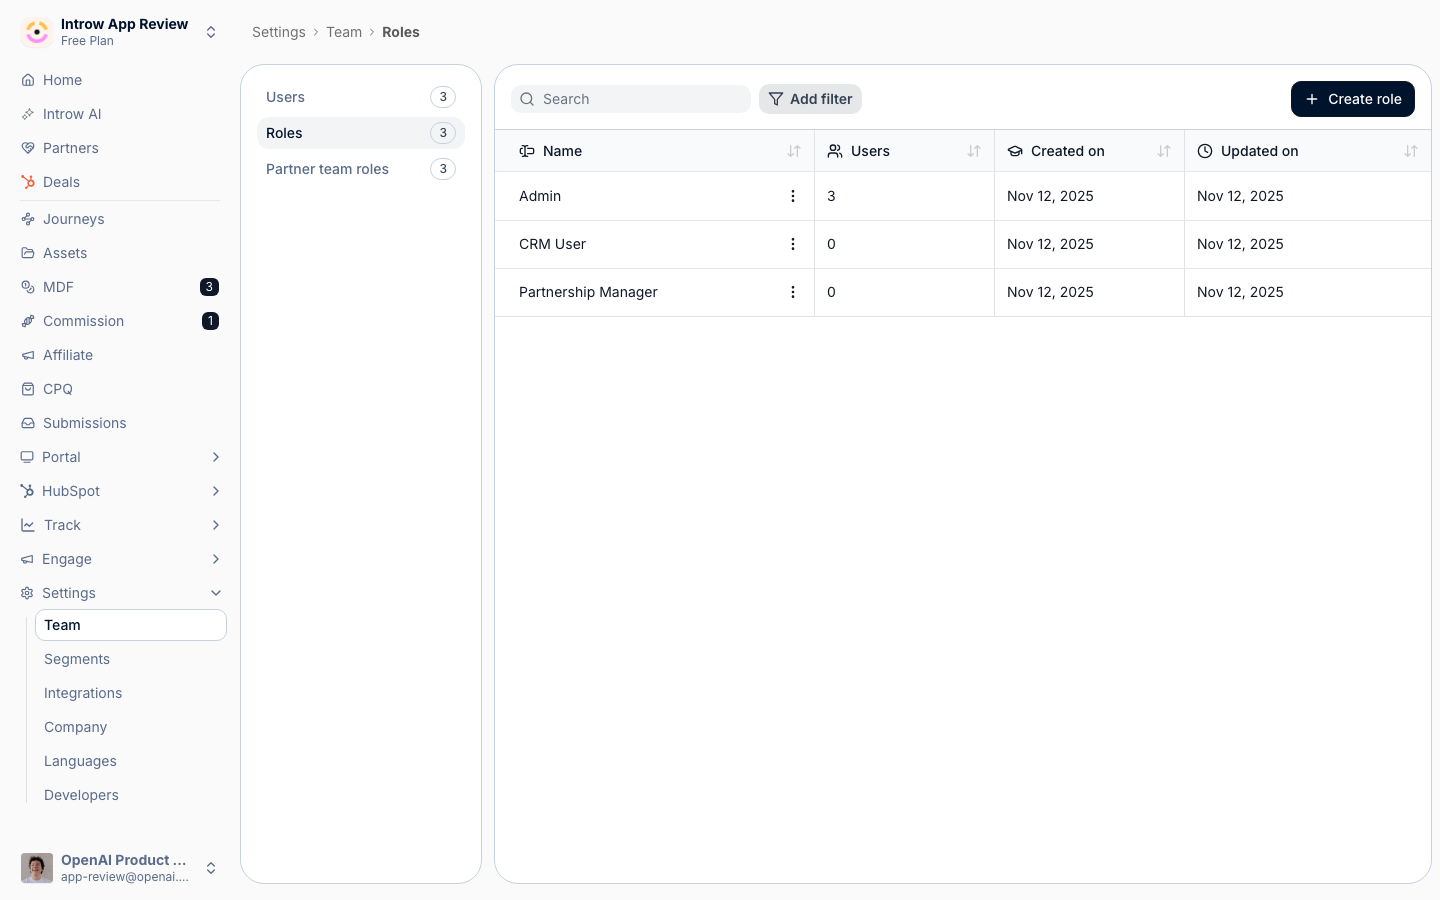
2
Create a new user role
Select Create role, then give the role a Name and pick a starting point under Start from a template. The template only seeds the initial permissions; you can change everything afterwards.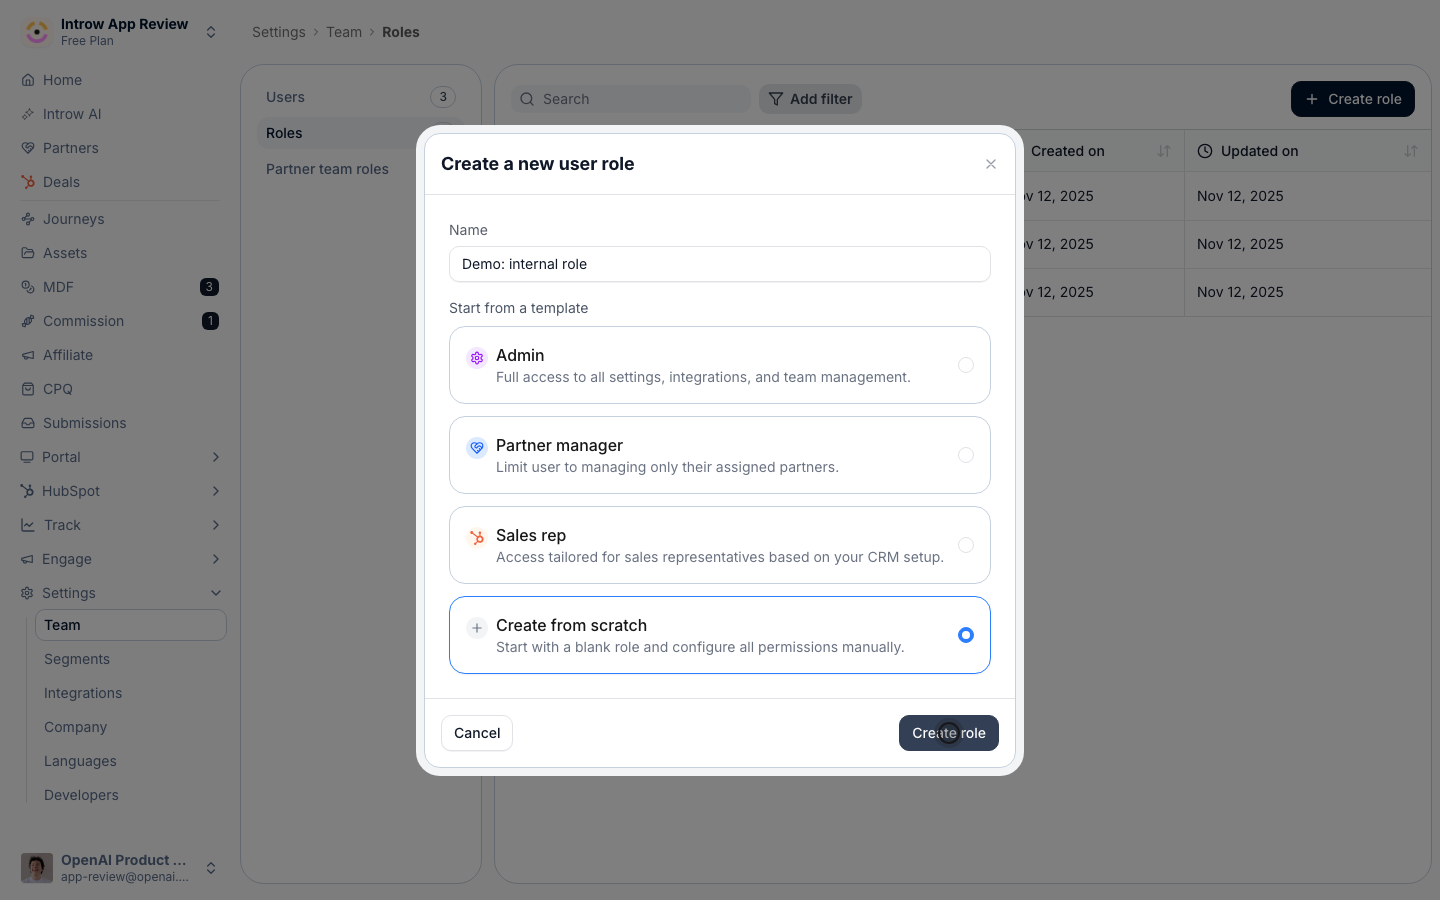
- Admin - starts with every permission on all partners.
- Partner manager - starts limited to the user’s assigned partners, with no module permissions.
- Sales rep - access tailored for sales reps based on your CRM setup (shown as a CRM-based option when HubSpot is connected).
- Create from scratch - starts with all categories on and no scoping, ready for you to trim.
3
Set the details
On the Details step, confirm the Role name and add a Description so colleagues understand what the role is for. Select Continue.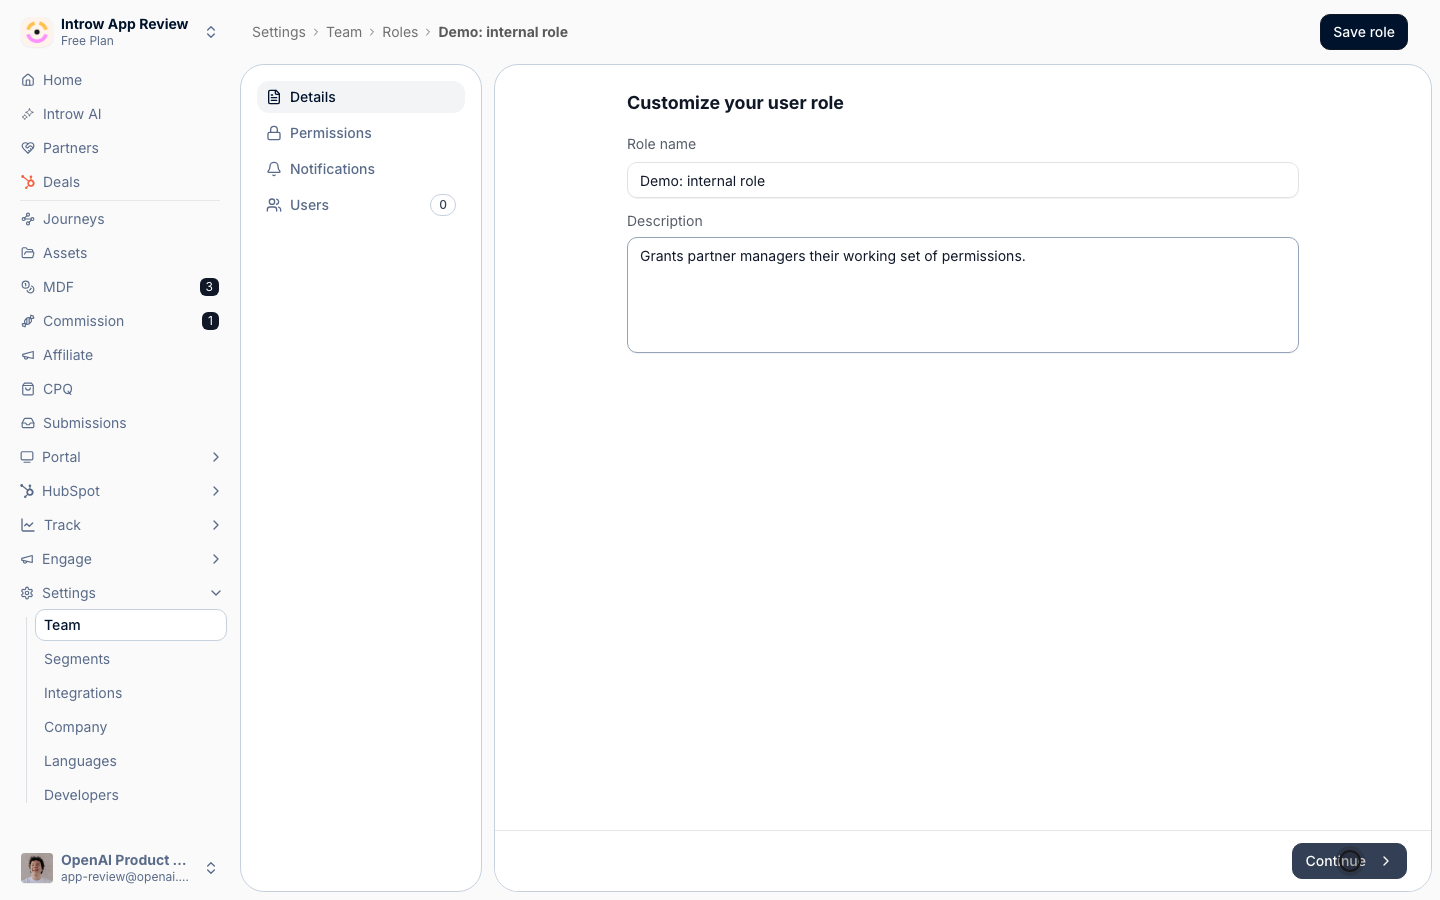
Choose access and permissions
1
Pick an access type
On the Permissions step, choose an Access type. This decides the shape of the role before you fine-tune individual areas.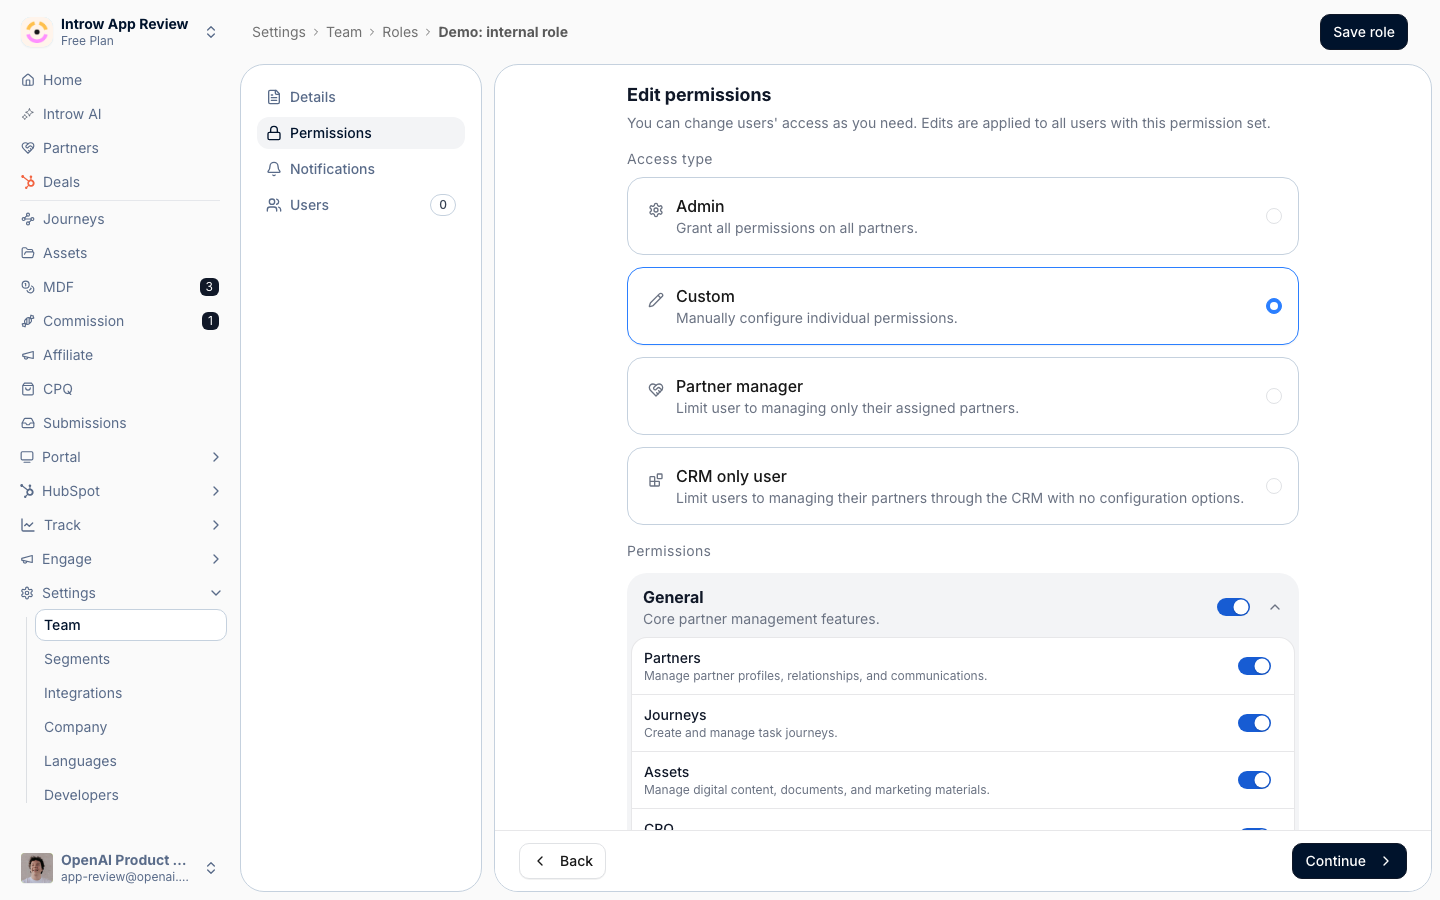
- Admin - grants all permissions on all partners. Use for full administrators.
- Custom - lets you turn individual permission categories on and off. Use for most roles.
- Partner manager - limits the user to managing only their assigned partners. This is the scoping option: users in the role see only the partners assigned to them across the program, which keeps their view focused and protects other managers’ relationships. Choose this for reps who should work only their own book.
- CRM only user - limits the user to managing their partners through the CRM with no Introw configuration access (available when HubSpot or Salesforce is connected). These users never enter Introw directly.
2
Set the permissions
Below the access type, the permissions are grouped into collapsible cards - General, Portal, Commissions, Track, Engage, and Settings - each holding the individual categories (for example Partners, Journeys, Assets, Goals, Courses, Plans, Reports, Announcements, Workflows, Team, Integrations, Single sign-on). Turn on only the categories this role should reach; toggle a whole card to enable or disable its group at once.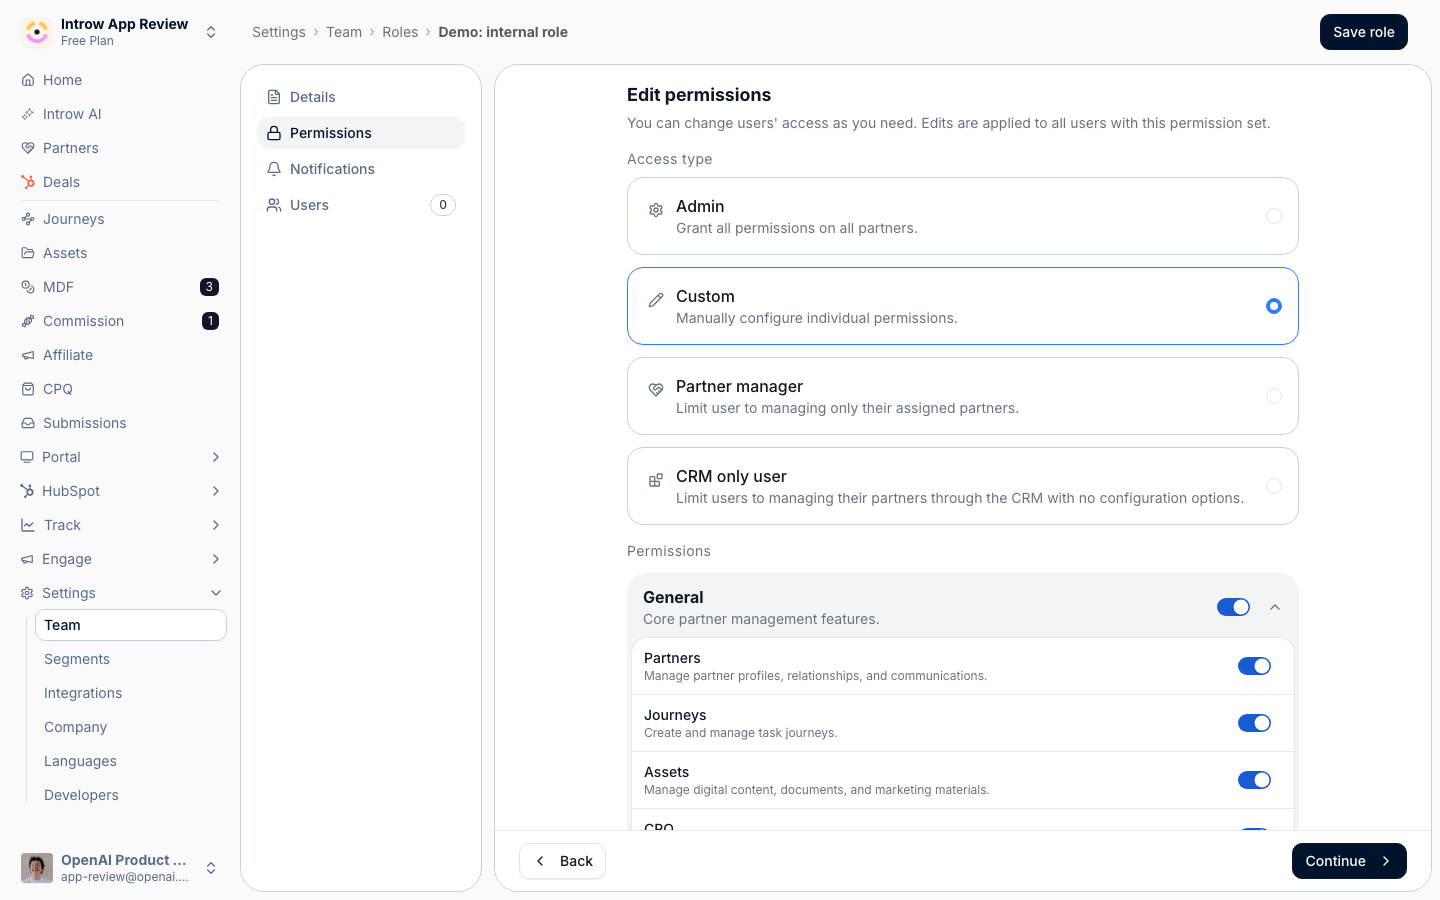 A few notes that affect what you see and can change:
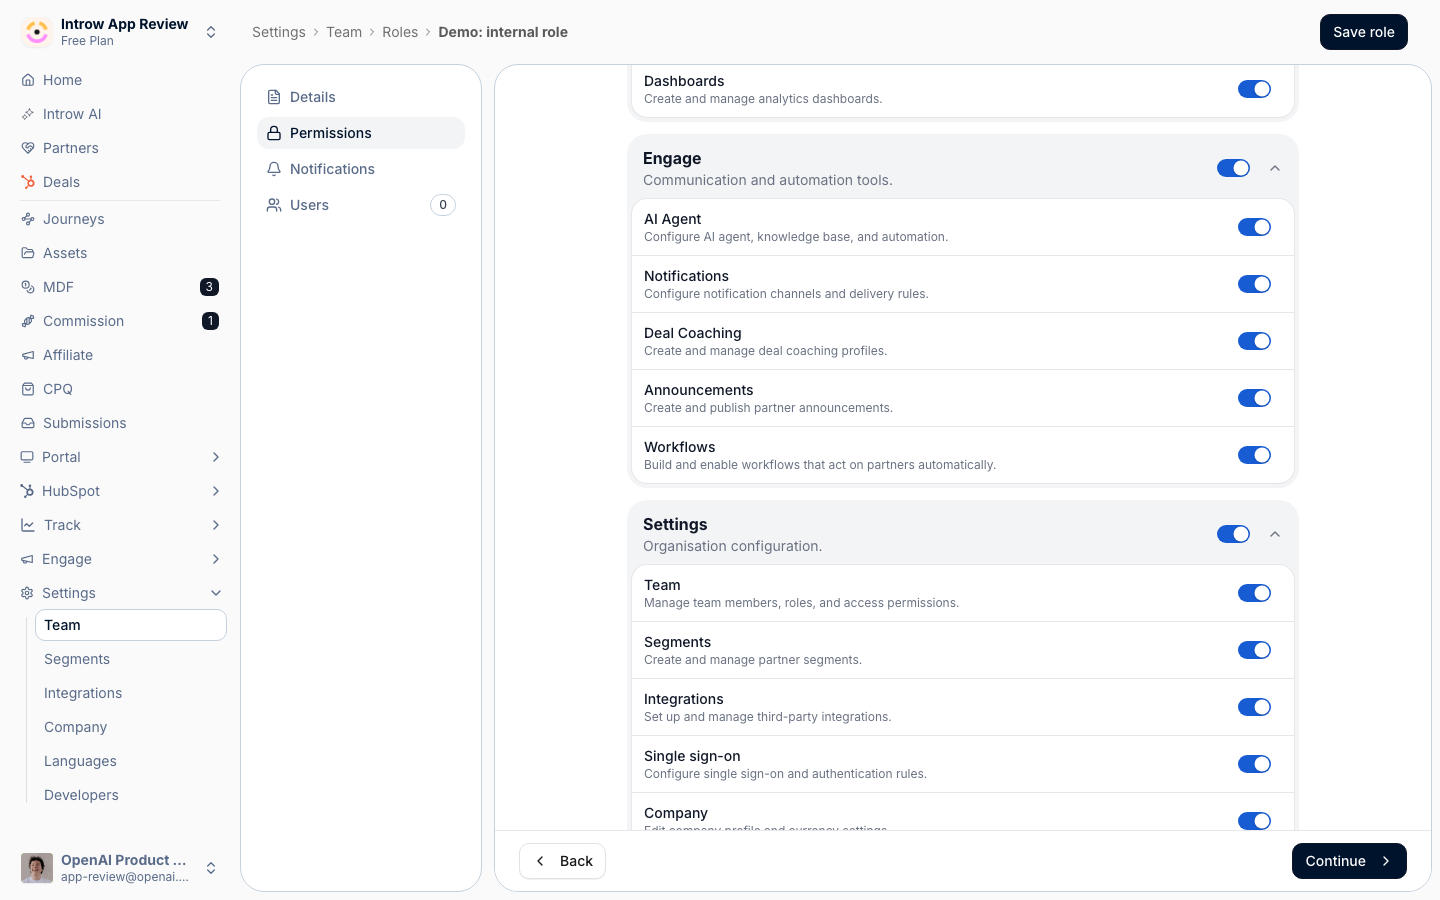 Select Continue.
- With Partner manager selected, the user stays limited to their assigned partners even as you grant categories.
- With CRM only user selected, the other permission options are disabled because those users never enter Introw directly.
- Some categories only appear when the related add-on is on your plan (for example Single sign-on, the Commissions categories, Deal Coaching, and Workflows).
- Workflows lets the role view, build, and turn on workflows. Roles created before it existed already have it on, except CRM only user roles.
- You cannot remove the Team permission from the role you are currently assigned to.
Set notifications and assign users
1
Choose notifications
On the Notifications step, choose which email notifications users with this role receive. Changes apply to everyone assigned to the role, so set them to match the role’s job rather than one person’s preference. Select Continue.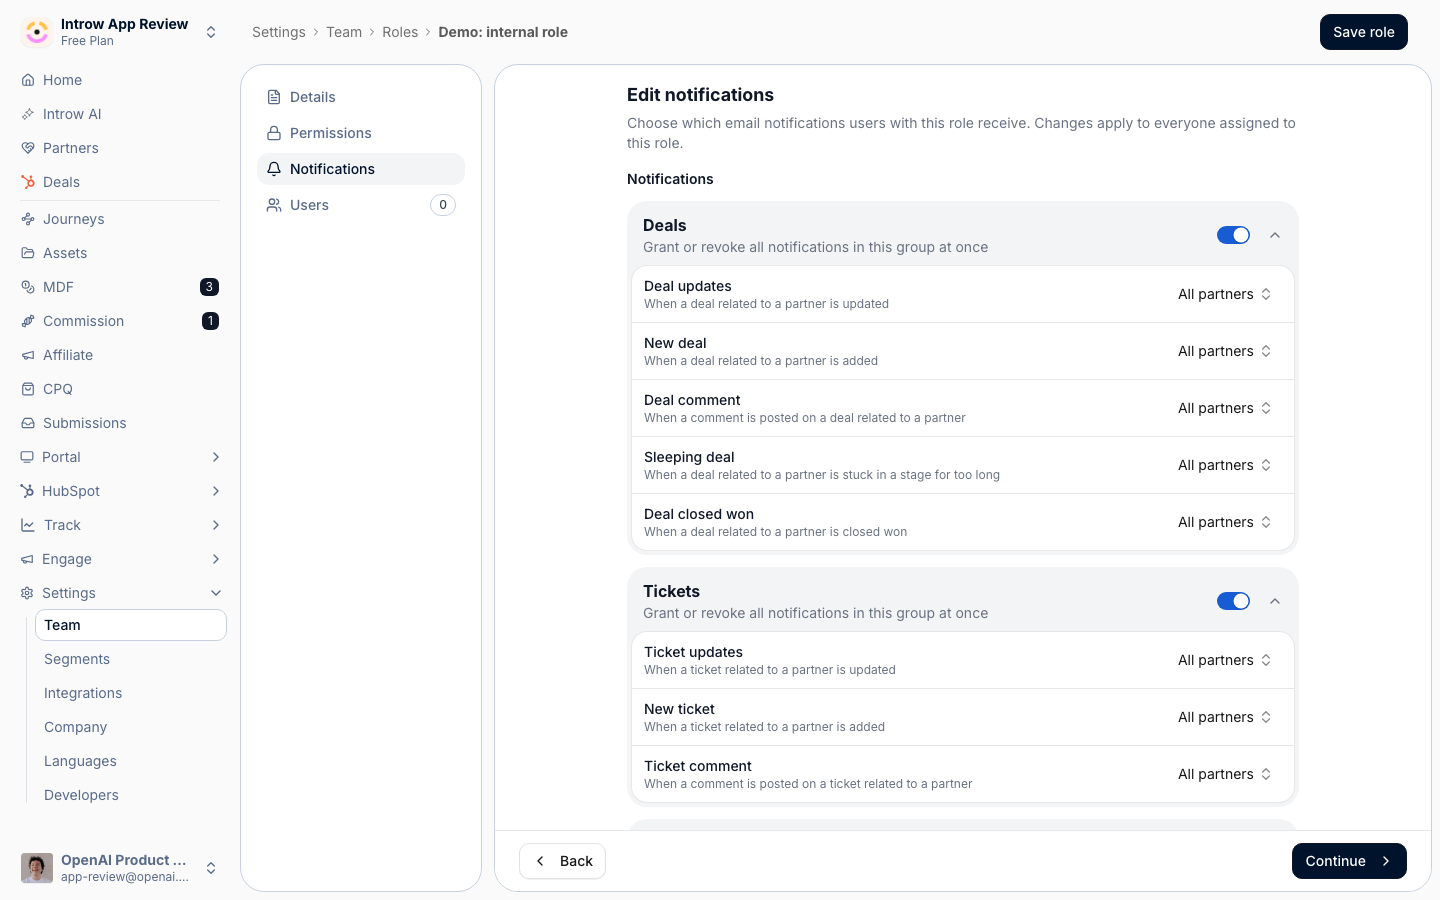
2
Assign users and save
On the Users step, assign the people who should hold this role. Then select Save role to apply it. Edits to a role apply to all users who have it.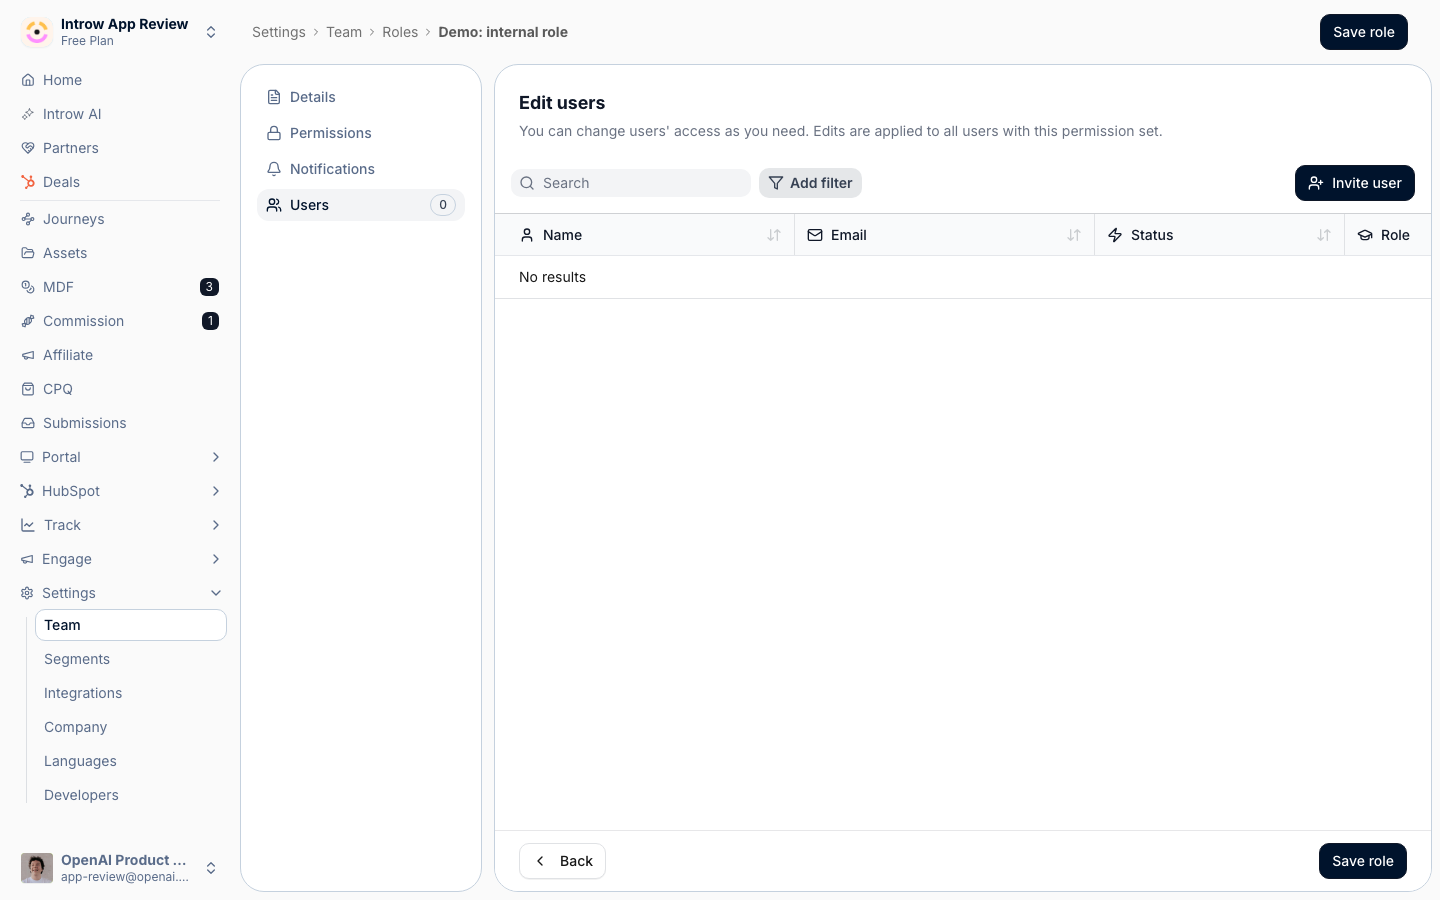
Verify it worked
The role appears on the Roles tab and can be selected when inviting or editing a user. If you chose the Partner manager access type, users in the role see only the partners assigned to them across the program; if you assigned partners after saving, those users see exactly that book.Related
Invite a team member
Assign the new role to a person.
Set up partner team roles
Assign partners to the people who manage them.
Implementation reference
Full configuration options.