

Where it lives
Single Sign-On sits under Settings, at Internal SSO.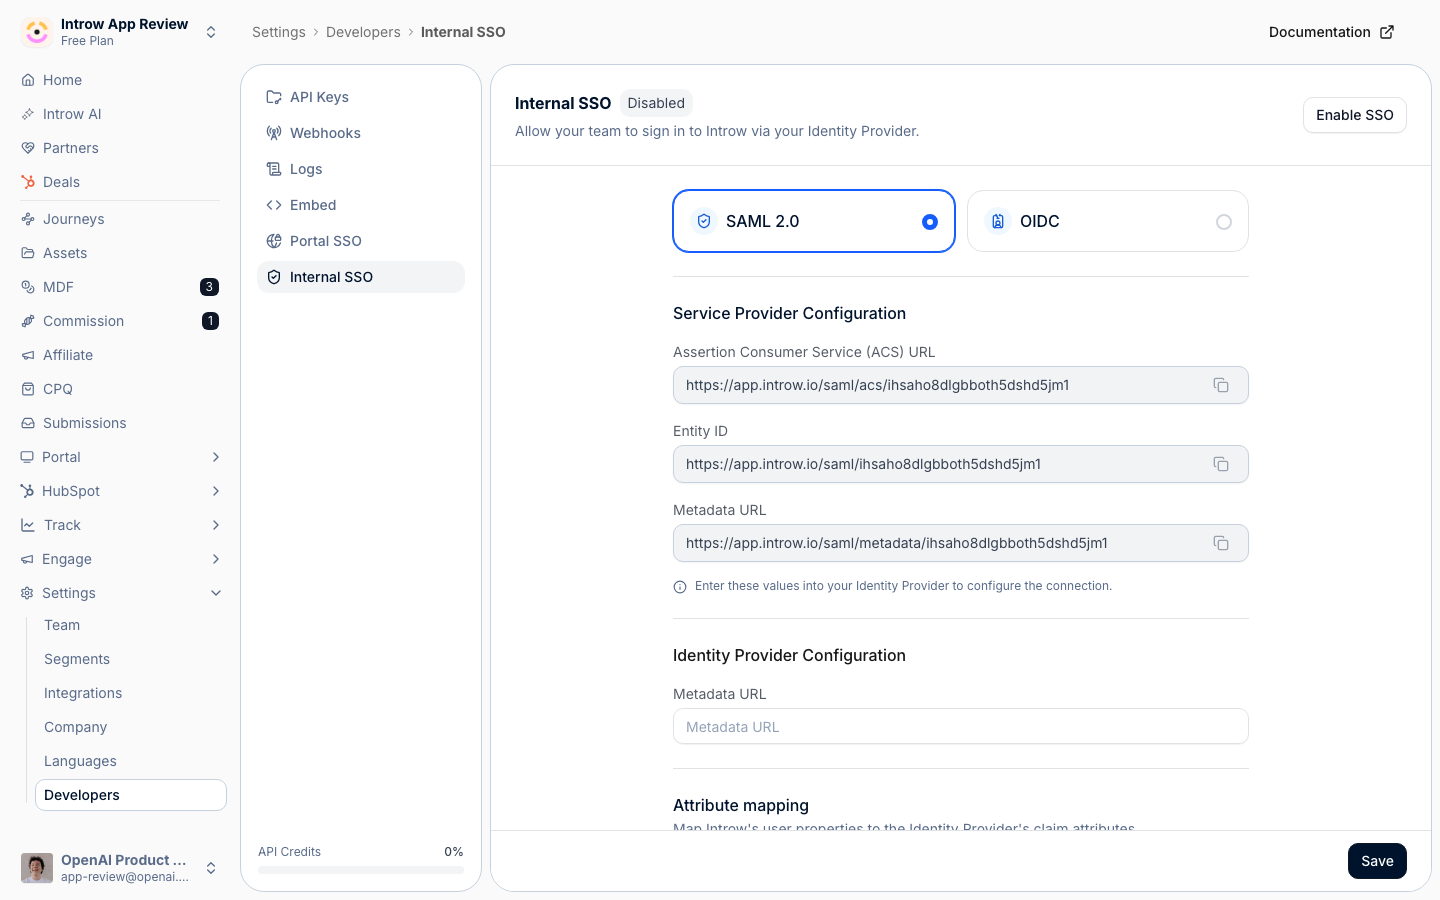
Before you start
How it works
Introw supports single sign-on in two protocols, SAML 2.0 and OIDC, in two places. Internal SSO controls how your own team signs in to Introw, and portal SSO controls how partners sign in to the portal. Both follow the same core pattern: you pick the protocol, give your identity provider the service provider details Introw shows, enter your provider’s connection details back in Introw, and enable it. With SAML you paste your provider’s metadata URL; with OIDC you enter a discovery URL and client credentials. Internal SSO also maps identity attributes and a default role so team members arrive with the right identity and access; portal SSO maps only the email claim, since partners are matched by email. The internal SSO page additionally hosts SCIM provisioning, where your identity provider creates and deactivates team members on its own. Once enabled, sign-in goes through your identity provider. Enabling portal SSO makes your identity provider the portal’s sign-in method, so partners use it instead of email or social login. Internal SSO’s service provider URLs are built on Introw’s domain. On portal SSO, SAML URLs and the OIDC post-logout redirect URI are built on your portal address (your custom domain if you have one, otherwise your subdomain). The portal OIDC Redirect URI and Back-channel logout URI stay on Introw’s domain. Copy the values from Settings rather than reconstructing them on the portal host.Settings & configuration
SSO is configured under Settings, Developers, on two pages: Internal SSO and Portal SSO. Each page works the same way: pick a protocol, exchange configuration with your identity provider, then enable it.Protocol
At the top of each page, SAML 2.0 and OIDC are the two protocols to choose between. Pick whichever your identity provider uses; the rest of the page changes to match.Service provider configuration
The Service Provider Configuration block shows the values to enter into your identity provider. For SAML 2.0 these are the Assertion Consumer Service (ACS) URL, the Entity ID, the Metadata URL, and the Single Logout (SLO) URL. For OIDC these are the Redirect URI, the Post-logout redirect URI, and the Back-channel logout URI. Each value has a copy button. Paste those copied values into your identity provider. Do not rebuild the URLs by hand. Register the logout URLs in your identity provider so signing out of Introw also ends the provider session. Until those URLs are registered, logout stays local to Introw. On internal SSO every URL is on Introw’s domain. On portal SSO, the SAML ACS, Entity ID, Metadata, and SLO URLs, plus the OIDC Post-logout redirect URI, use your portal address. The portal OIDC Redirect URI and Back-channel logout URI stay on Introw’s domain, because those handlers run on the Introw app. A dedicated portal host does not serve them.Identity provider configuration
The Identity Provider Configuration block is where you enter your provider’s details. For SAML 2.0, paste your provider’s Metadata URL; Introw fetches and validates it. For OIDC, enter the Discovery URL (your provider’s.well-known configuration address), the Client ID, and the Client secret (a
Saved or Not set pill shows whether a secret is stored), then pick the Scopes to request
(commonly openid, profile, and email). Introw validates the discovery URL as you enter it.
Attribute mapping
On internal SSO, the Attribute mapping block maps the claims your provider sends to Introw’s user fields: User ID, Email address, First name, and Last name, plus a Default role new users receive the first time they sign in. Portal SSO maps only the Email address claim, since partner contacts are matched by email, so it has no user-field or role mapping.Allowed domains (internal SSO only)
The Allowed domains block lists the email domains whose users may sign in through SSO and be created on first login. Your own primary domain is always allowed; add others with Add.Test login
Before enabling, use Test SSO Login and select Test login: it opens your identity provider in a popup, confirms the connection, and shows which attributes it returns, without creating or signing in a user. Save your configuration first.SCIM provisioning (internal SSO only)
The internal SSO page also hosts a SCIM provisioning section, where your identity provider creates, updates, and deactivates team members automatically. It runs independently of whether you switch your team to SSO sign-in. For the full setup, see Provision your team with SCIM.Portal SSO and portal access
Enabling portal SSO makes your identity provider the portal’s sign-in method, which replaces the other portal sign-in methods (email and social) for partners.How-to guides
Troubleshooting
Users sign in but have the wrong details
Users sign in but have the wrong details
Check the attribute mapping for User ID, email, and name.
OIDC will not validate
OIDC will not validate
Confirm the discovery URL points at your provider’s
.well-known configuration and that the client ID and secret are correct.Partners cannot log in to the portal
Partners cannot log in to the portal
Confirm portal SSO is configured correctly and your provider is reachable.
Portal OIDC redirect or back-channel logout is not reached
Portal OIDC redirect or back-channel logout is not reached
Copy the Redirect URI and Back-channel logout URI from Settings. Those two stay on Introw’s
domain even when the portal has a custom domain. Registering them on the portal host misses the
handler.