

What you’ll achieve
A fully configured commissions program: a payout method your finance team has chosen, payouts that run on a cadence partners can rely on, balances below your minimum roll forward instead of generating trivial payments, statements carry complete and invoice-ready company details, and amounts and fiscal-quarter timing use the right currency and fiscal year.Before you start
1
Confirm access
You need admin access to commission settings and company settings.
2
Gather billing details
Have your company name, address, finance email, and tax or company registration numbers ready for the statement billing info.
Watch it
- Video
- Click through
Steps
Phase 1 - Choose the method, schedule and minimum
1
Choose the payout method
Go to Payout Settings. Under How will payments be sent to partner?, pick who moves the money: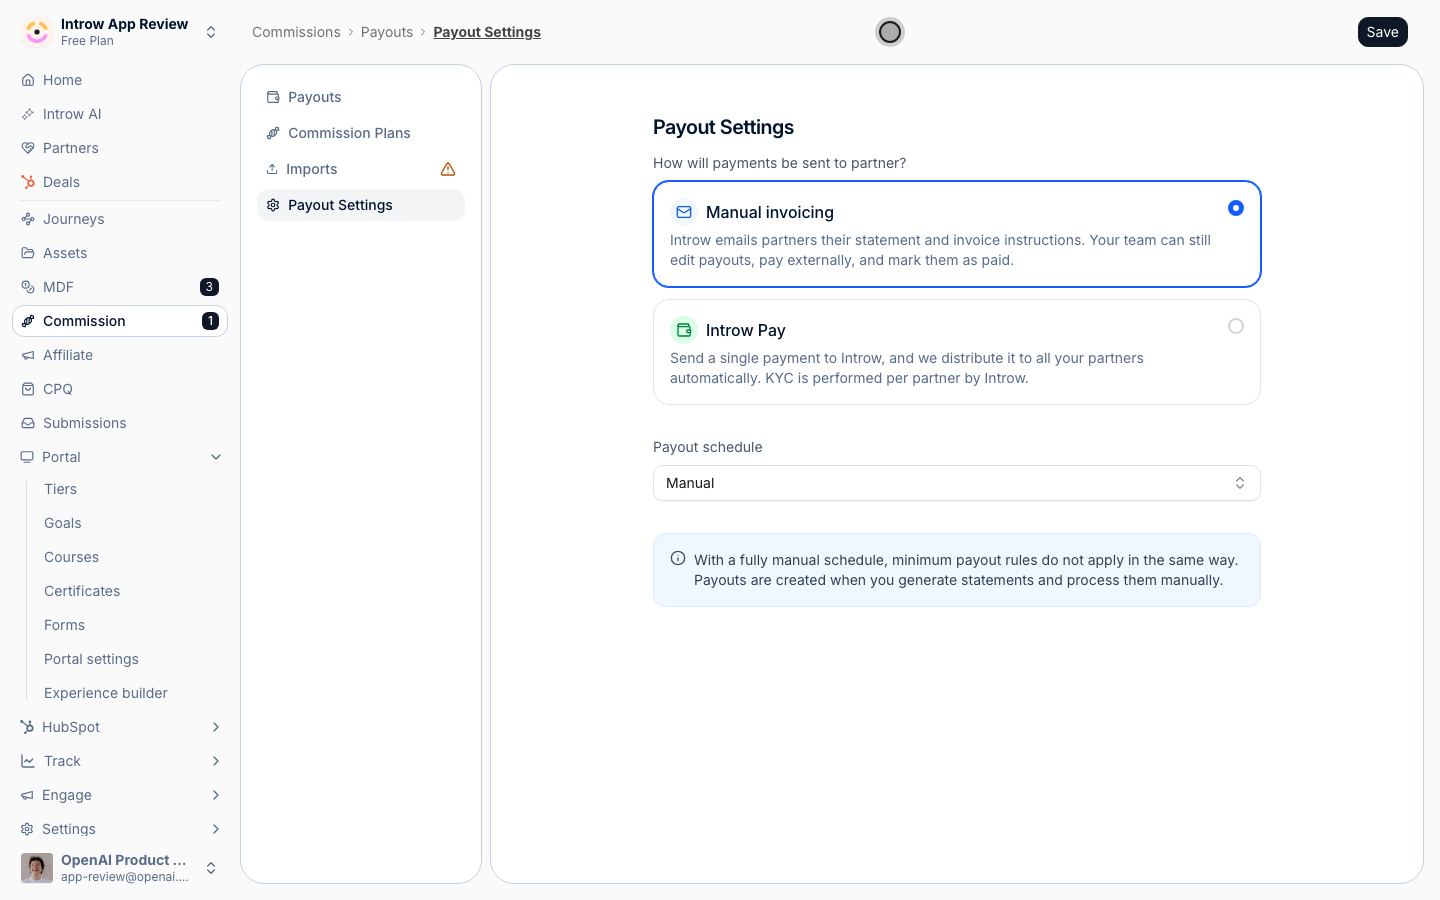
- Manual invoicing - Introw emails partners their statement and invoice instructions. Your team pays outside Introw, from a CSV export or through the API, and marks payouts paid.
- Introw Pay - you pay one consolidated invoice per cycle and Introw Pay distributes it to every partner, with verification performed per partner. It is included in every plan, with a percentage fee on the transactions Introw Pay processes. See Activate Introw Pay for the extra checks it needs.
2
Choose the payout schedule
Set Payout schedule to the rhythm your program pays on: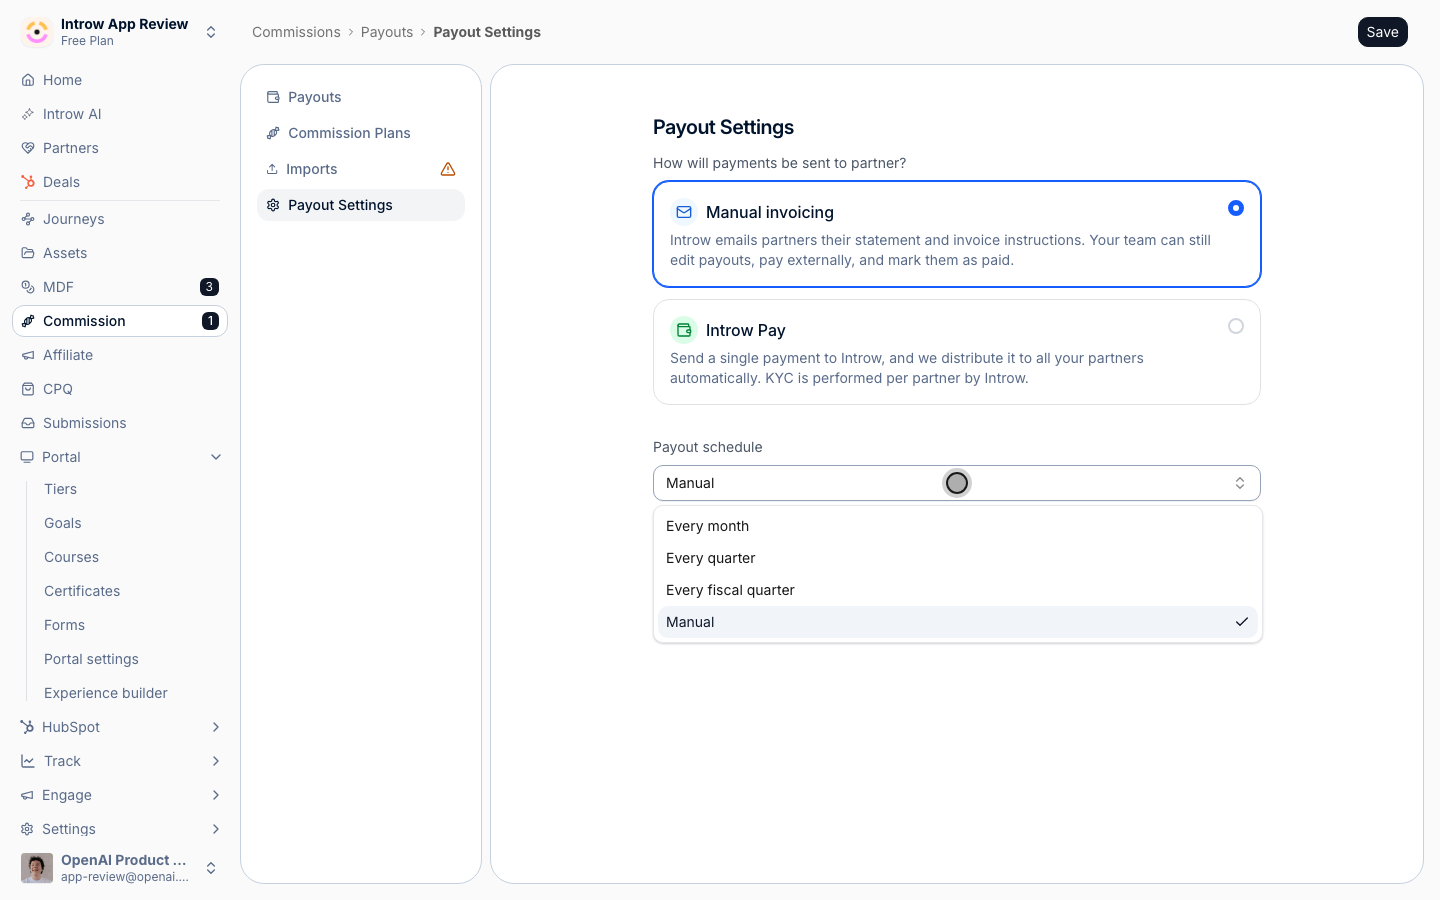
- Every month or Every quarter - a batch is created when each calendar period closes, covering that period.
- Every fiscal quarter - align payouts to your fiscal calendar instead of the calendar year (this relies on your fiscal year start, set later).
- Manual - no automatic batches; you create each payout yourself when you are ready.
3
Set a minimum payout amount
When the schedule is not manual, Minimum payout amount is required and must be above zero, so small balances are not paid until they are worth the admin: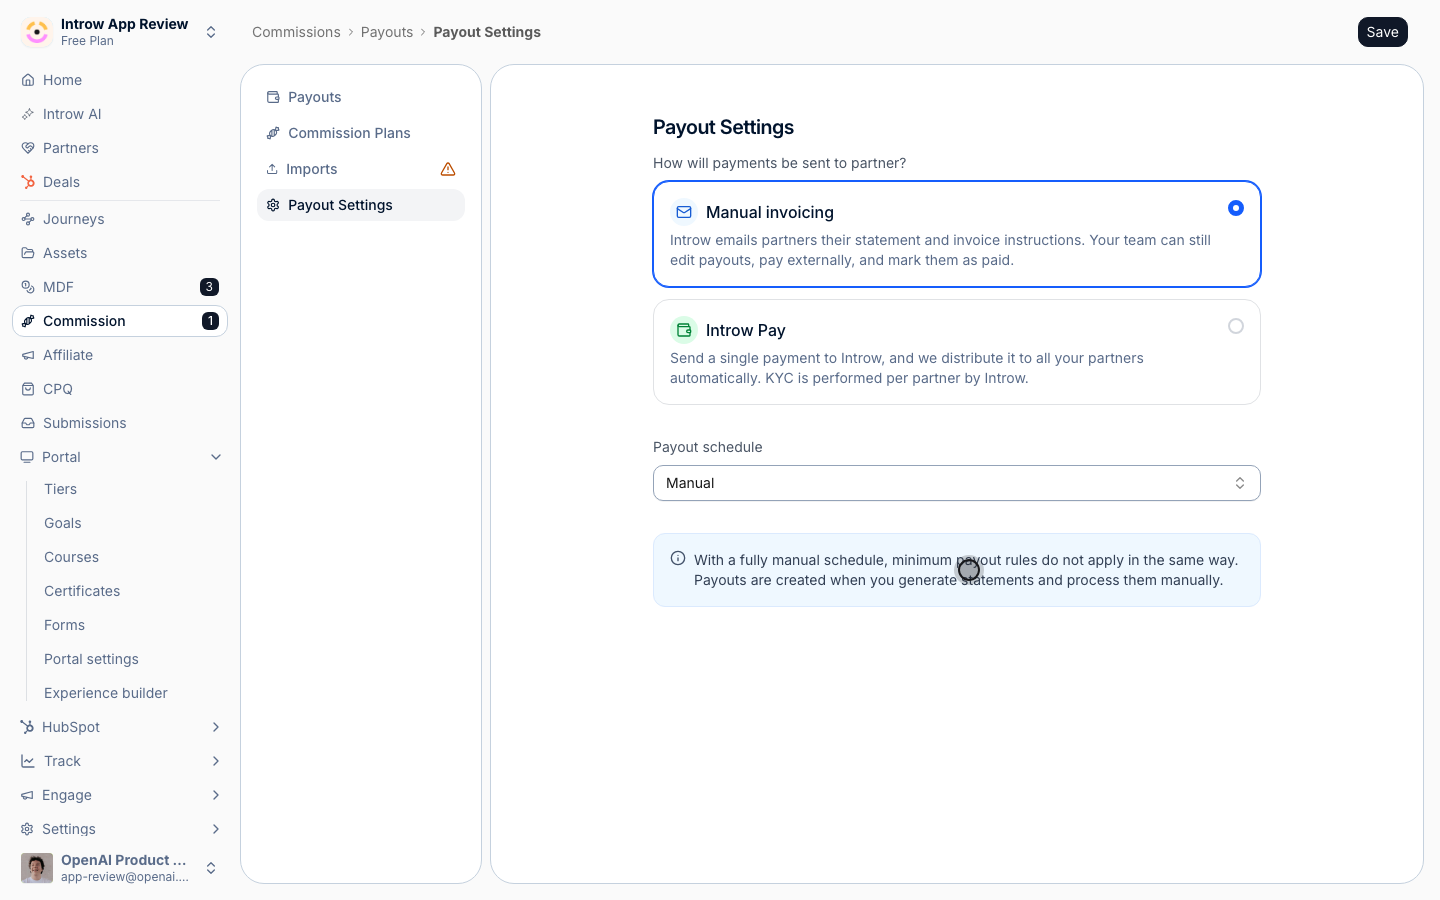
- Minimum payout amount - the threshold a balance must reach before it is paid. Balances below it roll forward to a later cycle.
- Basis - choose Per partner to apply the minimum to each partner’s own balance, or Organisation total to apply it across the program.
Phase 2 - Set the currency and fiscal year
1
Confirm currency and fiscal year
Go to Company settings and confirm the values commissions depend on: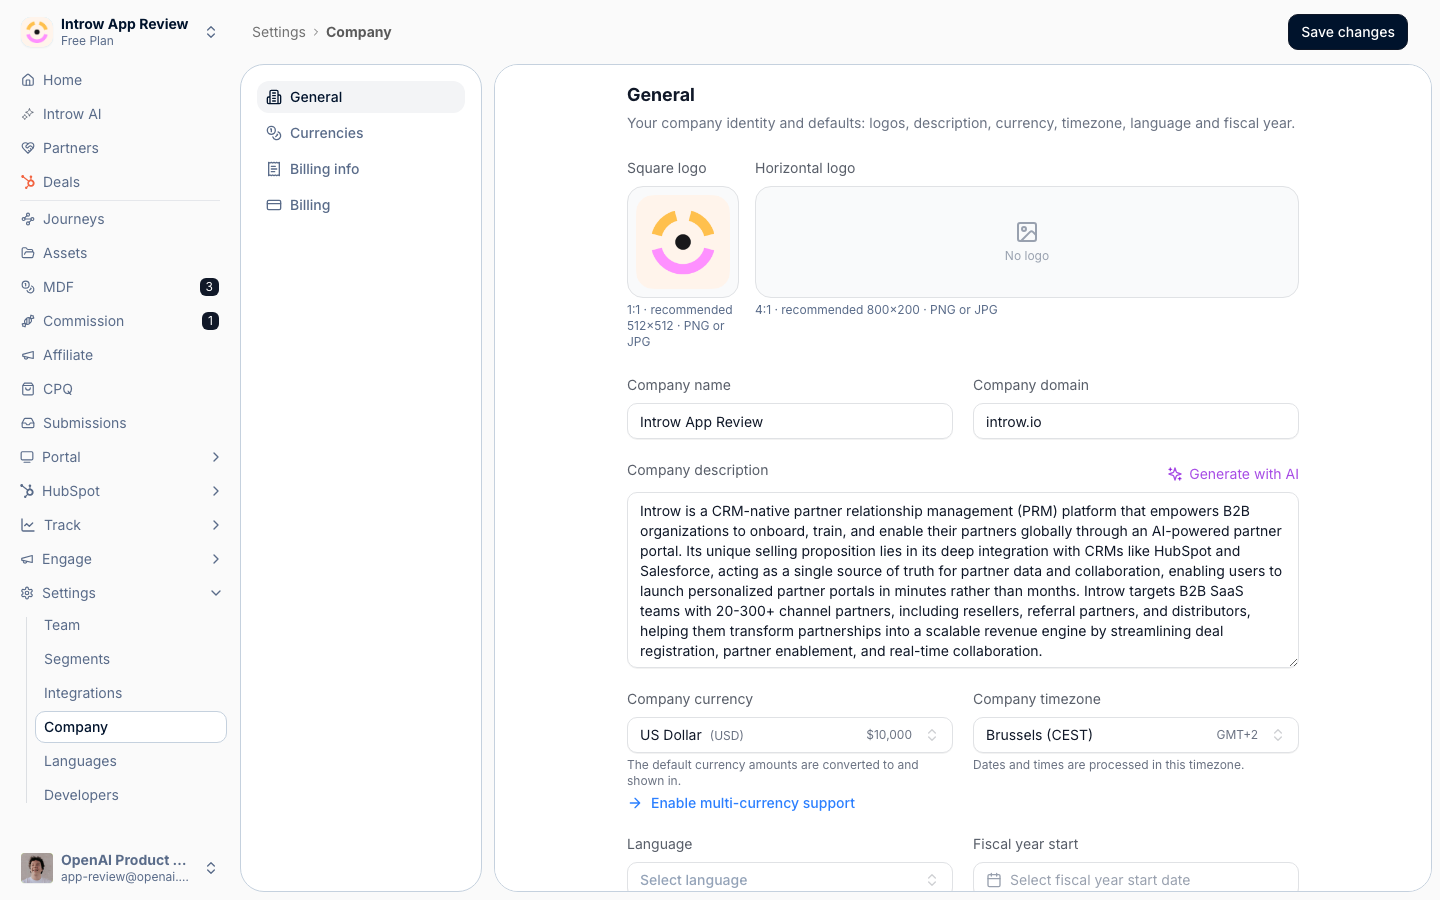
- Company currency - your default currency, used for batch totals and the minimum payout amount. Introw Pay needs it to be EUR or USD, and issues its consolidated invoice in US dollars for now.
- Fiscal year start date - when your fiscal year begins. This drives the Every fiscal quarter schedule and the year-to-date analytics on plans, so a wrong start date misaligns fiscal-quarter payouts.
Phase 3 - Set the commission billing info
1
Open billing info
Go to Billing info (the Billing Info tab in company settings). These details appear on every generated commission statement and tell partners what to put on their invoices.
2
Enter the company details
Fill in the billing fields so statements are complete and invoice-ready:
- Company Name - your legal entity name as it should appear on statements.
- Address Line 1 and Address Line 2 - your billing address.
- Postal Code, City, and Country Code - the rest of the address.
- Finance Email Address - the contact partners use for billing questions.
- Company Number and VAT Number - your registration and tax numbers, needed for partners to invoice you correctly. Introw validates the VAT number when you save.
Verify it worked
Payout settings show your chosen method, schedule and minimum, and on a non-manual schedule Introw begins creating batches on that cadence. On Introw Pay the Commission area gains a Payments tab. Company settings show the right currency and fiscal year start, and a generated commission statement displays your complete billing details, ready for a partner to invoice against.Related
Run a payout cycle
Use these settings to run and pay a batch.
Activate Introw Pay
The extra checks Introw Pay needs before the first run.
Request a partner invoice
Generate a statement that uses this billing info.
Implementation reference
Full configuration options.