

What you’ll achieve
A complete tier program: ordered tiers each with a visual identity (name, color, badge, description), and requirements and benefits filled in so partners know what it takes to climb and what they unlock, including measurable goals that show live progress.Before you start
1
Confirm access
You need access to tier settings to create programs and tiers.
2
Have badge artwork ready
Have one badge image per tier ready to upload. Badges are shown small and fitted, never cropped, and partners download them at full size to put on their own site, so a square PNG with a transparent background at around 512×512 works best. Up to 20 MB per file.
Watch it
- Video
- Click through
Steps
Create the program and tiers
1
Create the program
On Tiers, choose Create Program and name it for the partner type or motion it covers. Each program is independent, so you can run different ladders side by side for different partner types.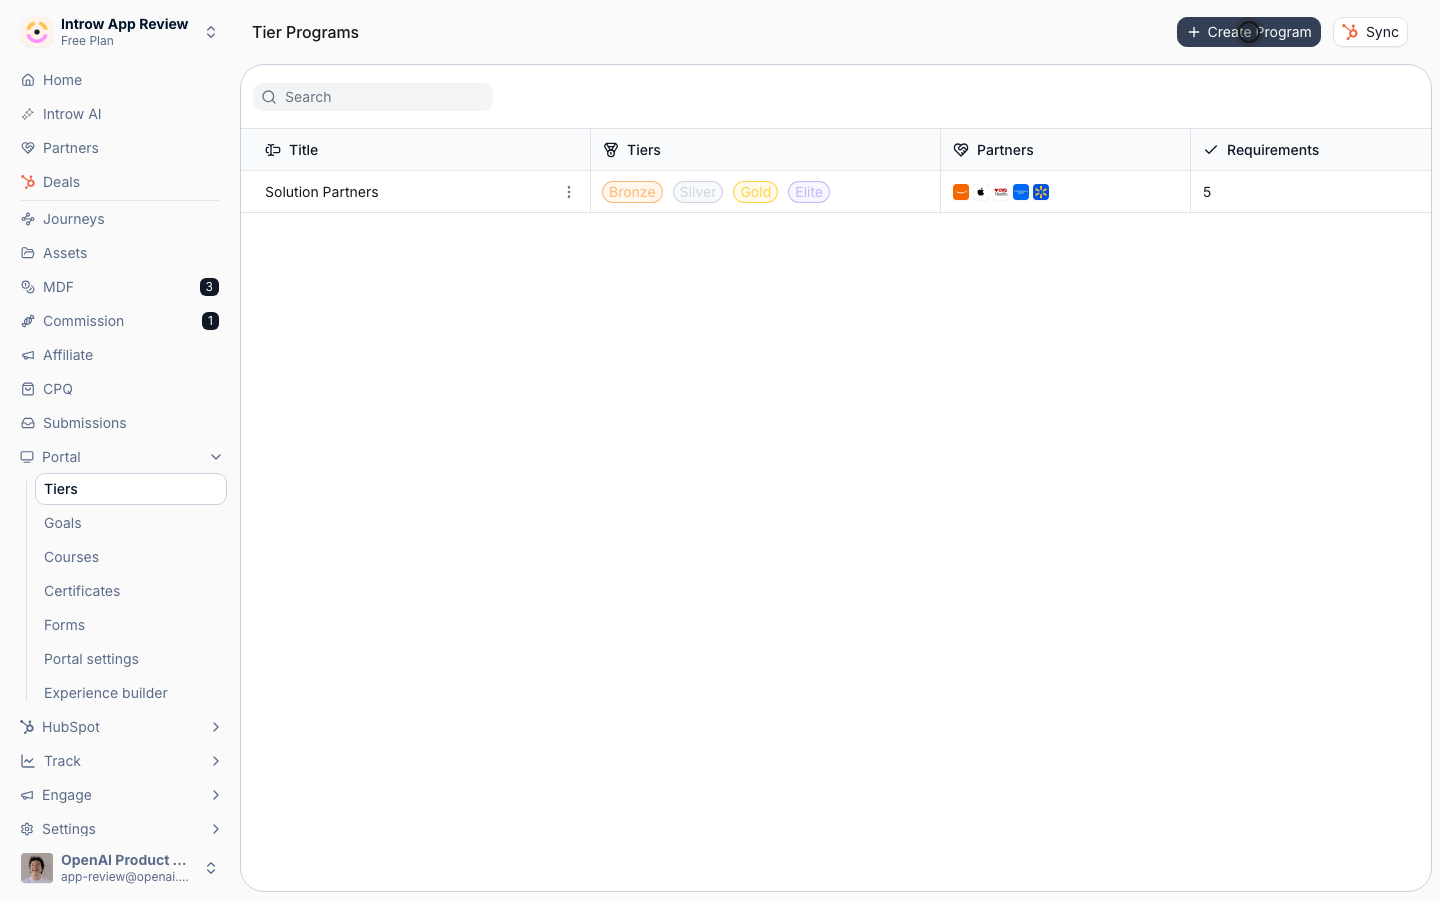
2
Add your tiers
In the program editor, choose Create tier for each level, such as Bronze, Silver, and Gold. A partner holds exactly one tier per program.
3
Order the tiers
Drag the tiers into sequence from entry level to top. This order is the ladder partners see, so keep it lowest to highest.
Brand each tier
1
Set the identity
Open a tier and set what partners see:
- Name - the label for the level, such as Gold. Keep it consistent with how you talk about the program.
- Color - a color that distinguishes this tier from the others on the ladder at a glance.
- Badge - the artwork for the tier. Partners assigned to it can download the badge to display on their site or signature, which markets your program for you. Use a square, transparent PNG around 512×512: in the portal it renders fitted at roughly 32px next to the tier name, and partners get the original file when they download it. The upload box in this editor is wide, so ignore how the preview frames it.
- Description - a rich description of what the tier represents, reinforcing its value.
Define requirements and benefits
1
Add requirements
In the tier’s requirements group, add items that explain how to reach the tier. Each item can be: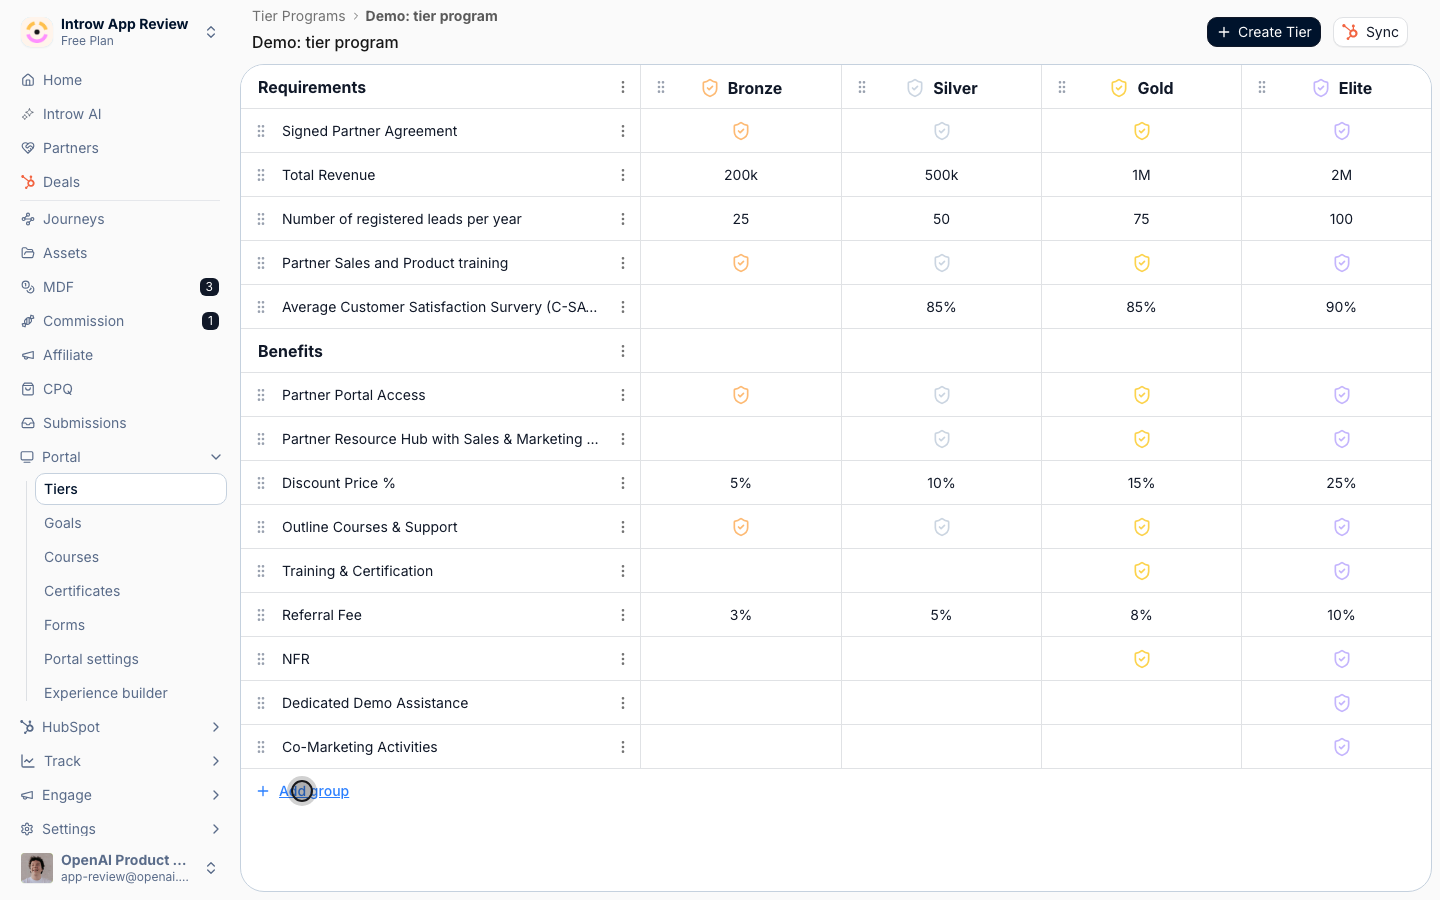
- Text - a plain statement of what is expected.
- Checkbox - a yes/no item partners can see as a checklist.
- Goal - a measurable target that progress tracks against.
2
Add benefits
In the benefits group, add the perks the tier unlocks using the same text, checkbox, or goal item types, so the value of leveling up is obvious.
3
Set goal targets
For any goal item, set its target so a partner’s progress shows against it. A goal with no target shows no progress, so this is what turns a static requirement into a live one.
Verify it worked
The program appears on Tiers with your tiers in order, each showing its color and badge, and every tier shows its requirements and benefits. Goal items display progress toward their target. The program is ready to assign partners to.Related
Assign a partner's tier
Place partners on the ladder, individually or in bulk.
Map tiers to a CRM property
Keep tier status aligned with your CRM.
Implementation reference
Full configuration options for tiers.