> ## Documentation Index
> Fetch the complete documentation index at: https://docs.introw.io/llms.txt
> Use this file to discover all available pages before exploring further.
# Brand the partner portal
> Apply your logos, colors, font, and login copy so the portal, login screen, and experiences all look like your product.
> For partner marketing and partner ops who want the portal to feel like a natural extension of your product.
Branding is what turns a generic portal into your product. This guide covers the whole job end to end: the logos partners see everywhere, the colors that theme the login screen and the experiences inside, the typeface that carries your brand voice, and the words on the login screen. Set it once and it propagates to every partner-facing surface, so the first sign-in and every visit after feel unmistakably yours.
## What you'll achieve
A partner portal styled top to bottom in your brand: your logos in headers and icons, your colors on buttons, tabs, and backgrounds across both the login screen and the experiences, your font rendering portal text, and login copy written in your voice. Partners experience a branded product from the login page onward.
## Before you start
You need admin access to company and portal settings to change branding.
Have your logo files (a square version and a horizontal version), your brand color values, and a font file ready if you use a custom typeface.
## Watch it
## Steps
### Add your logos
Go to [Company settings](https://app.introw.io/settings/company). Logos are set here because they identify your organisation across every surface, not just one portal.
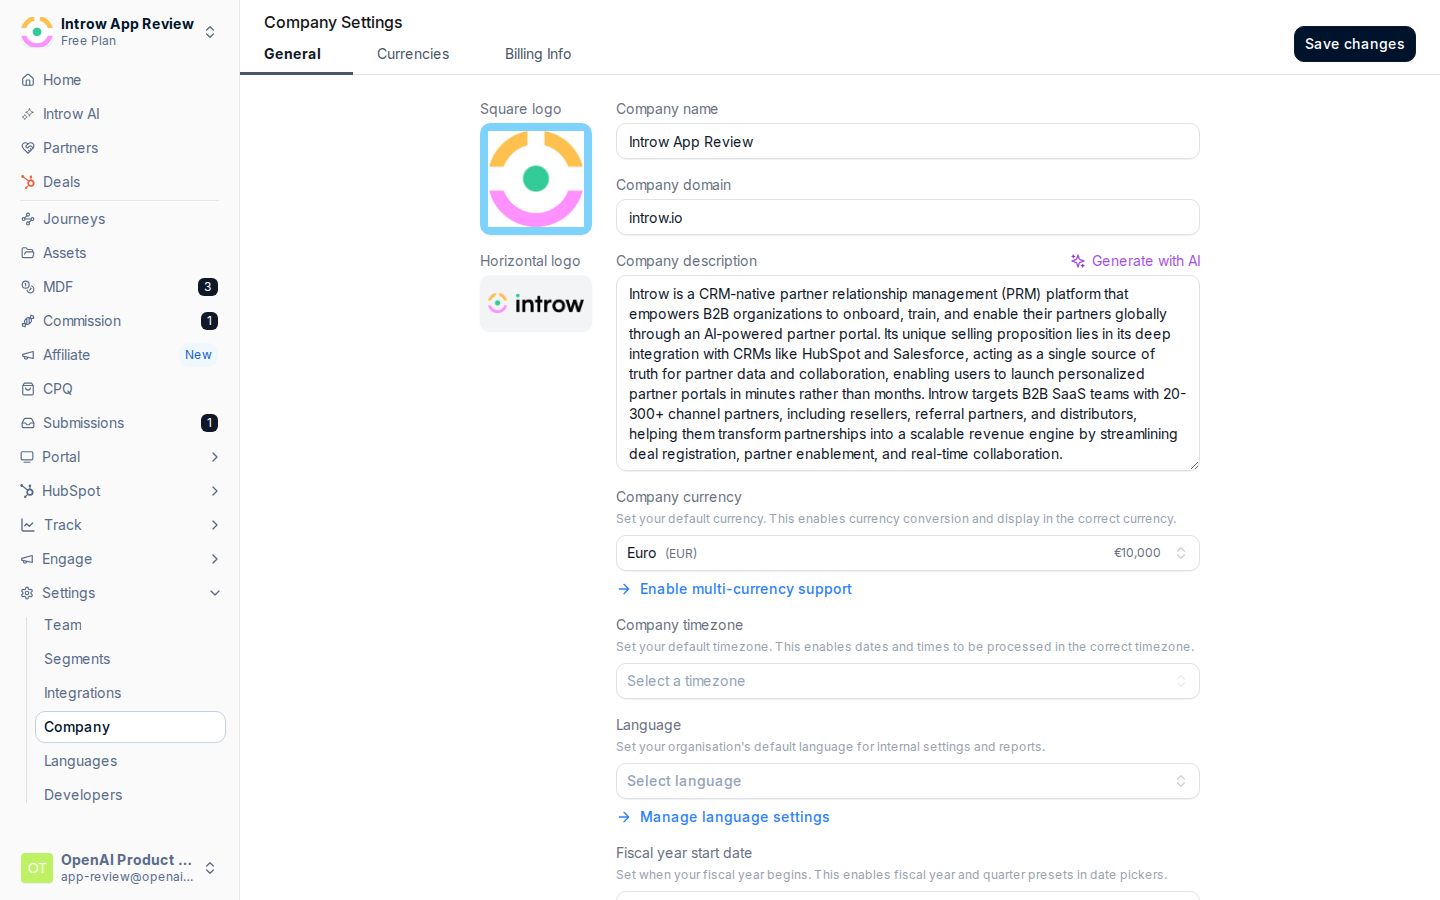 Add each logo so Introw can pick the right one for each context:
* **Square logo** - used where space is tight, such as the favicon, icons, and compact headers. Upload a high-resolution square image so it stays crisp when scaled down.
* **Horizontal logo** - used in wide areas like the portal header, the login screen, and emails. Upload a horizontal version so it fills those spaces without stretching.
Add each logo so Introw can pick the right one for each context:
* **Square logo** - used where space is tight, such as the favicon, icons, and compact headers. Upload a high-resolution square image so it stays crisp when scaled down.
* **Horizontal logo** - used in wide areas like the portal header, the login screen, and emails. Upload a horizontal version so it fills those spaces without stretching.
 ### Set the portal and login colors
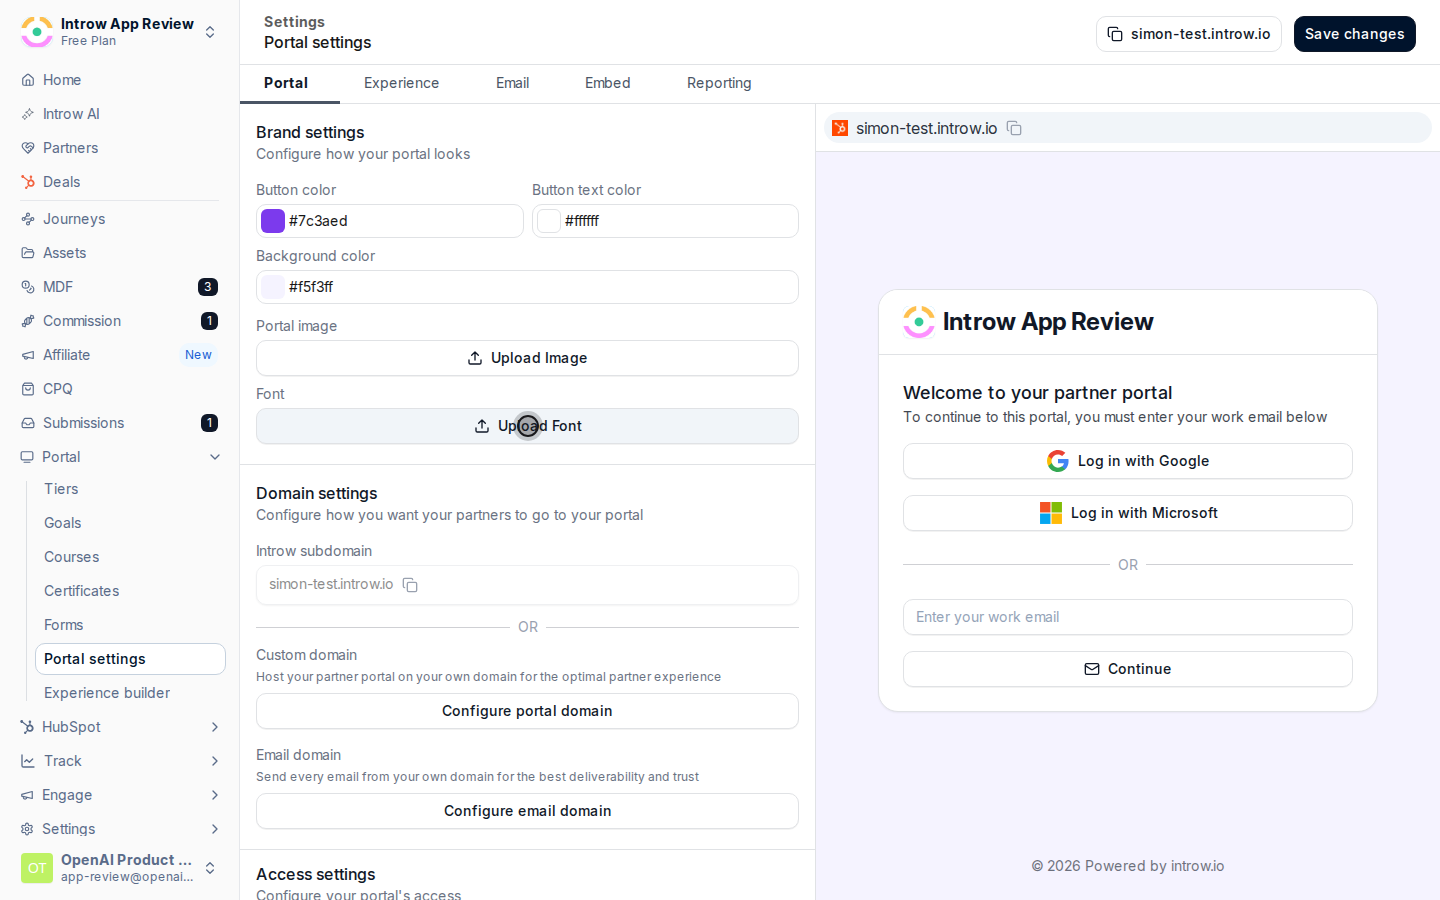
Go to [Portal settings](https://app.introw.io/settings/portal). The first tab controls the login screen and the portal shell partners sign in to. A live preview updates as you change each value.
### Set the portal and login colors
Go to [Portal settings](https://app.introw.io/settings/portal). The first tab controls the login screen and the portal shell partners sign in to. A live preview updates as you change each value.
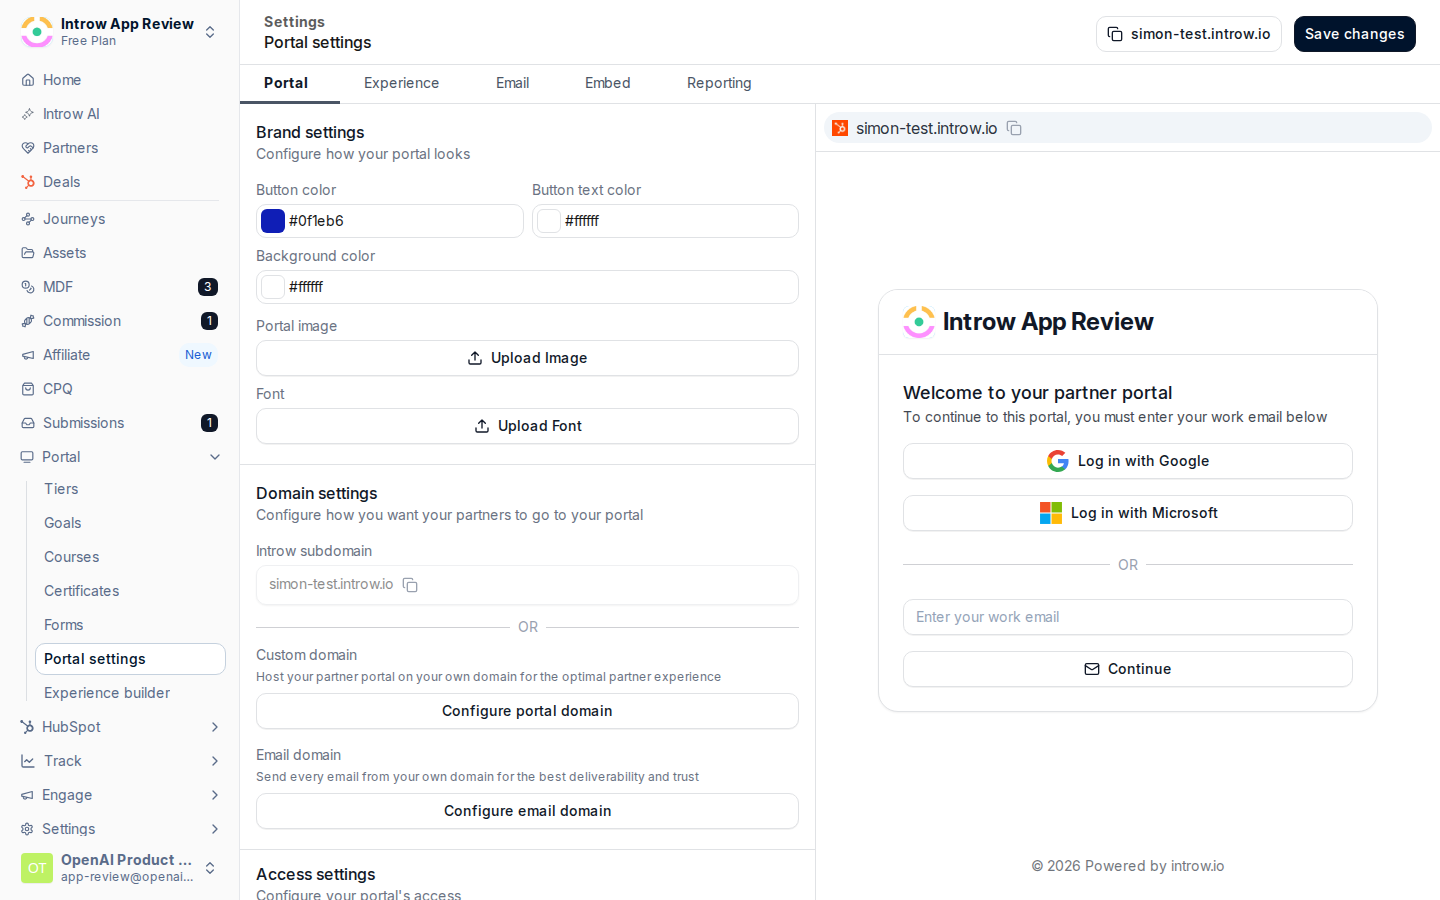 Each color is chosen with a color picker; pick the brand value or paste a hex code:
* **Button color** - the fill of primary buttons on the login and portal. Use your primary brand color so the main action stands out.
* **Button text color** - the label color on those buttons. Choose a value with enough contrast against the button color so text stays readable.
* **Background color** - the page background behind the login and portal shell. Keep it close to white or a light brand tone so content stays legible.
Each color is chosen with a color picker; pick the brand value or paste a hex code:
* **Button color** - the fill of primary buttons on the login and portal. Use your primary brand color so the main action stands out.
* **Button text color** - the label color on those buttons. Choose a value with enough contrast against the button color so text stays readable.
* **Background color** - the page background behind the login and portal shell. Keep it close to white or a light brand tone so content stays legible.
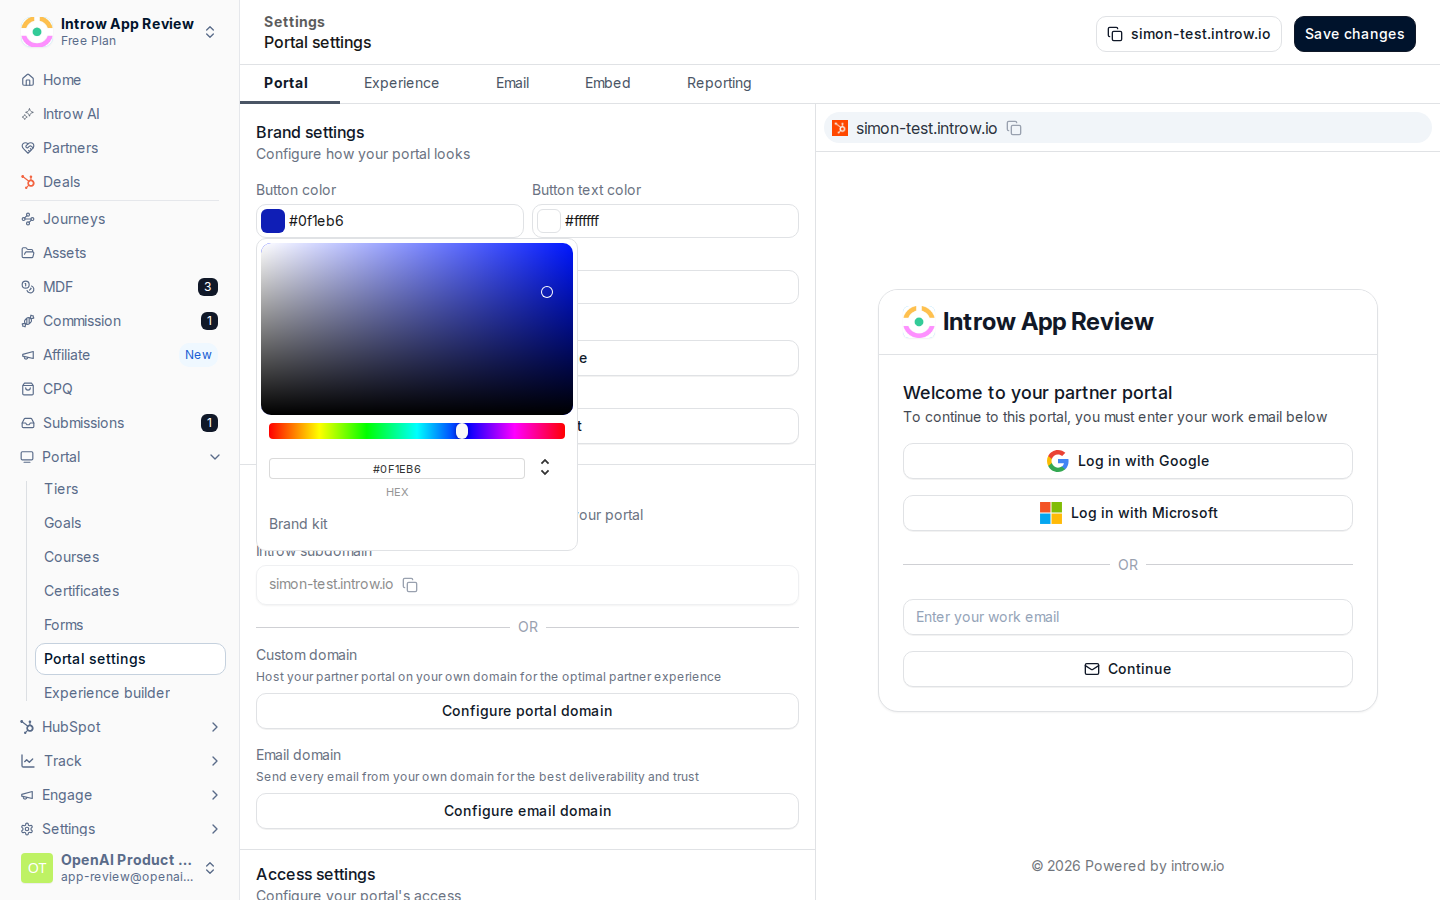 Upload your brand font file so portal text renders in your typeface instead of a generic system font. Use a supported web font format; if no custom font is uploaded, the portal falls back to its default font.
 ### Theme the experience chrome
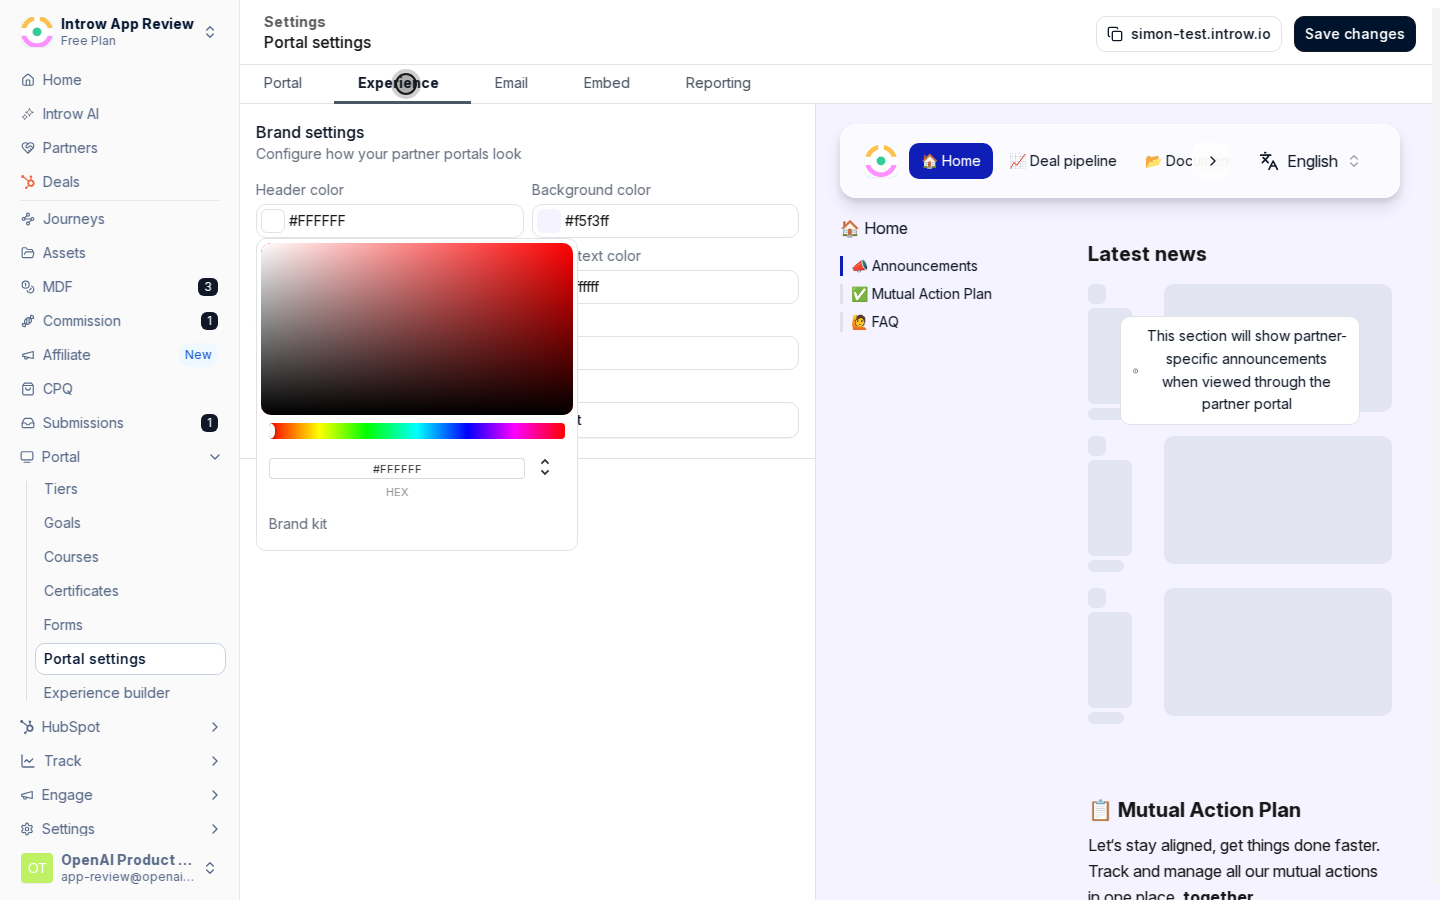
Still in [Portal settings](https://app.introw.io/settings/portal), switch to the **Experience** branding tab. These colors theme the experiences partners see after they log in, which have more surfaces than the login screen.
* **Header color** - the background of the experience header bar. Default is white; set it to a brand tone if you want a colored header.
* **Background color** - the page background behind experience content.
* **Button color** and **Button text color** - the fill and label of buttons inside experiences, matching the login styling.
* **Active tab color** - the highlight on the currently selected stage tab, so partners can see where they are. Use an accent color that reads clearly against the header.
### Theme the experience chrome
Still in [Portal settings](https://app.introw.io/settings/portal), switch to the **Experience** branding tab. These colors theme the experiences partners see after they log in, which have more surfaces than the login screen.
* **Header color** - the background of the experience header bar. Default is white; set it to a brand tone if you want a colored header.
* **Background color** - the page background behind experience content.
* **Button color** and **Button text color** - the fill and label of buttons inside experiences, matching the login styling.
* **Active tab color** - the highlight on the currently selected stage tab, so partners can see where they are. Use an accent color that reads clearly against the header.
 ### Customize the login copy
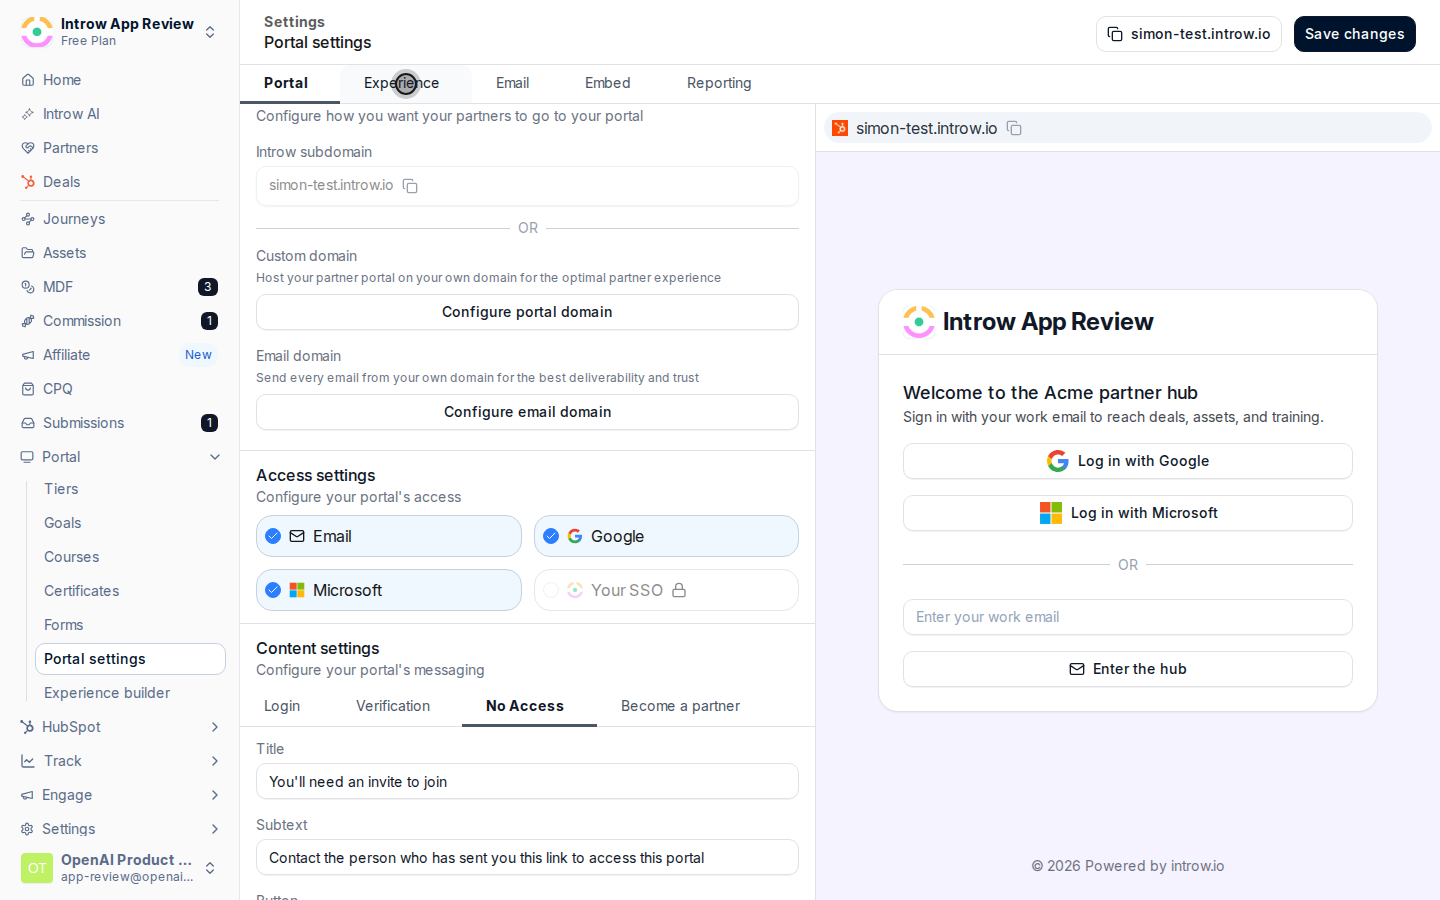
On the login branding tab, override the default wording so the sign-in page speaks in your voice. Each step of the login flow has editable copy:
* **Enter email step** - the **Title**, **Subtext**, email field **Placeholder**, and **Button text** partners see when they first arrive. There is also an **SSO button text** shown when single sign-on is offered. Leave any field blank to keep the default wording.
* **Verification step** - the **Title** and **Subtext** shown while a partner confirms the link sent to their email.
* **No access step** - the message shown when someone without access tries to sign in, so they know how to request it.
### Customize the login copy
On the login branding tab, override the default wording so the sign-in page speaks in your voice. Each step of the login flow has editable copy:
* **Enter email step** - the **Title**, **Subtext**, email field **Placeholder**, and **Button text** partners see when they first arrive. There is also an **SSO button text** shown when single sign-on is offered. Leave any field blank to keep the default wording.
* **Verification step** - the **Title** and **Subtext** shown while a partner confirms the link sent to their email.
* **No access step** - the message shown when someone without access tries to sign in, so they know how to request it.
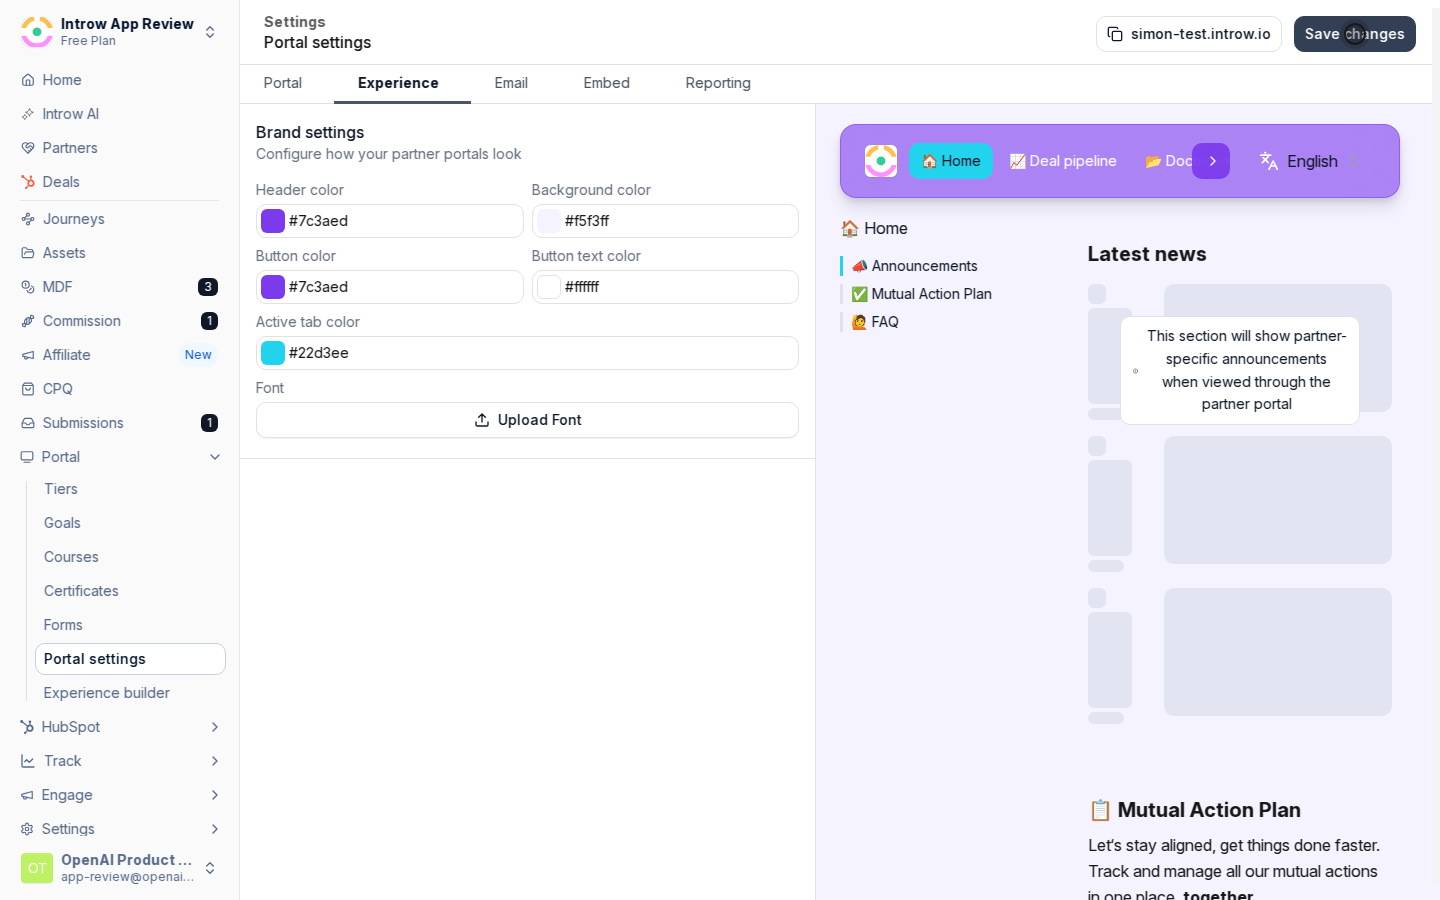
 Settings save as you edit; use the live preview to confirm the login screen and experiences reflect your brand before partners see them.
 ## Verify it worked
Open the portal login screen: it shows your horizontal logo, your colors on the button and background, your font, and your custom copy. Sign in and open an experience: the header, tabs, and buttons reflect the experience colors, and the square logo appears as the favicon. The brand now applies everywhere partners look.
## Related
Carry the brand into the emails partners receive.
Build the experiences your branding themes.
Serve the branded portal on your own hostname.
Full branding configuration options.
## Verify it worked
Open the portal login screen: it shows your horizontal logo, your colors on the button and background, your font, and your custom copy. Sign in and open an experience: the header, tabs, and buttons reflect the experience colors, and the square logo appears as the favicon. The brand now applies everywhere partners look.
## Related
Carry the brand into the emails partners receive.
Build the experiences your branding themes.
Serve the branded portal on your own hostname.
Full branding configuration options.