> ## Documentation Index
> Fetch the complete documentation index at: https://docs.introw.io/llms.txt
> Use this file to discover all available pages before exploring further.
# Create a dynamic segment
> Build an audience that updates itself from filters, then set its permissions and notifications so the whole segment behaves the way you want.
{/* The fastest way to keep targeting accurate is to let the data define the audience. A
dynamic segment selects its members from conditions, so as partner properties change in
your CRM, the segment updates itself. This guide builds one end to end: name it, define
the conditions, set who can invite and collaborate, and tune the notifications it receives,
so every feature that points at the segment treats the right partners the right way. */}
## What you'll achieve
A dynamic segment whose membership follows your conditions automatically, with collaboration permissions and notification behavior set for that audience. Point any feature (a portal experience, a course, a campaign) at the segment and it stays targeted at the right partners, who collaborate and get notified exactly as you intend.
## Before you start
You need access to segment settings. A connected CRM lets a dynamic segment filter on live partner data.
Decide what makes a partner belong (for example tier, region, or lifecycle phase) so your conditions capture fit and behavior, not just one label.
## Watch it
## Steps
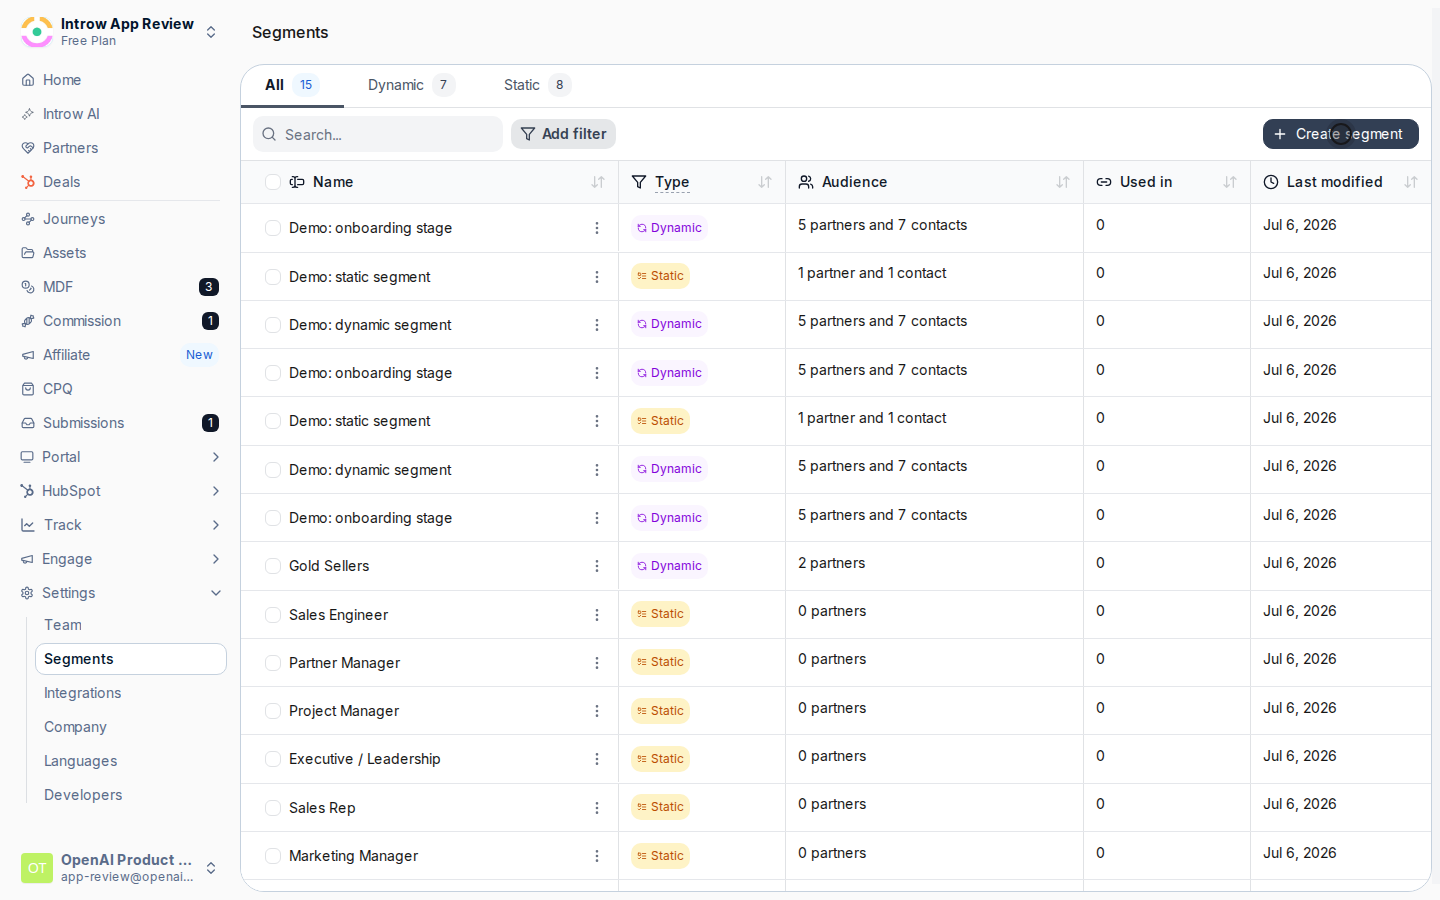
Go to [Segments](https://app.introw.io/settings/segments) and create a new segment. The segment editor opens on the **General** tab.
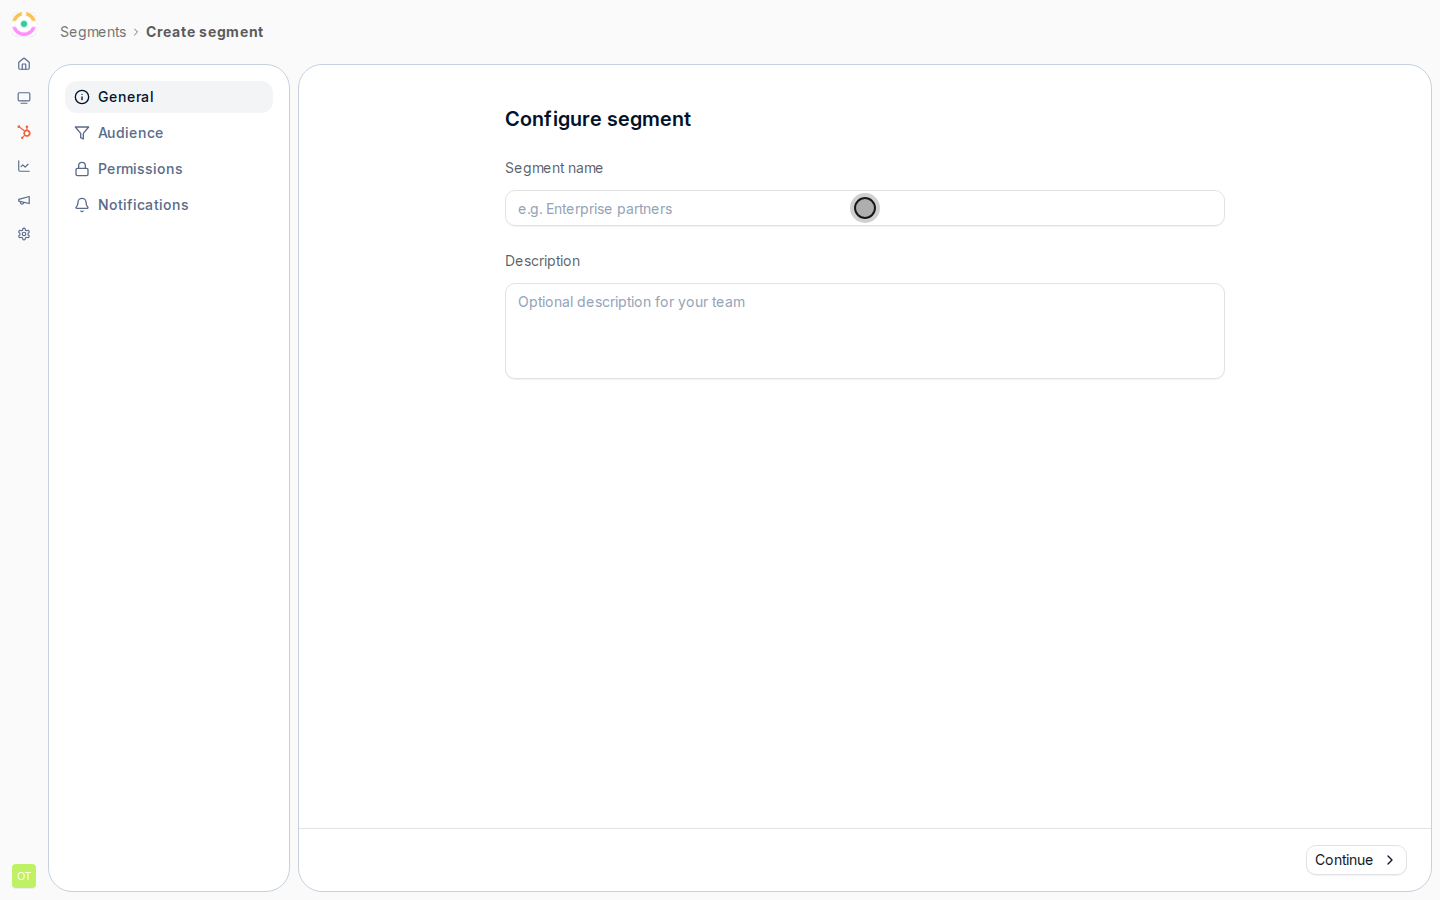
 On the **General** tab, fill in the basics:
* **Segment name** - how the segment appears everywhere you use it (for example "Enterprise partners"). Required, and worth making self-explanatory since teammates pick it from lists.
* **Description** - an optional note for your team about who this segment is for. It does not affect membership.
On the **General** tab, fill in the basics:
* **Segment name** - how the segment appears everywhere you use it (for example "Enterprise partners"). Required, and worth making self-explanatory since teammates pick it from lists.
* **Description** - an optional note for your team about who this segment is for. It does not affect membership.
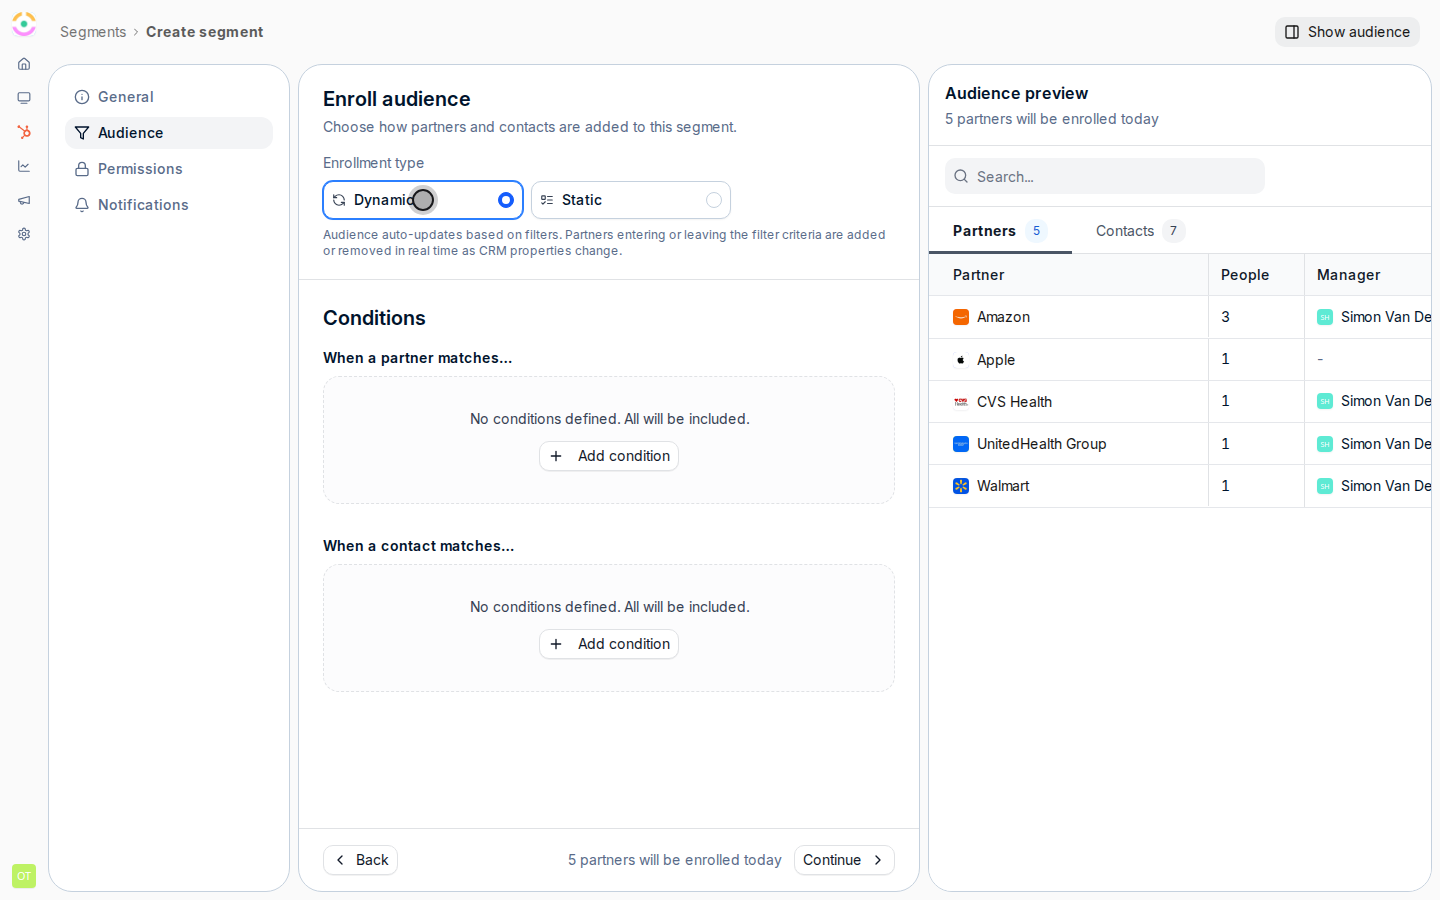
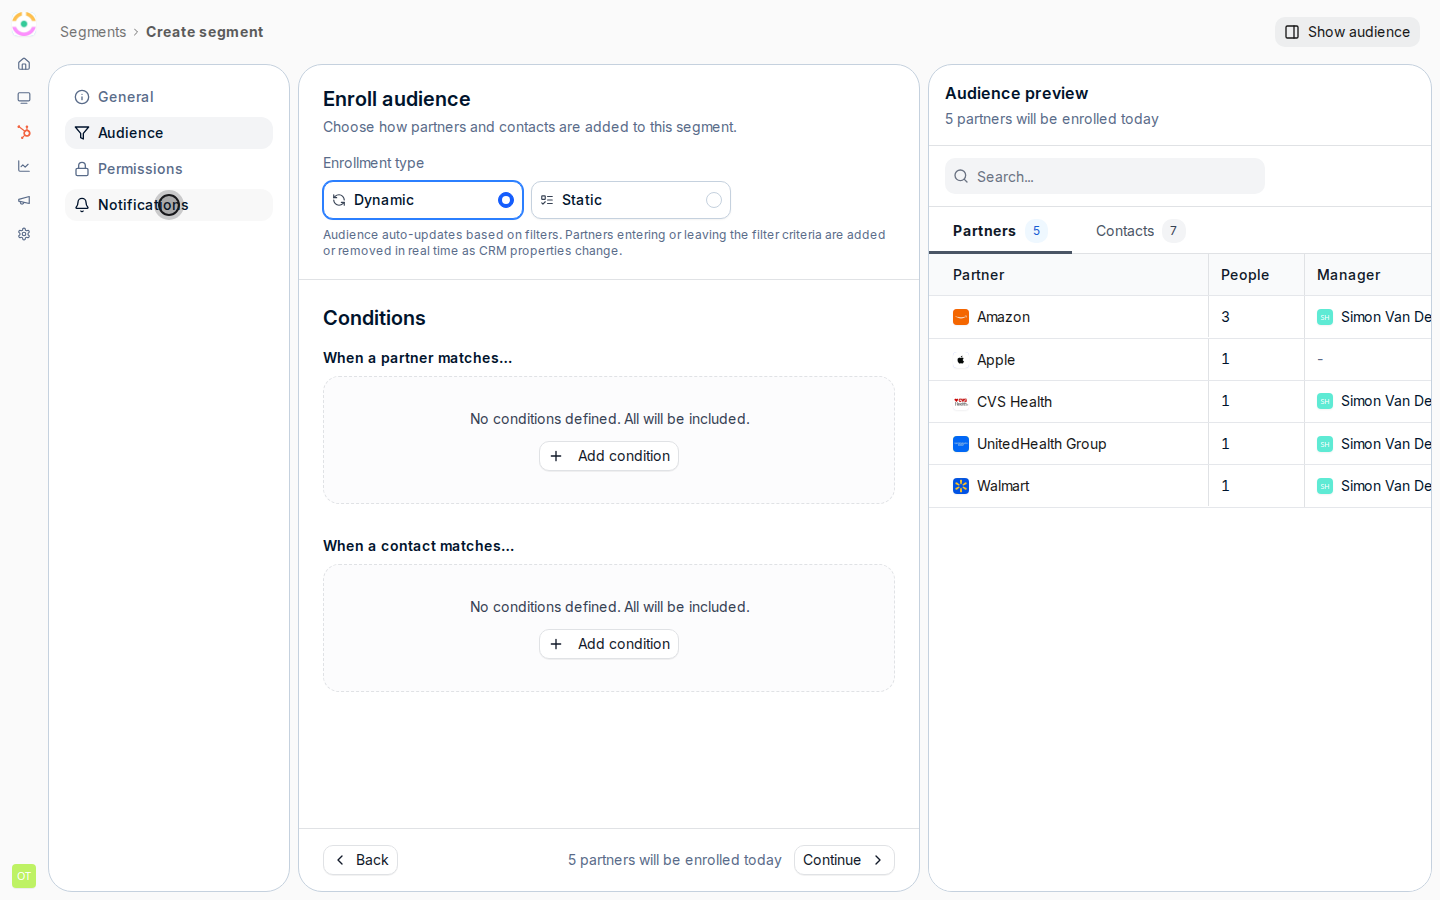
 On the **Audience** tab, set **Enrollment type** to **Dynamic**. Dynamic means membership auto-updates from conditions: partners entering or leaving the criteria are added or removed in real time as CRM properties change. (Choose **Static** instead only when you need a fixed, hand-picked list - see [Create a static segment](./create-a-static-segment).)
 Still on the **Audience** tab, build the rules that decide who belongs:
* **Partner conditions** - rules on partner-level fields (such as tier, phase, country, or a CRM property). Use these to target by organization-level fit.
* **Contact conditions** - rules on the people at those partners, when you want to narrow to contacts who match (such as a role or activity signal).
Combine conditions to target by fit and behavior together, not just one label. Use **Show audience** to open the live preview panel as you build.
Still on the **Audience** tab, build the rules that decide who belongs:
* **Partner conditions** - rules on partner-level fields (such as tier, phase, country, or a CRM property). Use these to target by organization-level fit.
* **Contact conditions** - rules on the people at those partners, when you want to narrow to contacts who match (such as a role or activity signal).
Combine conditions to target by fit and behavior together, not just one label. Use **Show audience** to open the live preview panel as you build.
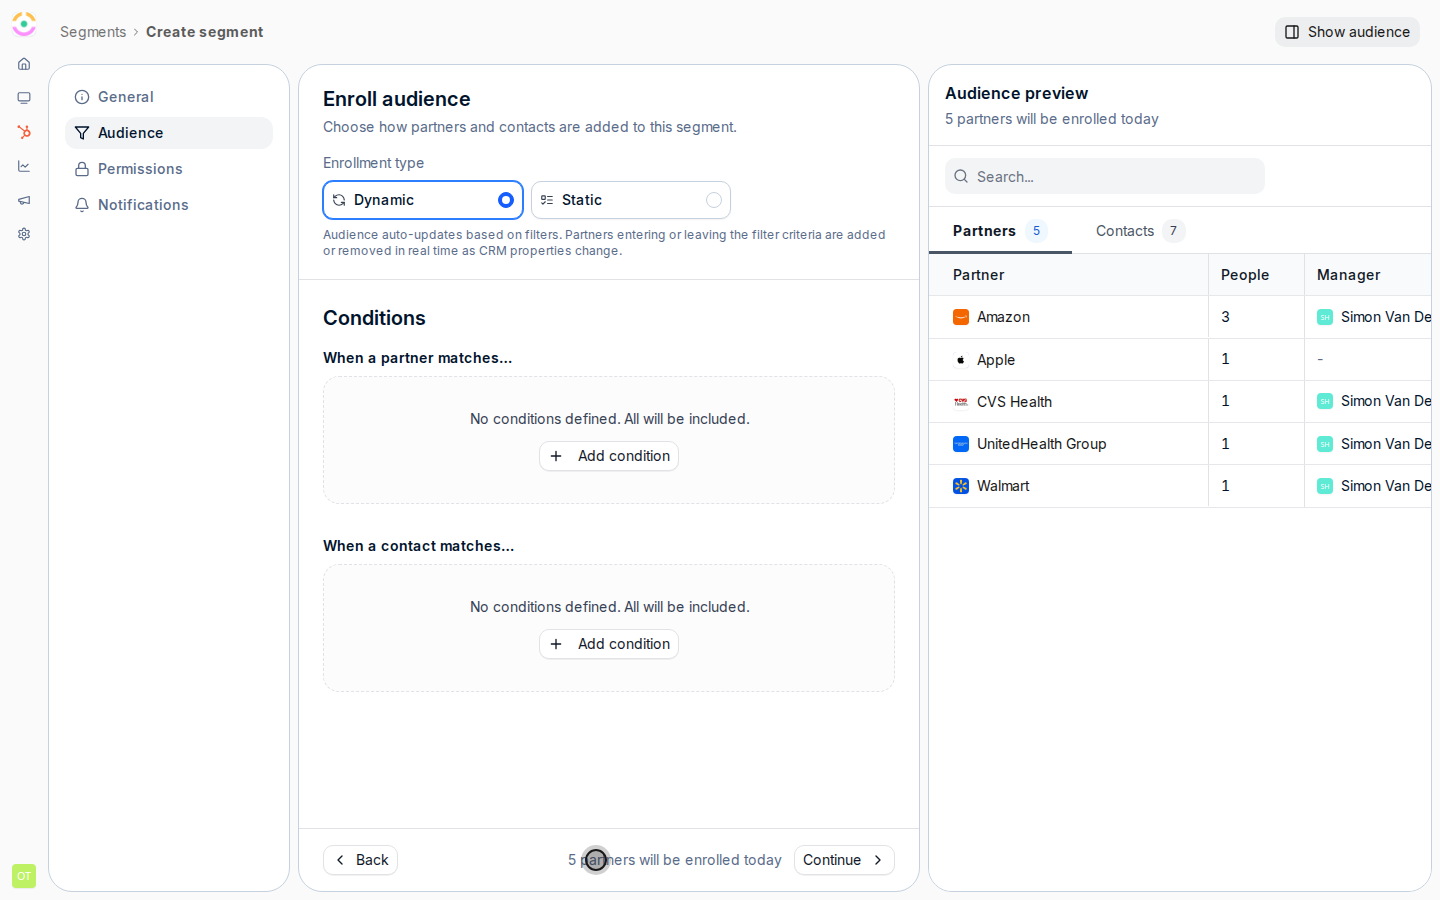 Review the audience preview of who currently matches, with its partner and contact counts, to confirm the segment captures the right people before you rely on it.
 On the **Permissions** tab, decide how this segment's partners may act:
* **Invite team members** - lets partners in this segment invite their own colleagues into the portal. On by default; leave it on for trusted groups and turn it off for audiences you want to keep tightly controlled.
* **Collaboration restricted** - when on, deal and lead nudges show only where a partner contact is actively collaborating, rather than across all their records. Off by default; turn it on for segments where you want to limit collaboration surface area.
For contacts who belong to several segments, the most permissive setting wins: a restriction here only applies to contacts whose every segment restricts them. See [Layer segments to progressively unlock capabilities](./layer-segments-to-progressively-unlock).
On the **Permissions** tab, decide how this segment's partners may act:
* **Invite team members** - lets partners in this segment invite their own colleagues into the portal. On by default; leave it on for trusted groups and turn it off for audiences you want to keep tightly controlled.
* **Collaboration restricted** - when on, deal and lead nudges show only where a partner contact is actively collaborating, rather than across all their records. Off by default; turn it on for segments where you want to limit collaboration surface area.
For contacts who belong to several segments, the most permissive setting wins: a restriction here only applies to contacts whose every segment restricts them. See [Layer segments to progressively unlock capabilities](./layer-segments-to-progressively-unlock).
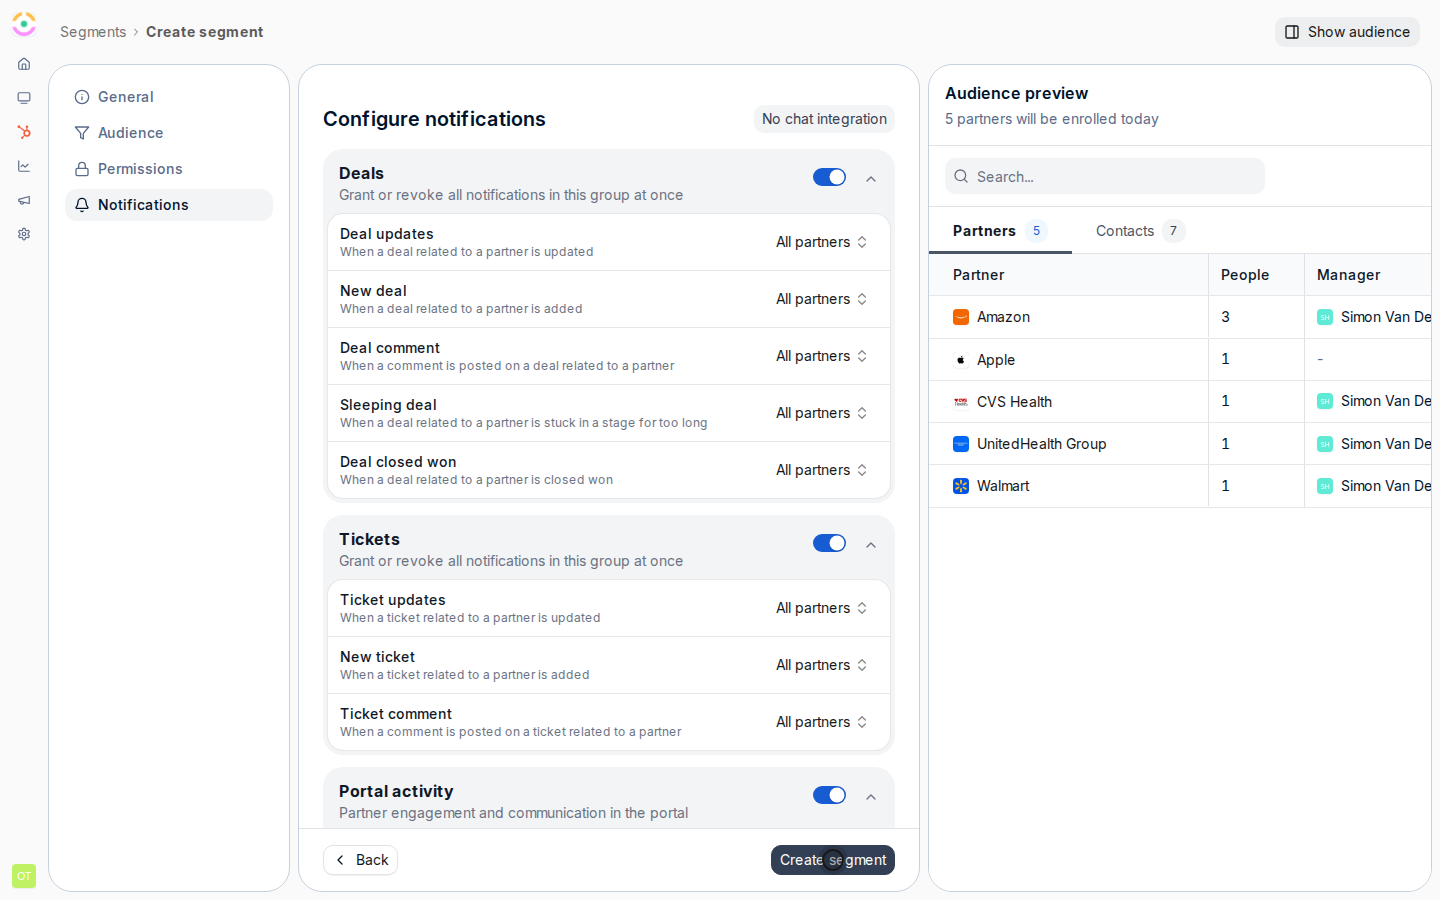 On the **Notifications** tab, override the default notification behavior for this audience. For each update type (announcements, comments, new records, task nudges, object updates, sleeping-deal nudges, submission outcomes, course and certificate events), you can set:
* **Channel** - whether the notification goes out by **email**, by **chat**, or both.
* **Scope** - who in the segment receives it: all partners, or only collaborating contacts.
Only override the types where this segment should differ from your program defaults; leave the rest untouched to inherit the standard behavior. For contacts in several segments, the most allowing override wins: a notification turned on in any of their segments reaches them, even if another of their segments turns it off.
On the **Notifications** tab, override the default notification behavior for this audience. For each update type (announcements, comments, new records, task nudges, object updates, sleeping-deal nudges, submission outcomes, course and certificate events), you can set:
* **Channel** - whether the notification goes out by **email**, by **chat**, or both.
* **Scope** - who in the segment receives it: all partners, or only collaborating contacts.
Only override the types where this segment should differ from your program defaults; leave the rest untouched to inherit the standard behavior. For contacts in several segments, the most allowing override wins: a notification turned on in any of their segments reaches them, even if another of their segments turns it off.
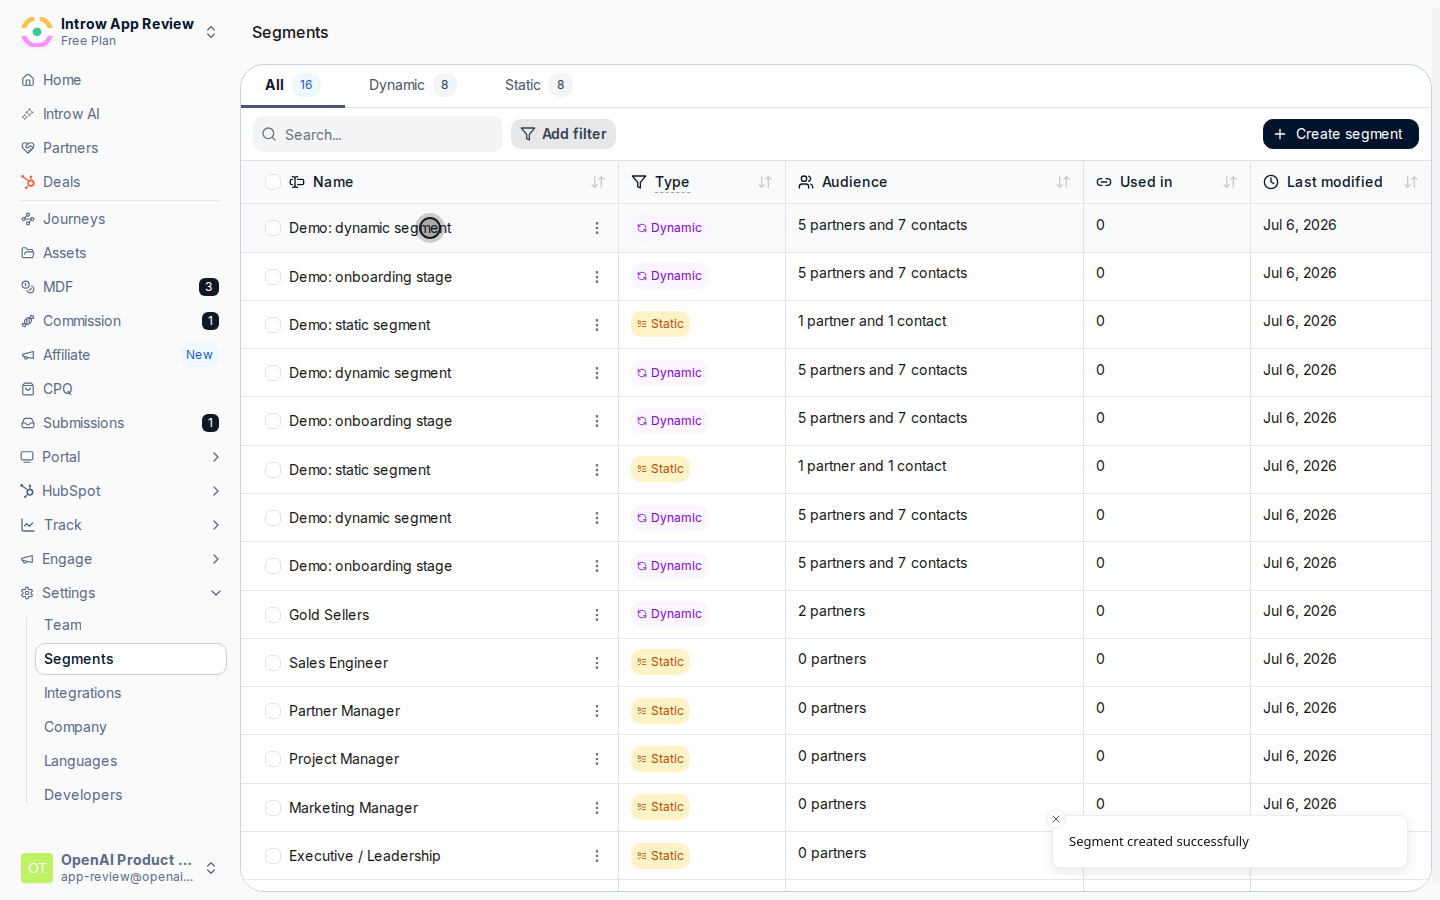 Save to create the segment. Membership now updates on its own as partner data changes, and the permissions and notification settings apply to everyone the conditions capture.
## Verify it worked
The segment shows its current members on [Segments](https://app.introw.io/settings/segments), and the count shifts as matching partner data changes. The segment also shows where it is used across the product, so before you later edit or delete it you can see its reach.
## Related
Hand-pick a fixed audience instead.
Use the segment to gate portal content.
How overlapping segments resolve, and how to design around it.
Full configuration options for segments.
Save to create the segment. Membership now updates on its own as partner data changes, and the permissions and notification settings apply to everyone the conditions capture.
## Verify it worked
The segment shows its current members on [Segments](https://app.introw.io/settings/segments), and the count shifts as matching partner data changes. The segment also shows where it is used across the product, so before you later edit or delete it you can see its reach.
## Related
Hand-pick a fixed audience instead.
Use the segment to gate portal content.
How overlapping segments resolve, and how to design around it.
Full configuration options for segments.