> ## Documentation Index
> Fetch the complete documentation index at: https://docs.introw.io/llms.txt
> Use this file to discover all available pages before exploring further.
# Configure the claim step
> Configure the MDF claim step: build the claim form with proof-of-spend upload, set CRM automations, approval gates, and the submission window.
> The claim step is where a partner proves what they spent. Configuring it decides what proof they attach, how the claim lands in your CRM, who approves it, and how long they have. This guide sets up the whole step from the fund's edit mode.
Proof of expense is what reimbursement rests on, so the claim step deserves a deliberate setup: a form that captures the amount and the receipts, a CRM automation that records the claim against the project, approval gates that clear the routine claims and route the rest, and a submission window that keeps claims timely. All of it is no-code, and the step can be switched off entirely if your program does not collect claims.
## What you'll achieve
A claim step where partners submit an amount with proof-of-spend attached, the claim lands as a CRM record drawing down the approved budget, an AI review plus your approvers decide it, and a claim window bounds when it can be submitted.
## Before you start
Claims file against an approved proposal. See [Configure the proposal step](/features/mdf/projects/guides/configure-the-proposal-form).
The claim's CRM automation needs a connected CRM. See [CRM Automations](/features/forms/crm-automations).
## Watch it
## Steps
### Open the claim step
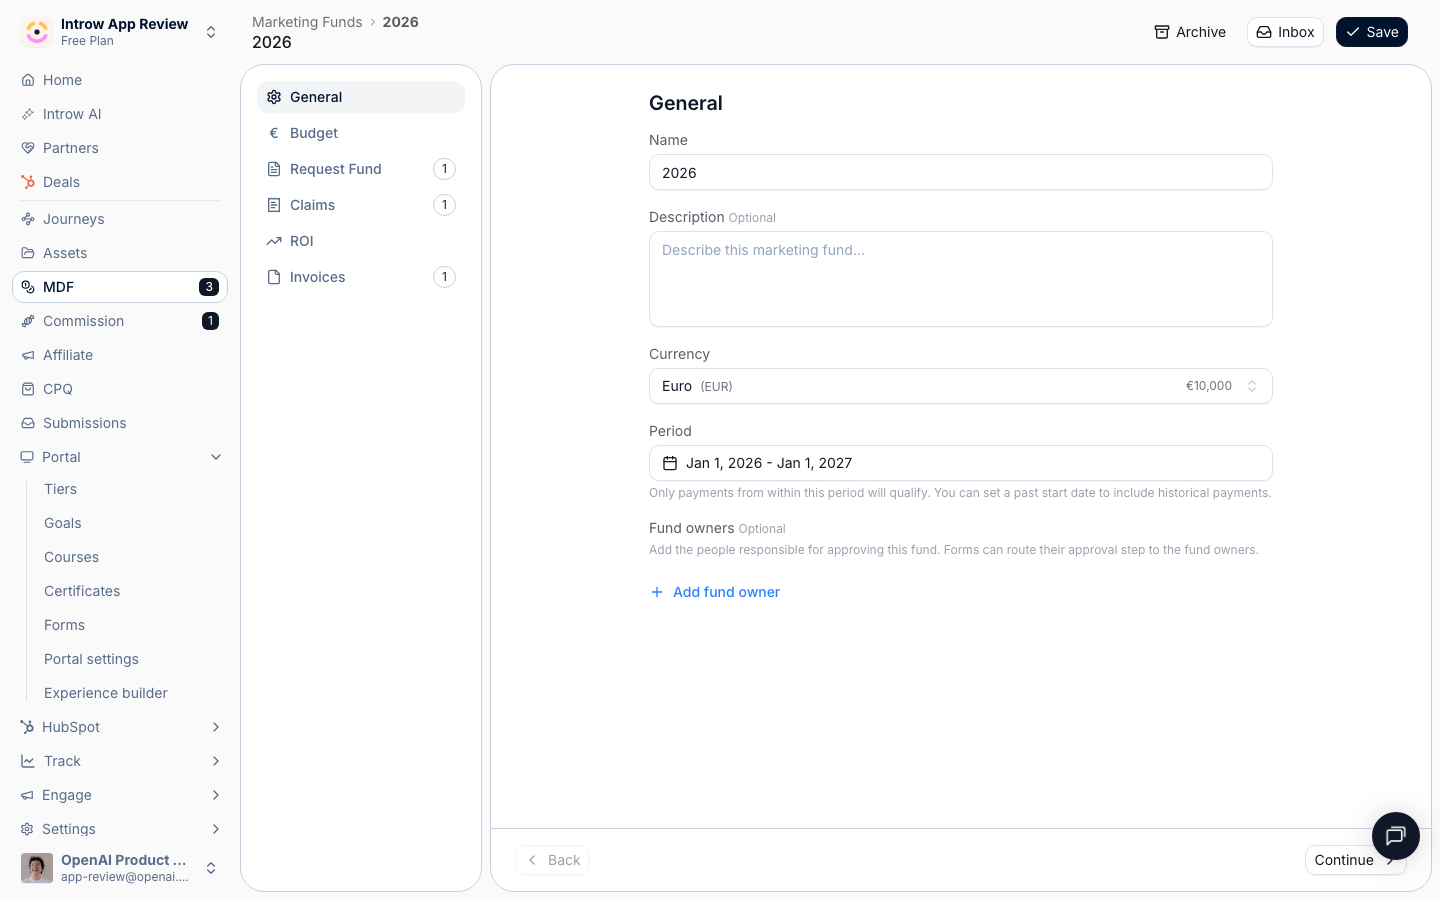
Go to [Marketing Funds](https://app.introw.io/marketing-funds), open the fund, and use **Configure**. Open the **Claims** step. A switch at the top of the step turns it off entirely if your program does not collect claims.
 ### Build the claim form
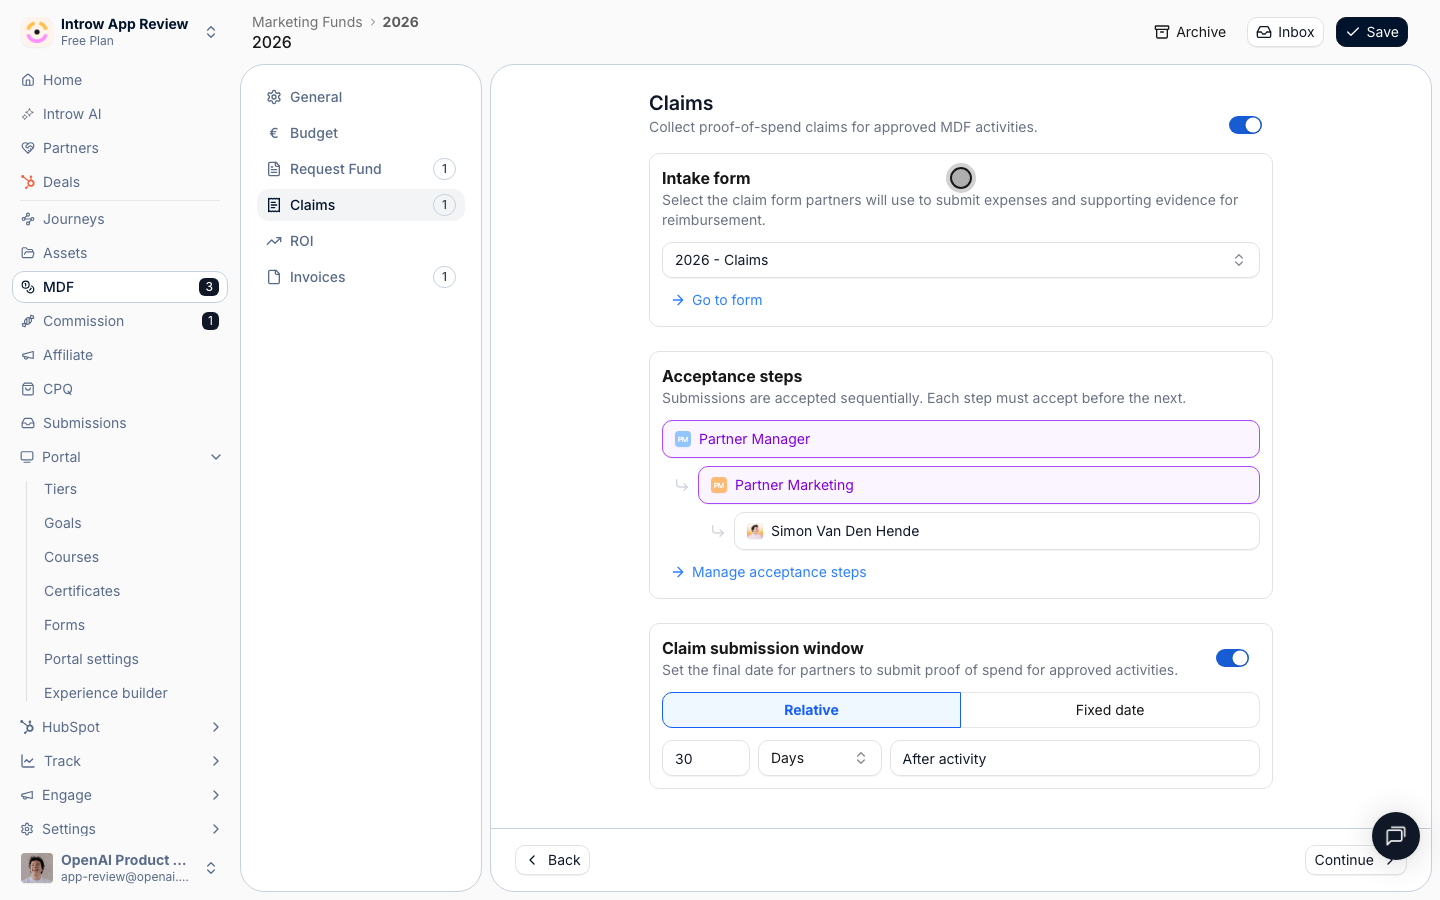
The **Intake form** section shows the claim form bound to the step. Select **Go to form** to open it in the no-code builder.
### Build the claim form
The **Intake form** section shows the claim form bound to the step. Select **Go to form** to open it in the no-code builder.
 On the **Form builder** tab, keep the amount and date fields and the **upload** field partners use to attach receipts and invoices as proof of spend. Add any fields your finance team needs; everything is drag-in, no code.
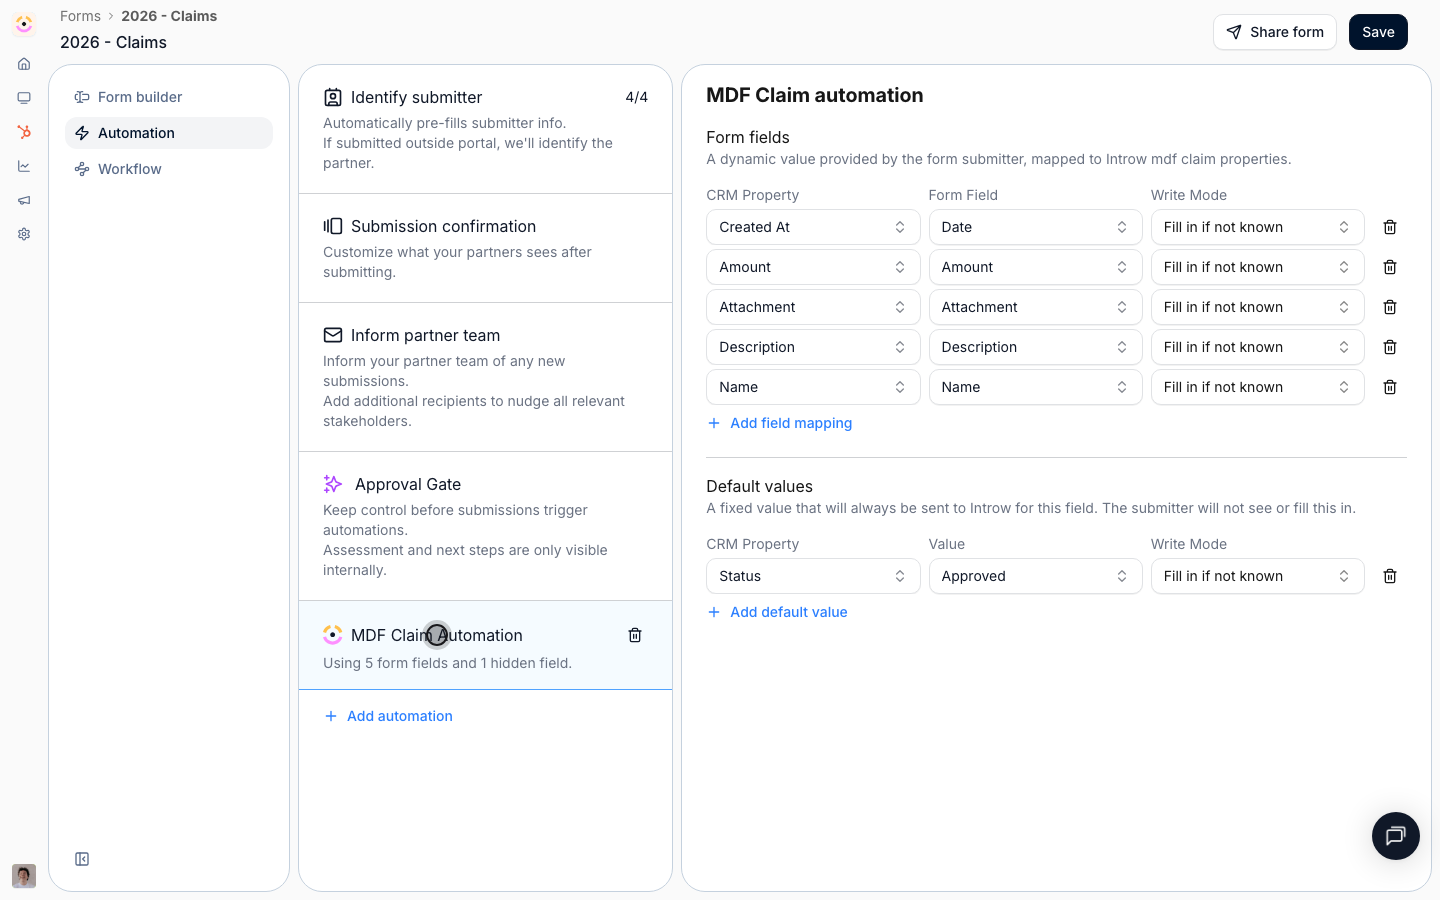
On the **Automation** tab, the claim automation maps each field to a CRM property and records the claim against the project, so approved claims draw down the approved budget. See [CRM Automations](/features/forms/crm-automations).
On the **Form builder** tab, keep the amount and date fields and the **upload** field partners use to attach receipts and invoices as proof of spend. Add any fields your finance team needs; everything is drag-in, no code.
On the **Automation** tab, the claim automation maps each field to a CRM property and records the claim against the project, so approved claims draw down the approved budget. See [CRM Automations](/features/forms/crm-automations).
 ### Set the approval gates
Enable the agentic review so straightforward claims auto-approve above a certainty threshold and the rest escalate - so a stack of small, well-documented claims does not sit in a queue.
Under **Acceptance steps**, use **Manage acceptance steps** to set who signs off, in order. Each approver can be a person, a partner-team role, or anyone; each step must accept before the next. Only approved claims count against the budget.
### Set the claim window
Set the **Claim submission window** - how long partners have to submit proof after the activity, measured relative to the activity date or as a fixed date - then **Save**.
## Verify it worked
Open the Claims step and confirm its form (with the proof upload), acceptance steps, and submission window are set. A test claim submitted against an approved project lands as a CRM record with its attachment, runs the AI review, and routes to your approvers; once approved it draws down the budget.
## Related
Why claims are the auditable statement of reimbursable spend.
Operate the whole flow, from proposal through reimbursement.
How the claim form maps and records against the project.
### Set the approval gates
Enable the agentic review so straightforward claims auto-approve above a certainty threshold and the rest escalate - so a stack of small, well-documented claims does not sit in a queue.
Under **Acceptance steps**, use **Manage acceptance steps** to set who signs off, in order. Each approver can be a person, a partner-team role, or anyone; each step must accept before the next. Only approved claims count against the budget.
### Set the claim window
Set the **Claim submission window** - how long partners have to submit proof after the activity, measured relative to the activity date or as a fixed date - then **Save**.
## Verify it worked
Open the Claims step and confirm its form (with the proof upload), acceptance steps, and submission window are set. A test claim submitted against an approved project lands as a CRM record with its attachment, runs the AI review, and routes to your approvers; once approved it draws down the budget.
## Related
Why claims are the auditable statement of reimbursable spend.
Operate the whole flow, from proposal through reimbursement.
How the claim form maps and records against the project.