> ## Documentation Index
> Fetch the complete documentation index at: https://docs.introw.io/llms.txt
> Use this file to discover all available pages before exploring further.
# Automate Introw with Zapier
> Generate a Zapier API key, connect the Introw app in Zapier, and build a Zap from a partner event so onboarding, notifications, and syncs run automatically.
Zapier lets you turn an Introw partner event into an automated action in hundreds of other apps without writing code. This guide takes the whole job end to end: generate a Zapier API key in Introw, connect the Introw app in Zapier, and build a Zap that fires from a partner event. Do this once and onboarding tasks, notifications, and record syncs run automatically every time the event happens. The key you generate here is dedicated to the Zapier connection and is separate from a general developer API key you would create for calling the Introw API directly.
## What you'll achieve
A live Zap that reacts to an Introw partner event, such as a new partner or a portal visit, and runs an action in another app, so a partner workflow happens automatically with no manual step.
## Before you start
You need permission to manage integrations in Introw to generate the Zapier API key.
You need a Zapier account where you can create Zaps.
## Watch it
## Steps
### Generate a key and connect the Introw app
Go to [Integrations](https://app.introw.io/settings/integrations?category=communication) and stay on the **Communication** category, then select the **Zapier** tile to open the **Zapier Integration** dialog.
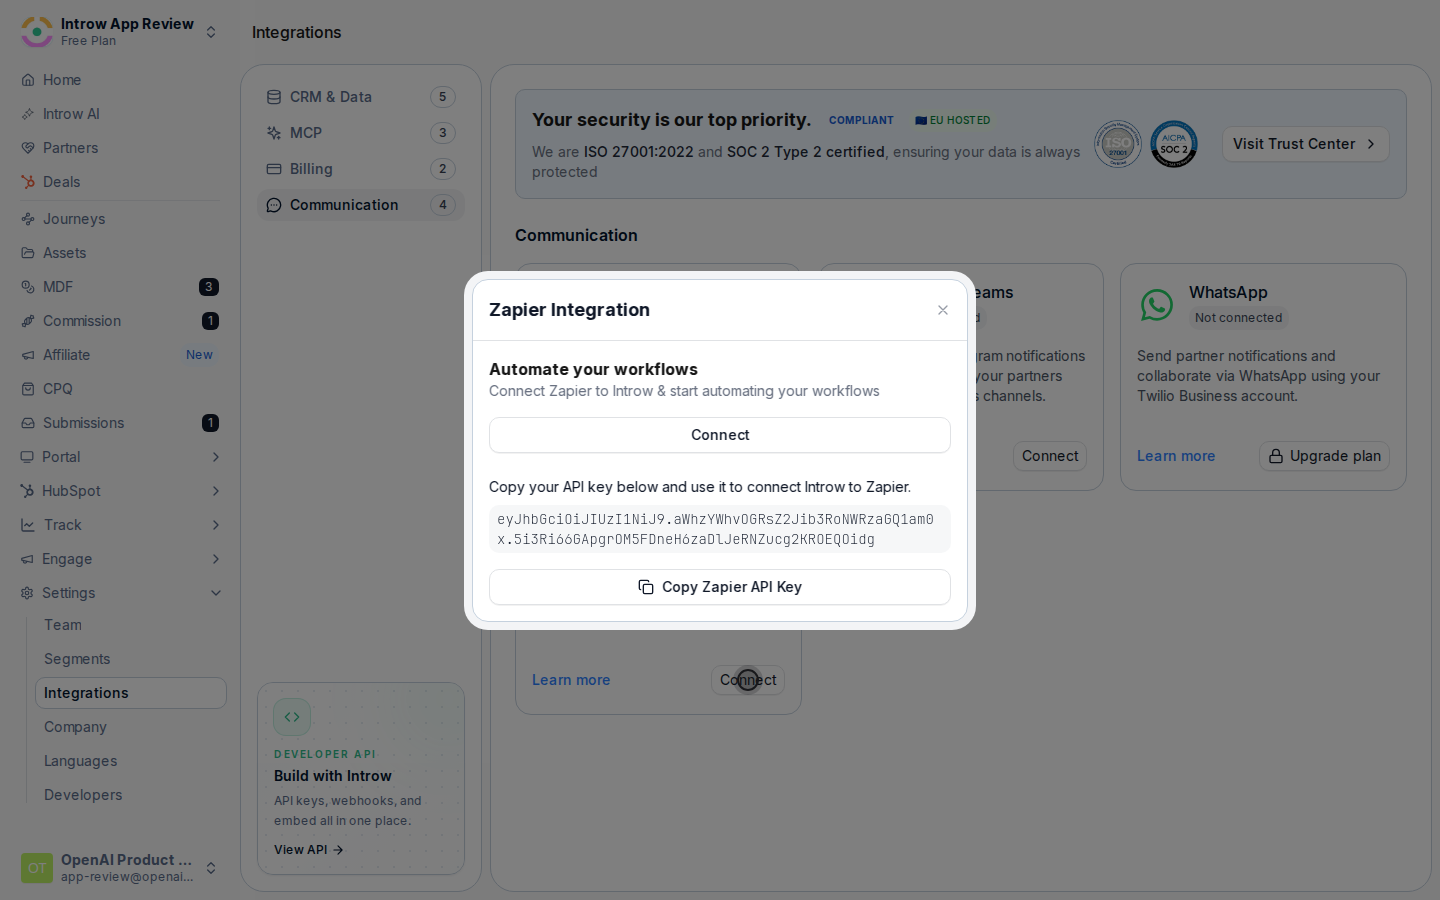 The dialog generates a **Zapier API key** for your organization. Select **Copy Zapier API Key** to copy it. This key authenticates Zapier to Introw and is specific to this connection. It is not the same as a developer API key you create for direct API calls; for that, see [Create and manage API keys](/features/developer/api/guides/create-and-manage-api-keys).
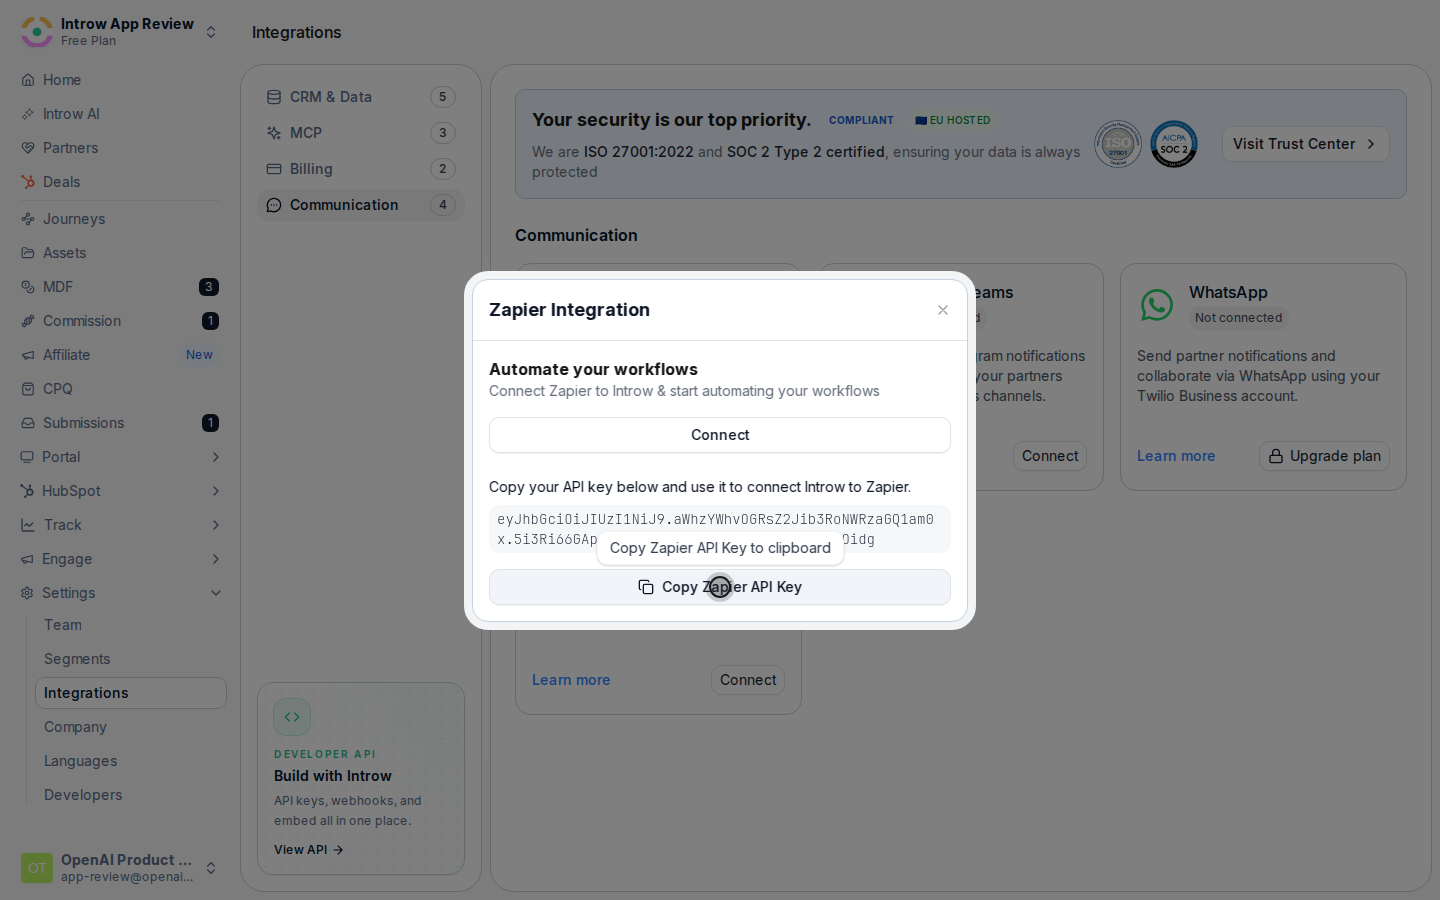 In the same dialog select **Connect** to open the Introw app on Zapier. In Zapier, add Introw to a Zap and, when prompted to connect your account, paste the Zapier API key you copied. Zapier confirms the Introw account is connected.
### Build a Zap from a partner event
Start a Zap in Zapier, pick Introw as the trigger app, and choose one of the three partner events Introw can start a Zap from. Pick the one that matches the workflow you want to automate:
* **New partner** - fires when a new partner is added in Introw. It provides the partner's name, domain, logo, CRM id, and partner manager email, so you can automate onboarding, for example creating a project, sending a welcome email, or adding a row to a tracker.
* **Portal visitor** - fires when a partner contact visits their portal. It provides the visitor's name and email, the partner name and tier, the partner manager email, and the CRM ids for the company and contact, so you can alert the partner manager or log engagement.
* **Access changed** - fires when a partner contact's portal access changes. It provides the same visitor and partner details plus whether access was revoked, so you can keep an access log or notify the right people on grant or removal.
Add the app and action you want to run, for example posting to a chat channel, creating a CRM record, or adding a spreadsheet row. Map the Introw event fields (the fields listed above for your trigger) into the action's inputs so the downstream record carries the partner context. The connected Introw app can also be used as an action to create or update records in Introw; those actions run with the permissions of the Zapier API key you connected.
Use Zapier's test step to pull a recent sample event from Introw and confirm the action runs as expected, then turn the Zap on so it fires automatically from then on.
## Verify it worked
Trigger the event in Introw, for example add a new partner or visit a partner portal, and confirm the Zap runs in Zapier's history and the downstream action completes in your other app. Back in Introw, the Zapier tile shows as connected.
## Related
Scope a developer key for direct API calls.
Automate beyond Zapier with the API.
Full configuration options.
In the same dialog select **Connect** to open the Introw app on Zapier. In Zapier, add Introw to a Zap and, when prompted to connect your account, paste the Zapier API key you copied. Zapier confirms the Introw account is connected.
### Build a Zap from a partner event
Start a Zap in Zapier, pick Introw as the trigger app, and choose one of the three partner events Introw can start a Zap from. Pick the one that matches the workflow you want to automate:
* **New partner** - fires when a new partner is added in Introw. It provides the partner's name, domain, logo, CRM id, and partner manager email, so you can automate onboarding, for example creating a project, sending a welcome email, or adding a row to a tracker.
* **Portal visitor** - fires when a partner contact visits their portal. It provides the visitor's name and email, the partner name and tier, the partner manager email, and the CRM ids for the company and contact, so you can alert the partner manager or log engagement.
* **Access changed** - fires when a partner contact's portal access changes. It provides the same visitor and partner details plus whether access was revoked, so you can keep an access log or notify the right people on grant or removal.
Add the app and action you want to run, for example posting to a chat channel, creating a CRM record, or adding a spreadsheet row. Map the Introw event fields (the fields listed above for your trigger) into the action's inputs so the downstream record carries the partner context. The connected Introw app can also be used as an action to create or update records in Introw; those actions run with the permissions of the Zapier API key you connected.
Use Zapier's test step to pull a recent sample event from Introw and confirm the action runs as expected, then turn the Zap on so it fires automatically from then on.
## Verify it worked
Trigger the event in Introw, for example add a new partner or visit a partner portal, and confirm the Zap runs in Zapier's history and the downstream action completes in your other app. Back in Introw, the Zapier tile shows as connected.
## Related
Scope a developer key for direct API calls.
Automate beyond Zapier with the API.
Full configuration options.