> ## Documentation Index
> Fetch the complete documentation index at: https://docs.introw.io/llms.txt
> Use this file to discover all available pages before exploring further.
# Set up a partner application form
> Turn a form into a self-serve partner application that auto-creates the partner in Introw, links company and contact records in your CRM, and invites the applicant to their portal.
> For partner ops or partner marketing who want a self-serve on-ramp that recruits partners and sets them up without manual data entry.
A partner application form is how new partners join your program on their own. This guide takes the whole job end to end: build (or open) the application form, add the **Partner automation** action so a submission creates a fully populated partner in Introw, link company and contact records back to your CRM, assign each applicant a starting tier, phase, manager, and portal experience, and optionally invite them to their portal automatically. Set it up once and every accepted application becomes a real, attributed partner with a linked CRM record, no CRM workflow required.
## What you'll achieve
A published application form that, on each submission, creates the partner in Introw, links a company and contact in your CRM, applies your default tier, phase, manager, and experience, and (optionally) emails the applicant a portal invitation. You can also surface the form on your portal login page and add a human review step before anyone is created.
## Before you start
To auto-create linked company and contact records, a CRM must be connected. See [Connect HubSpot](/features/integrations/crm/guides/connect-hubspot) or [Connect Salesforce](/features/integrations/crm/guides/connect-salesforce). The partner is still created in Introw without a CRM, you just skip the CRM linking.
Assigning a portal **Experience** in the automation is what lets you auto-invite applicants. See [Build and publish a portal experience](/features/portal/experiences/guides/build-and-publish-a-portal-experience).
Decide the tier, lifecycle phase, and partner manager every new applicant should start with, so onboarding and attribution are correct from day one.
## Watch it
## Steps
### Build the application form
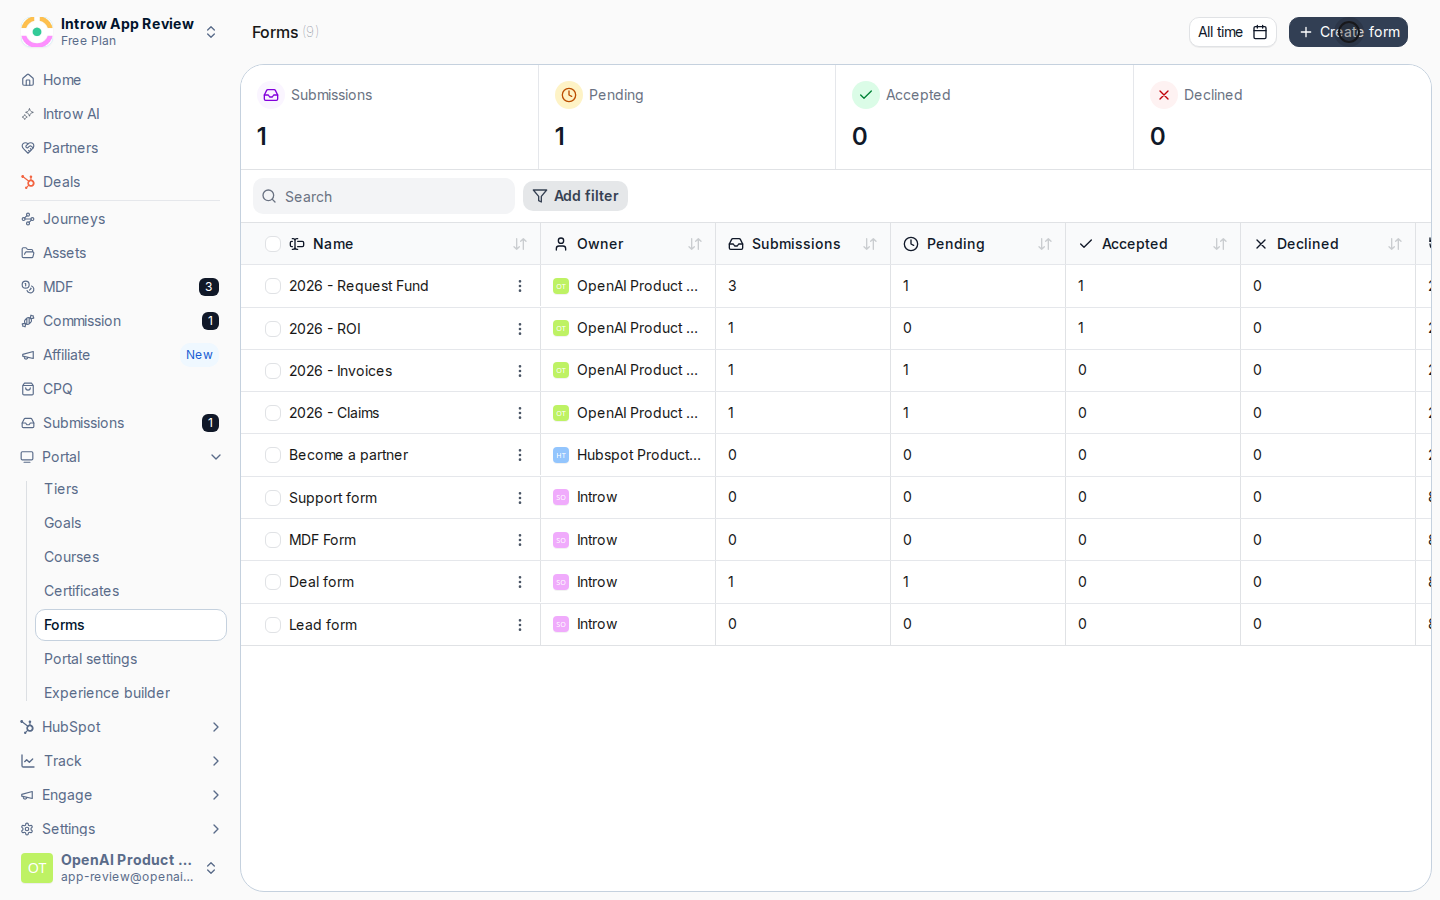
Go to [Forms](https://app.introw.io/forms) and open an existing partner application form, or create a new one. This form is what applicants fill in, so include the fields you need to qualify and create a partner, such as company name, website, and the applicant's contact details.
 A partner application form includes a terms and conditions checkbox by default, so applicants explicitly agree before they are created. Two things make it work for you:
* **Link to your terms** - in the field label, replace the placeholder URL with the link to your own terms and conditions page so applicants can read them before agreeing.
* **Record acceptance in your CRM (optional)** - map the checkbox to a CRM property in the automation later, so you keep a clean compliance record of who accepted and when. Map it to a boolean property to record acceptance and, if you like, a date/time property to capture the moment.
If terms acceptance is not relevant for your program, remove the field.
### Add the Partner automation
Open the form's **Automation** tab (the second tab of the form editor), select **Add automation**, and choose **Partner automation**. This is the action that turns a submission into a real partner, everything below is configured inside it.
A partner application form includes a terms and conditions checkbox by default, so applicants explicitly agree before they are created. Two things make it work for you:
* **Link to your terms** - in the field label, replace the placeholder URL with the link to your own terms and conditions page so applicants can read them before agreeing.
* **Record acceptance in your CRM (optional)** - map the checkbox to a CRM property in the automation later, so you keep a clean compliance record of who accepted and when. Map it to a boolean property to record acceptance and, if you like, a date/time property to capture the moment.
If terms acceptance is not relevant for your program, remove the field.
### Add the Partner automation
Open the form's **Automation** tab (the second tab of the form editor), select **Add automation**, and choose **Partner automation**. This is the action that turns a submission into a real partner, everything below is configured inside it.
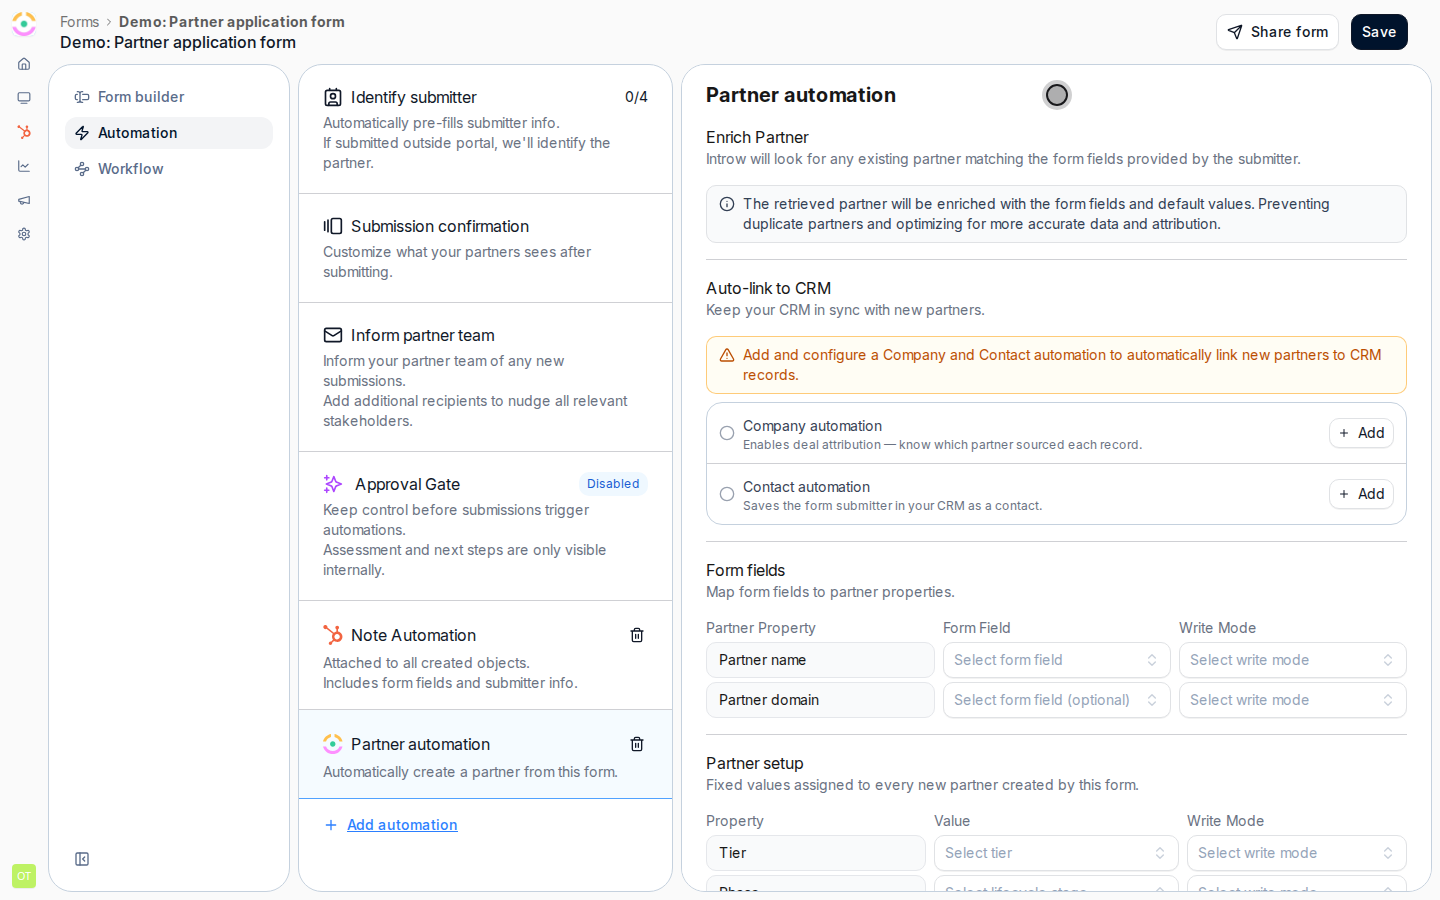
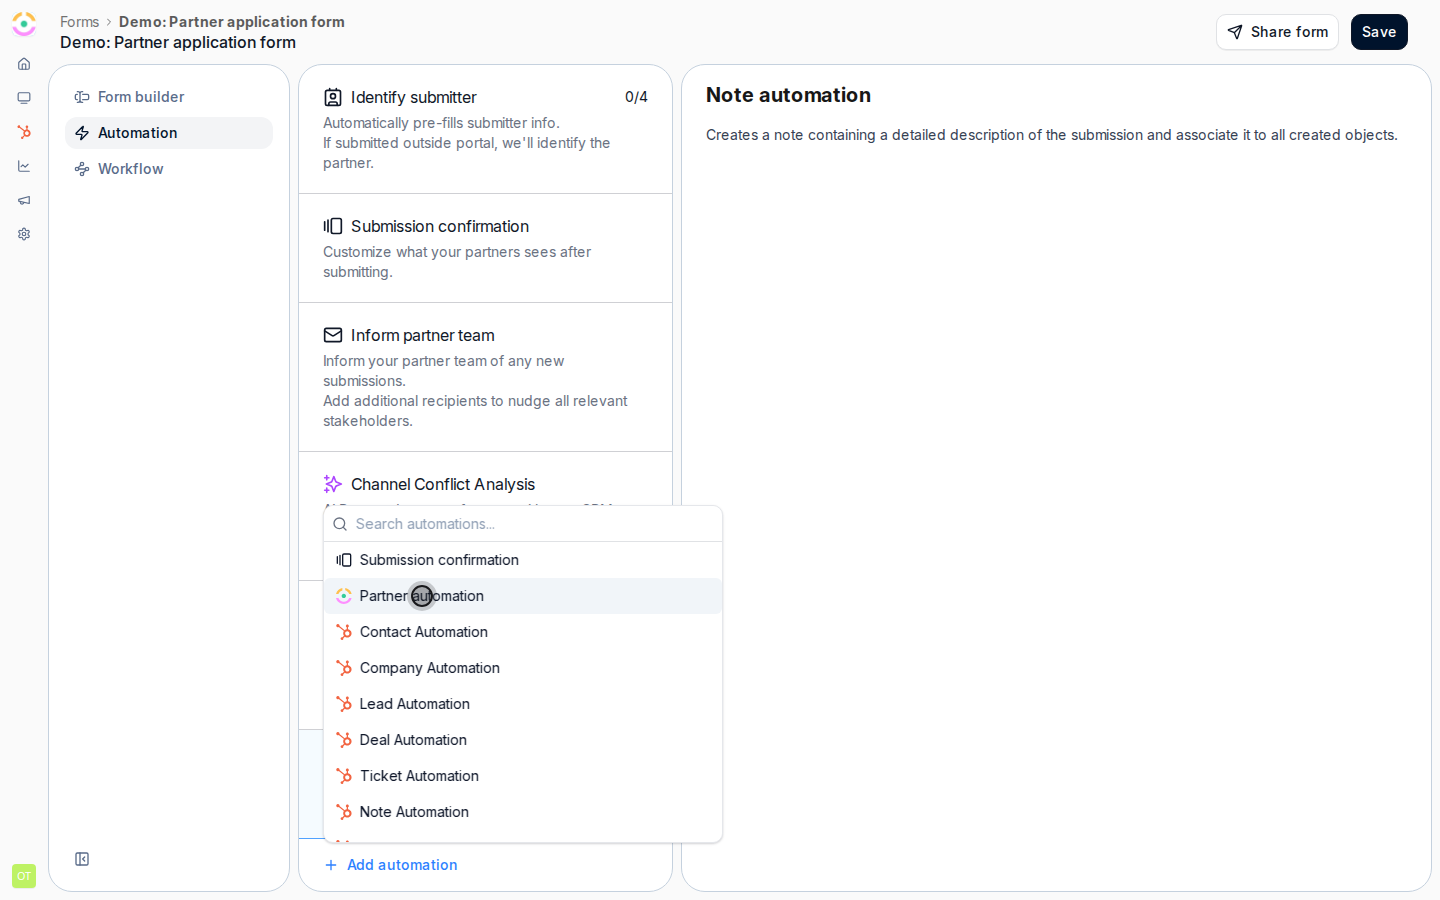 At the top of the **Partner automation** block, **Enrich Partner** matches each submission against existing partners using the form fields provided and enriches the match instead of creating a duplicate. This keeps partner data accurate and attribution clean. There is nothing to switch on, it is how the action behaves.
Under **Auto-link to CRM**, select **Add** for each record type you want created and linked in your CRM:
* **Company automation** - creates the partner company in your CRM and enables deal attribution, so you always know which partner sourced each record.
* **Contact automation** - saves the applicant as a contact in your CRM, linked to the partner company.
Both are optional but recommended for a fully linked setup. After adding each, use **Configure** to map which form fields fill which CRM properties.
At the top of the **Partner automation** block, **Enrich Partner** matches each submission against existing partners using the form fields provided and enriches the match instead of creating a duplicate. This keeps partner data accurate and attribution clean. There is nothing to switch on, it is how the action behaves.
Under **Auto-link to CRM**, select **Add** for each record type you want created and linked in your CRM:
* **Company automation** - creates the partner company in your CRM and enables deal attribution, so you always know which partner sourced each record.
* **Contact automation** - saves the applicant as a contact in your CRM, linked to the partner company.
Both are optional but recommended for a fully linked setup. After adding each, use **Configure** to map which form fields fill which CRM properties.
 ### Populate and set up the partner
Under **Form fields**, map each form field to the matching partner property. At minimum map **Partner name** to your company-name field; **Partner domain** is optional. For each mapping, set a **Write Mode**:
* **Fill in if not known** - only writes when the property is empty, so you never overwrite existing data. This is the safe default for enrichment.
* **Overwrite** - always replaces the current value with the submission.
Under **Partner setup**, define fixed values applied to every partner this form creates, so applicants start correctly placed:
* **Tier** - the tier a new applicant starts in.
* **Phase** - the lifecycle stage, for example a "Potential partner" phase, so the applicant enters your funnel at the right point.
* **Partner manager** - the team member made responsible for the partner from the start.
Each also has a **Write Mode** so you control whether these overwrite an enriched partner's existing values.
### Populate and set up the partner
Under **Form fields**, map each form field to the matching partner property. At minimum map **Partner name** to your company-name field; **Partner domain** is optional. For each mapping, set a **Write Mode**:
* **Fill in if not known** - only writes when the property is empty, so you never overwrite existing data. This is the safe default for enrichment.
* **Overwrite** - always replaces the current value with the submission.
Under **Partner setup**, define fixed values applied to every partner this form creates, so applicants start correctly placed:
* **Tier** - the tier a new applicant starts in.
* **Phase** - the lifecycle stage, for example a "Potential partner" phase, so the applicant enters your funnel at the right point.
* **Partner manager** - the team member made responsible for the partner from the start.
Each also has a **Write Mode** so you control whether these overwrite an enriched partner's existing values.
 ### Give access and go live
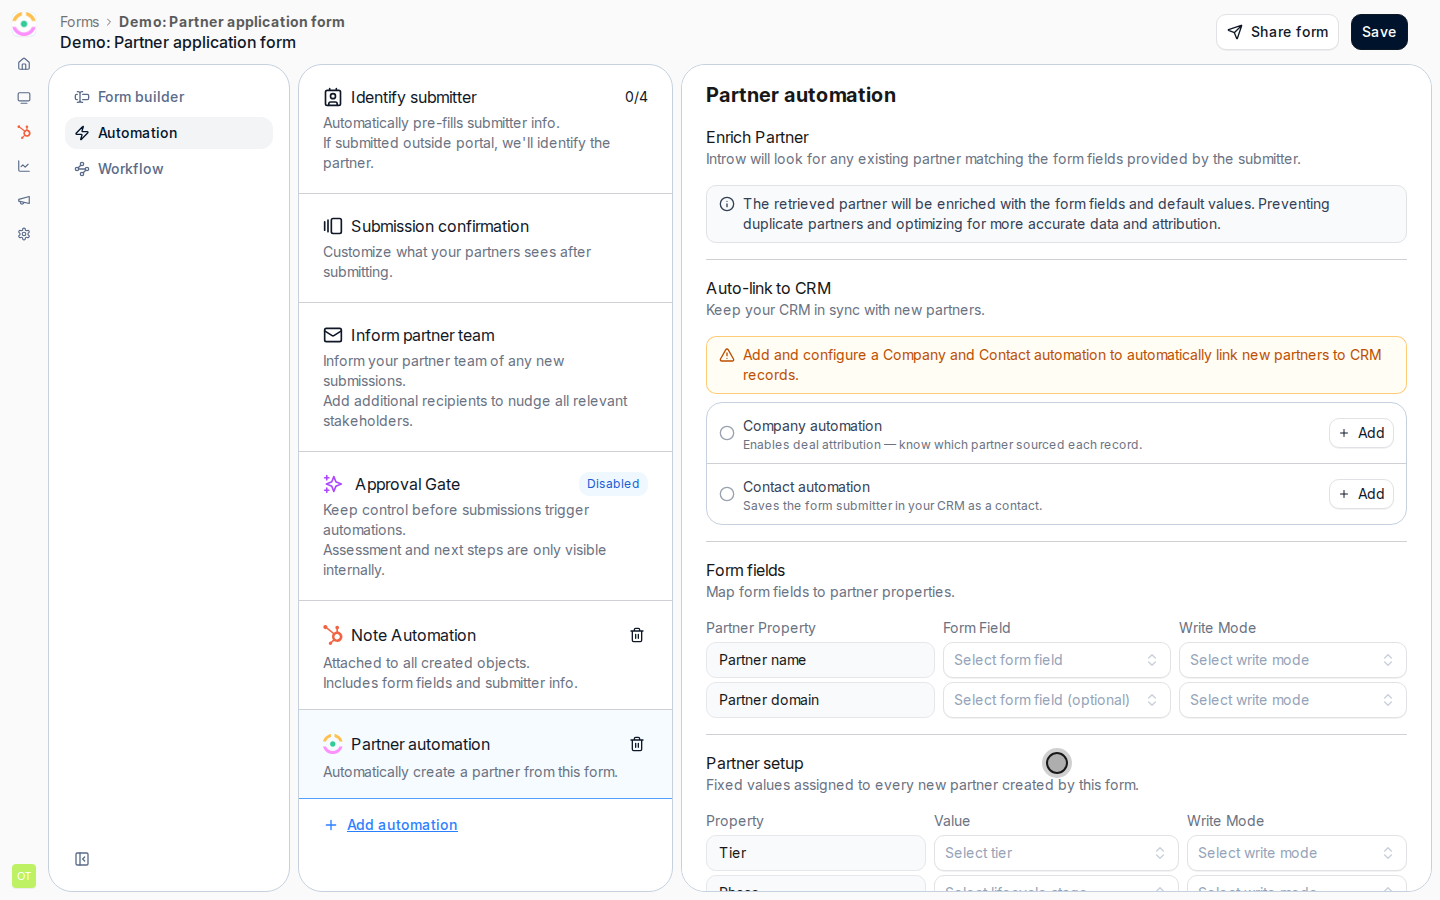
Under **Portal settings**, choose the **Experience** every new partner should land in, so their portal is ready on day one. Set **Partner portal access** to control who can open it: **Restricted to invited users** (only the people you invite) or **Restricted to partner domain** (anyone on the partner's email domain).
Turn on **Auto-invite submitter** to email the applicant a portal invitation once their application is processed. Add an optional **Welcome message** that appears in the invitation email, and use **Preview email** to see exactly what the partner will receive before going live. Auto-invite requires an assigned experience.
Save your changes and publish the form. From now on, every accepted application instantly creates a fully populated partner in Introw and the linked records in your CRM.
To let people apply straight from your portal login page, go to [Portal settings](https://app.introw.io/settings/portal) and open the **Become a partner** tab. Select the form you just set up, customize the link text and message visitors see (for example "Not a partner yet? Apply to join our program"), and save. The form then appears on your portal login page automatically. You can also embed the form on your website or a landing page.
By default every application is processed automatically. If your program has a vetting step, enable approval on the form so submissions land in your approval queue first: no partner and no CRM records are created until you approve. See [Run a submission approval workflow](/features/forms/submissions-approvals/guides/run-a-submission-approval-workflow).
## Verify it worked
Submit a test application. A new partner appears in Introw enriched with the mapped fields and your default tier, phase, and manager; the linked company and contact show up in your CRM; and, if you enabled it, the applicant receives the portal invitation email for the experience you assigned. With approval enabled, the submission instead waits in your approval queue and nothing is created until you approve it.
## Related
Create the form and its fields before wiring the automation.
Map form fields to CRM properties and attribute submissions.
Add a human review step before partners are created.
Full configuration options.
### Give access and go live
Under **Portal settings**, choose the **Experience** every new partner should land in, so their portal is ready on day one. Set **Partner portal access** to control who can open it: **Restricted to invited users** (only the people you invite) or **Restricted to partner domain** (anyone on the partner's email domain).
Turn on **Auto-invite submitter** to email the applicant a portal invitation once their application is processed. Add an optional **Welcome message** that appears in the invitation email, and use **Preview email** to see exactly what the partner will receive before going live. Auto-invite requires an assigned experience.
Save your changes and publish the form. From now on, every accepted application instantly creates a fully populated partner in Introw and the linked records in your CRM.
To let people apply straight from your portal login page, go to [Portal settings](https://app.introw.io/settings/portal) and open the **Become a partner** tab. Select the form you just set up, customize the link text and message visitors see (for example "Not a partner yet? Apply to join our program"), and save. The form then appears on your portal login page automatically. You can also embed the form on your website or a landing page.
By default every application is processed automatically. If your program has a vetting step, enable approval on the form so submissions land in your approval queue first: no partner and no CRM records are created until you approve. See [Run a submission approval workflow](/features/forms/submissions-approvals/guides/run-a-submission-approval-workflow).
## Verify it worked
Submit a test application. A new partner appears in Introw enriched with the mapped fields and your default tier, phase, and manager; the linked company and contact show up in your CRM; and, if you enabled it, the applicant receives the portal invitation email for the experience you assigned. With approval enabled, the submission instead waits in your approval queue and nothing is created until you approve it.
## Related
Create the form and its fields before wiring the automation.
Map form fields to CRM properties and attribute submissions.
Add a human review step before partners are created.
Full configuration options.