> ## Documentation Index
> Fetch the complete documentation index at: https://docs.introw.io/llms.txt
> Use this file to discover all available pages before exploring further.
# Generate a certificate with AI
> Create a course-matched certificate in one step, then refine and attach it.
> For teams that want a polished certificate without doing design work.
Designing a certificate (wording, colors, layout) is the kind of small task that quietly delays a course launch, especially without a designer on hand. Generating one with AI removes that step: Introw creates a certificate matched to the course in a single action, ready to refine, attach, and issue.
## What you'll achieve
A certificate tailored to a specific course, generated by AI and set as that course's credential, ready to refine and auto-issue on completion.
## Before you start
You need a team role with write access to Certificates and Courses, and AI features must be enabled for your organisation.
Decide which course the certificate is for, since the AI tailors the credential to that course.
## Watch it
## Steps
Open the course from [Courses](https://app.introw.io/courses), select **Configure**, and go to the **Certificate** tab, where you attach or create the course's credential.
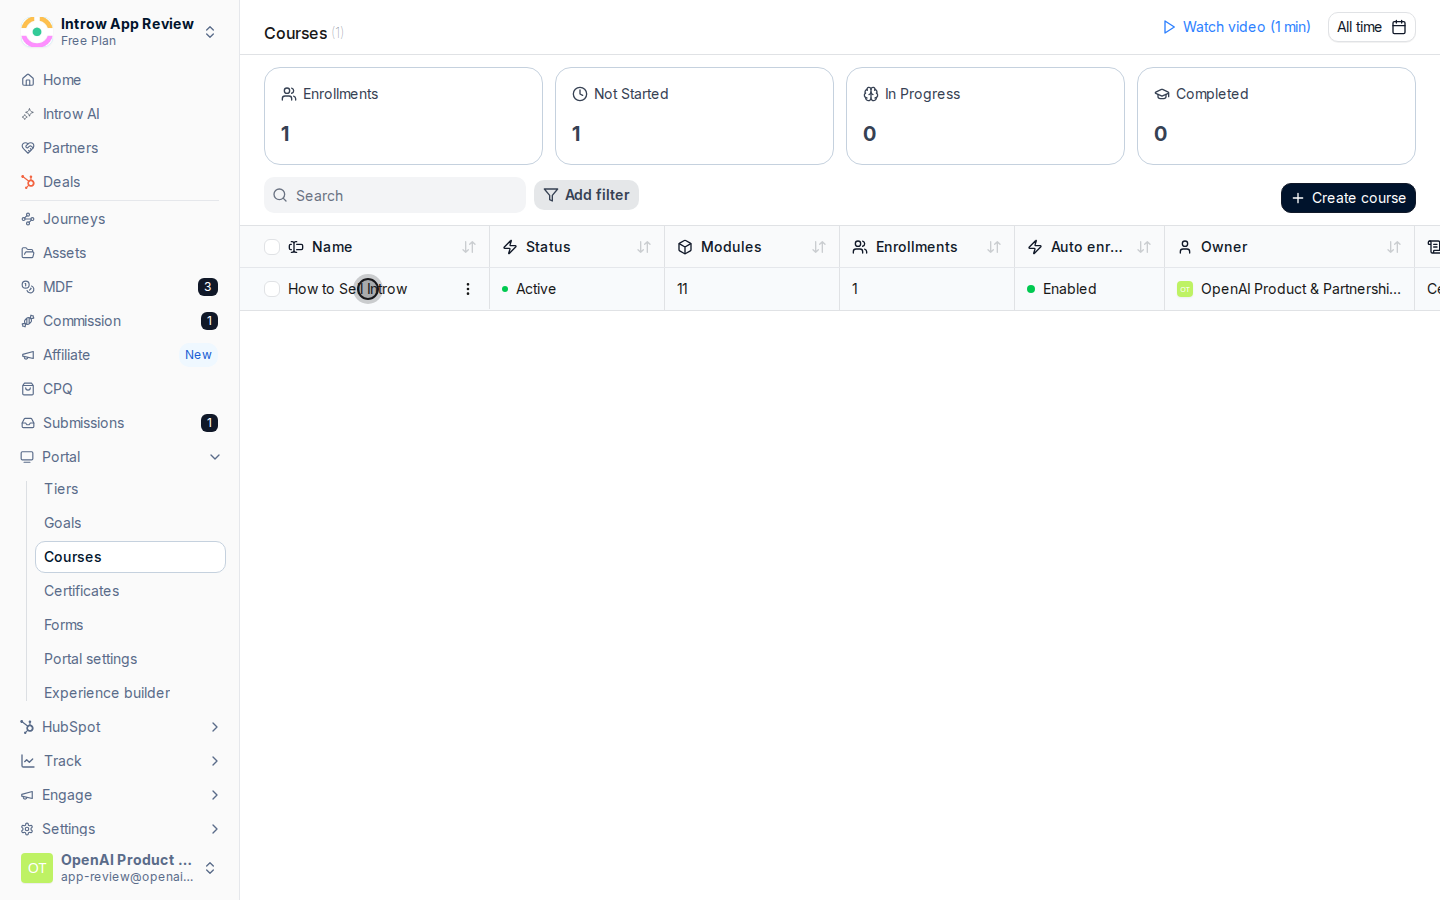 Choose **Generate with AI**. Introw drafts a certificate tailored to this course, including its name, supporting text, and styling, so you start from a finished design rather than a blank one.
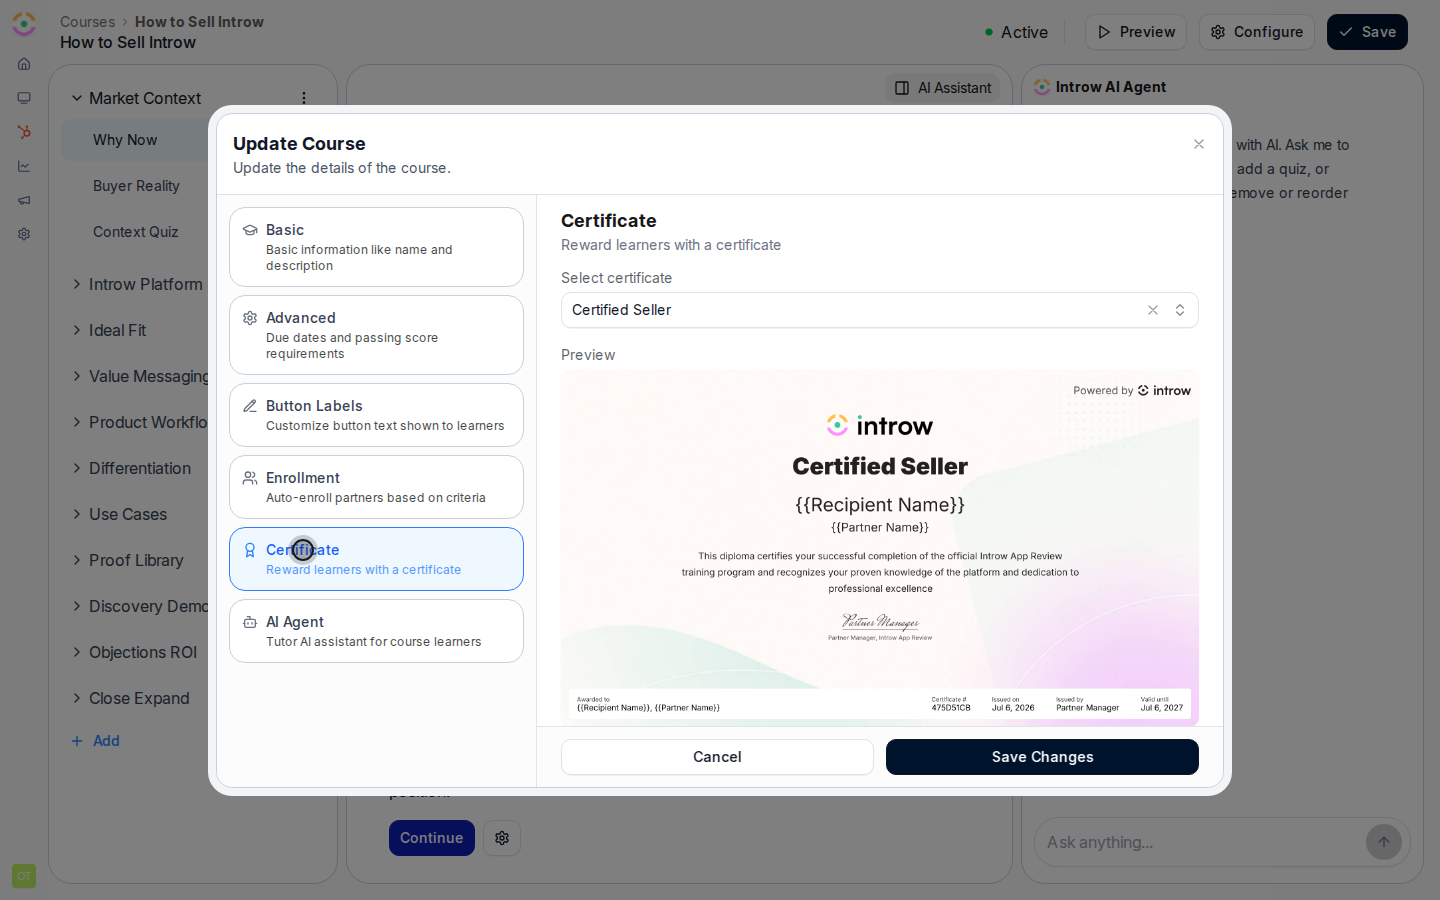 Review the generated certificate. Open it from **Certificates** to adjust the name, description, validity, colors, or background image if you want (see [Create and auto-issue a certificate](./create-a-certificate) for each field). It is already set as the course's certificate, so it auto-issues to learners who complete and pass, if a passing score is set.
## Verify it worked
A new certificate appears matched to the course, a preview renders in the settings panel, and it is set as the course's certificate so qualifying completions issue it automatically.
## Related
Build and brand one by hand instead.
Award a credential to individuals or a segment.
Generation, validity, and issuance.
Review the generated certificate. Open it from **Certificates** to adjust the name, description, validity, colors, or background image if you want (see [Create and auto-issue a certificate](./create-a-certificate) for each field). It is already set as the course's certificate, so it auto-issues to learners who complete and pass, if a passing score is set.
## Verify it worked
A new certificate appears matched to the course, a preview renders in the settings panel, and it is set as the course's certificate so qualifying completions issue it automatically.
## Related
Build and brand one by hand instead.
Award a credential to individuals or a segment.
Generation, validity, and issuance.