> ## Documentation Index
> Fetch the complete documentation index at: https://docs.introw.io/llms.txt
> Use this file to discover all available pages before exploring further.
# Build your first workflow
> Create a workflow that moves a partner up a tier the moment they earn a certification, from an empty canvas through a rehearsal to an enabled automation.
Tiering a partner up when they certify is the classic partner-program rule that never gets enforced: the certification lands, and the tier follows whenever somebody notices. This guide builds it as a workflow, end to end: pick the trigger, narrow it to the certificate that counts, write the tier onto the partner, tell them, rehearse the whole thing against a real partner without changing anything, and switch it on. Everything you learn here, the two-part narrowing, the write mode, the rehearsal, and the enable gate, applies to every other workflow you build.
## What you'll achieve
An enabled workflow that, from the moment you switch it on, moves any partner whose contact earns your certification onto the next tier, records it on their CRM record, and emails the partner to tell them, with a rehearsal behind you proving the flow does what you meant.
## Before you start
**Workflows** has to be in your left-hand navigation under **Engage**, and your role needs write access to it. If the menu item is missing, ask your Introw contact to switch Workflows on for your organisation.
This workflow triggers on a certificate being issued and writes a tier, so both need to exist. See [Create a certificate](/features/courses/certificates/guides/create-a-certificate) and [Build a tier program](/features/partners/tiers/guides/build-a-tier-program).
The test run needs one partner and, ideally, one of their contacts. Any partner will do: nothing is written.
## Watch it
## Steps
### Create the workflow
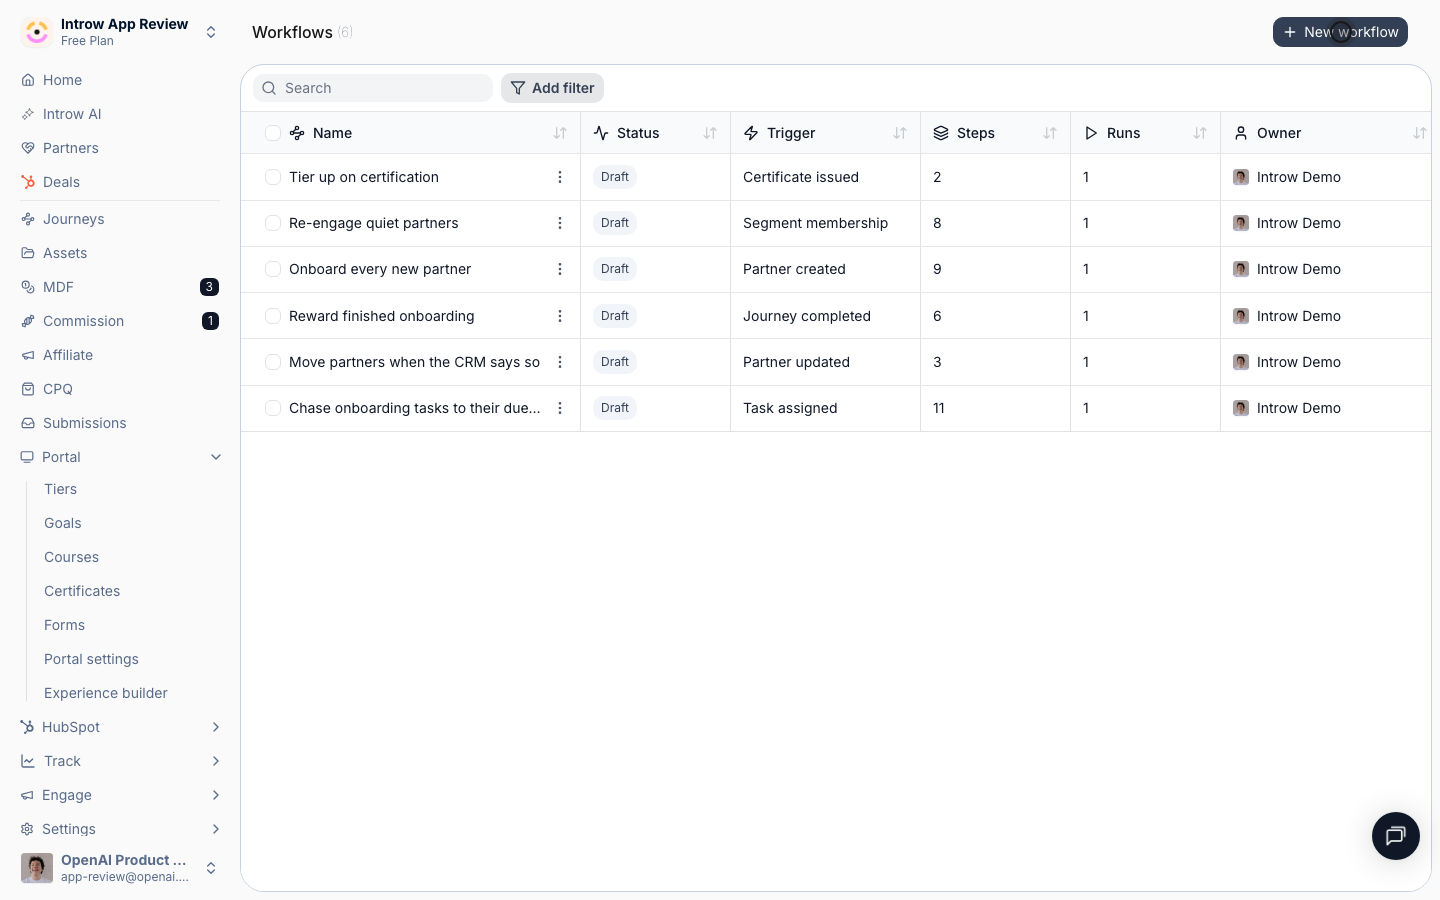
Go to [Workflows](https://app.introw.io/workflows) and select **New workflow**. On an empty account, choose **Start from scratch** on the first-run screen. Introw creates a draft named **Untitled workflow** and opens the canvas, which is a single trigger node with a **+** under it.
Leave the name for now. You can rename it in the page title at any time, and **Generate with AI** will name it from the finished canvas later.
 ### Set the trigger
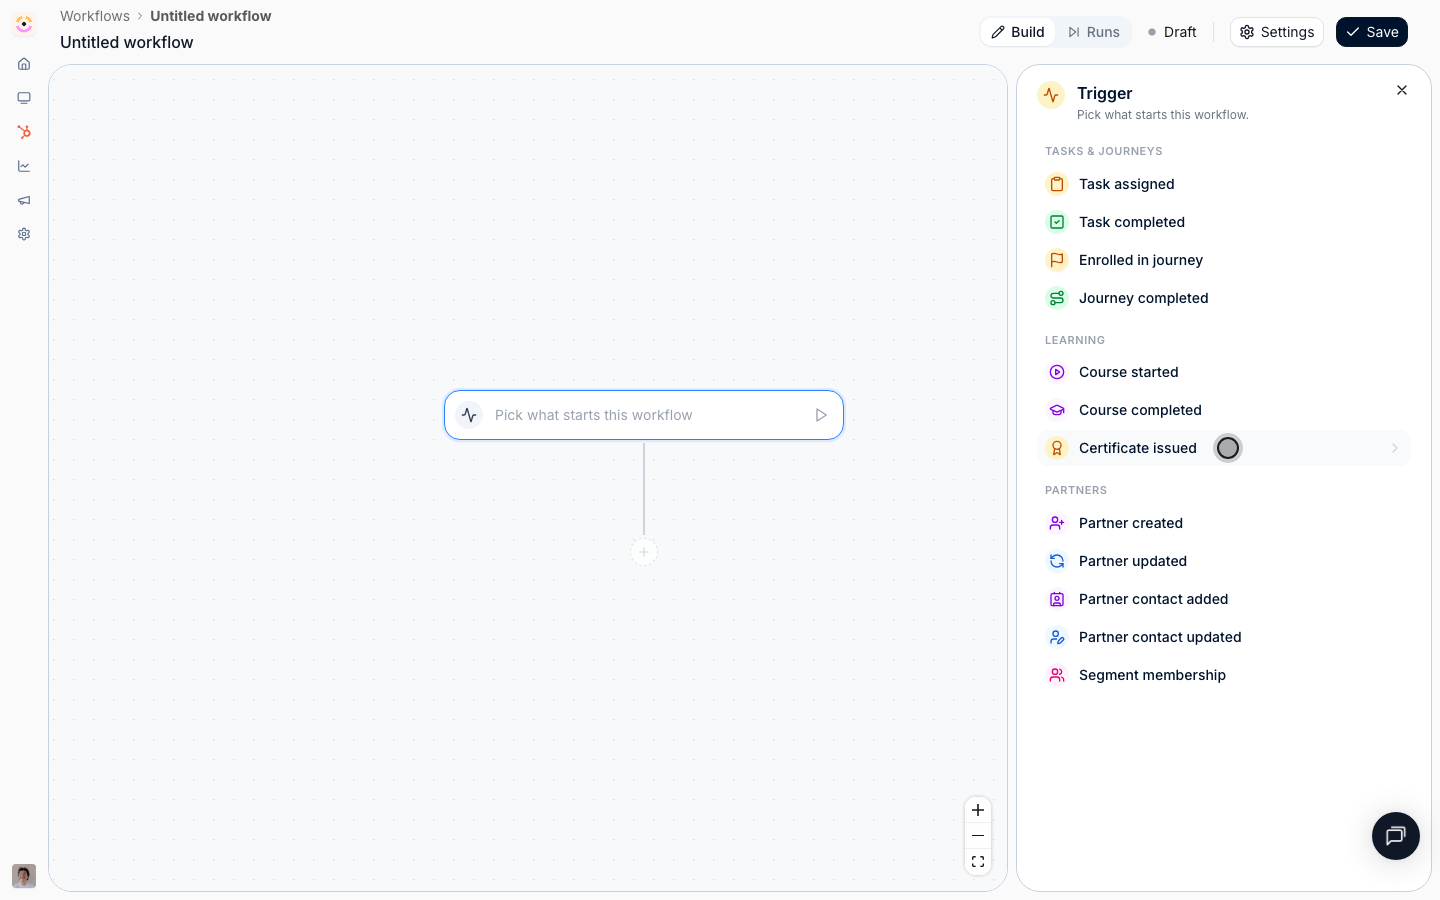
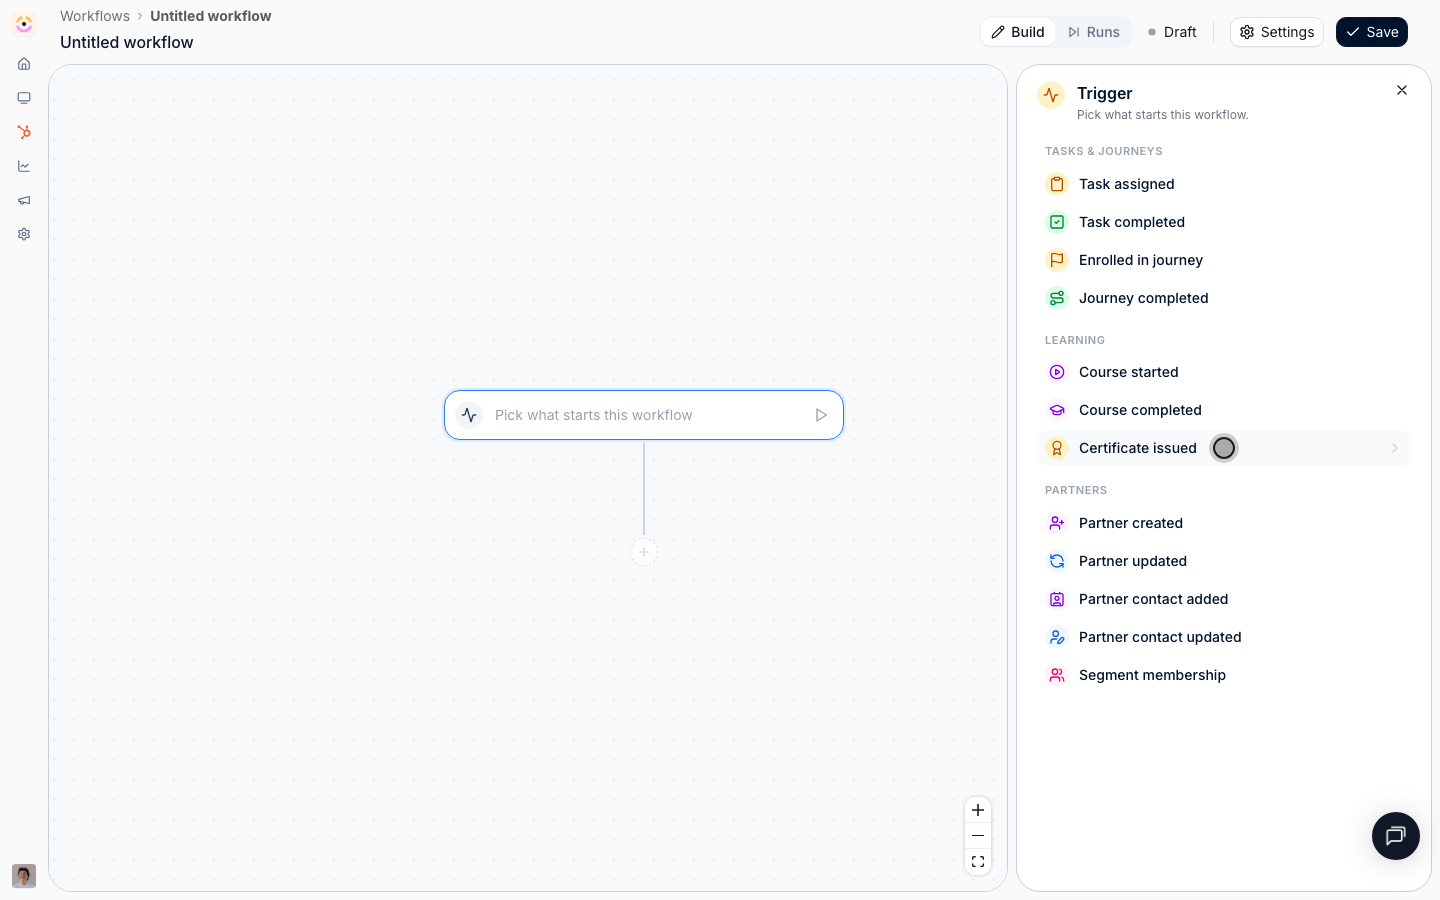
Select the trigger node. The panel lists the triggers in three groups: **Tasks & journeys**, **Learning**, and **Partners**. Under **Learning**, choose **Certificate issued**. It fires when a certificate is awarded to a partner contact, and re-issuing the same certificate to the same contact does not fire it again.
### Set the trigger
Select the trigger node. The panel lists the triggers in three groups: **Tasks & journeys**, **Learning**, and **Partners**. Under **Learning**, choose **Certificate issued**. It fires when a certificate is awarded to a partner contact, and re-issuing the same certificate to the same contact does not fire it again.
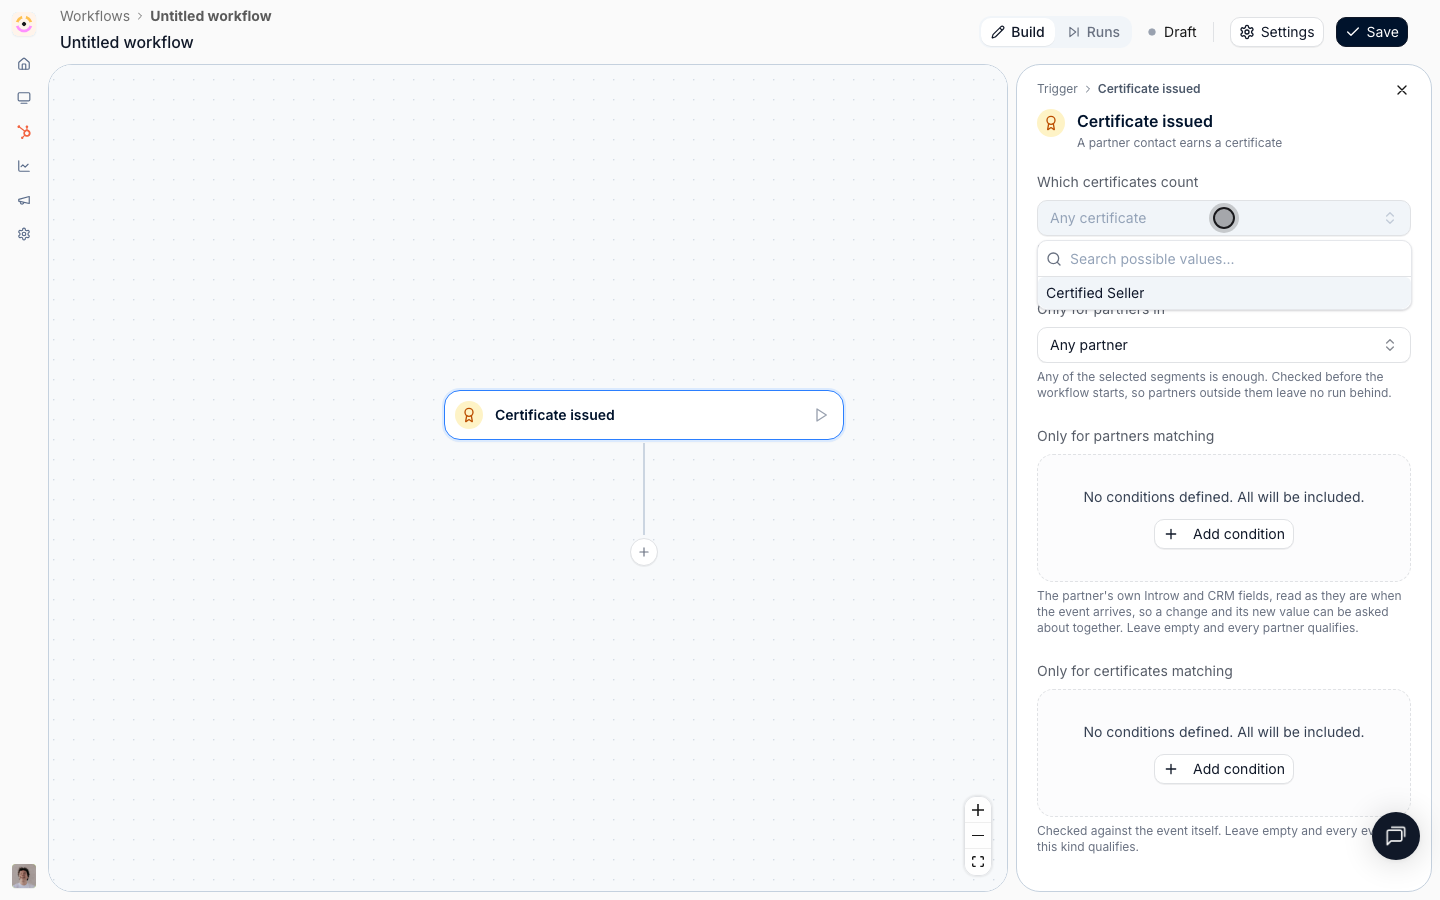
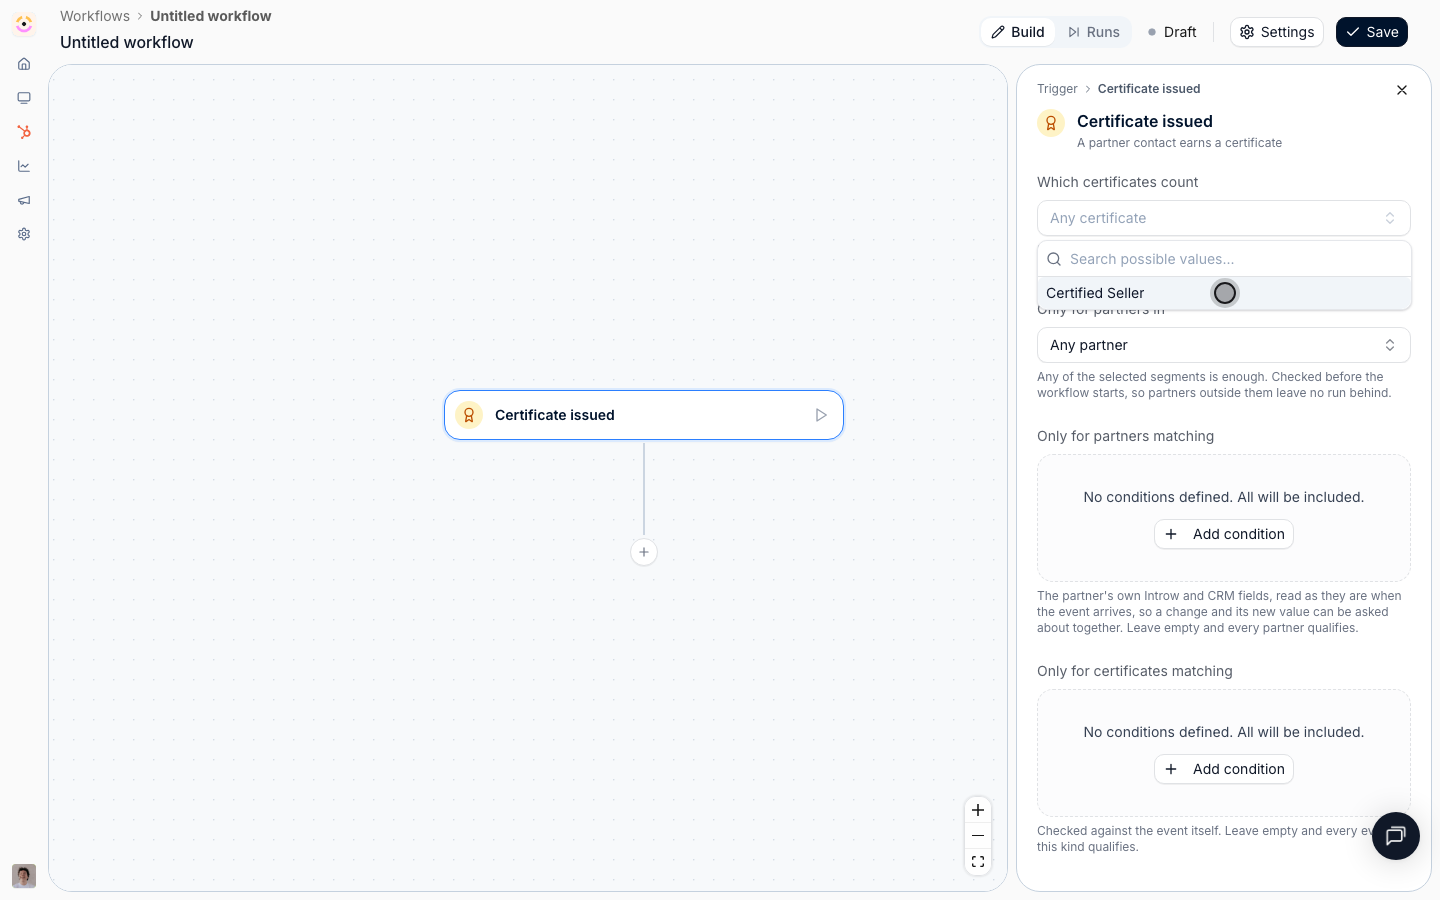
 The panel now shows the trigger's own narrowing and its filter. Work through them in order:
* **Which certificates count** - the certificates that qualify. Pick your certification. Leaving it empty means any certificate, which would tier partners up for a webinar attendance badge, so this is the one narrowing you should not skip.
* **Only for partners in** - the segments the partner has to be in. This is checked before the workflow starts, so partners outside these segments leave no run behind. Leave it empty for your first workflow, or point it at a segment of the partner types the tier program applies to if your program has several.
* **Only for partners matching** - conditions on the partner's own Introw and CRM fields, for a check you would not keep a segment for. Leave it empty here, or use it to hold the promotion to the partners it applies to, for example **Partner tier** **is any of** Bronze or Silver so an Elite partner is not "promoted" downwards.
* **Only for certificates matching** - conditions on the event itself, over **Certificate**, **Issued at**, and **Expires at**. You have already narrowed by certificate, so leave this empty. It is where you would add something like an expiry date more than 30 days out.
The rule to remember: the first two blocks are about the partner, the last one is about the event, and all three are ANDed. Reach for a segment when the audience is one you already maintain or want to reuse, and for **Only for partners matching** when it is a one-off check this workflow alone cares about.
The panel now shows the trigger's own narrowing and its filter. Work through them in order:
* **Which certificates count** - the certificates that qualify. Pick your certification. Leaving it empty means any certificate, which would tier partners up for a webinar attendance badge, so this is the one narrowing you should not skip.
* **Only for partners in** - the segments the partner has to be in. This is checked before the workflow starts, so partners outside these segments leave no run behind. Leave it empty for your first workflow, or point it at a segment of the partner types the tier program applies to if your program has several.
* **Only for partners matching** - conditions on the partner's own Introw and CRM fields, for a check you would not keep a segment for. Leave it empty here, or use it to hold the promotion to the partners it applies to, for example **Partner tier** **is any of** Bronze or Silver so an Elite partner is not "promoted" downwards.
* **Only for certificates matching** - conditions on the event itself, over **Certificate**, **Issued at**, and **Expires at**. You have already narrowed by certificate, so leave this empty. It is where you would add something like an expiry date more than 30 days out.
The rule to remember: the first two blocks are about the partner, the last one is about the event, and all three are ANDed. Reach for a segment when the audience is one you already maintain or want to reuse, and for **Only for partners matching** when it is a one-off check this workflow alone cares about.
 ### Add the actions
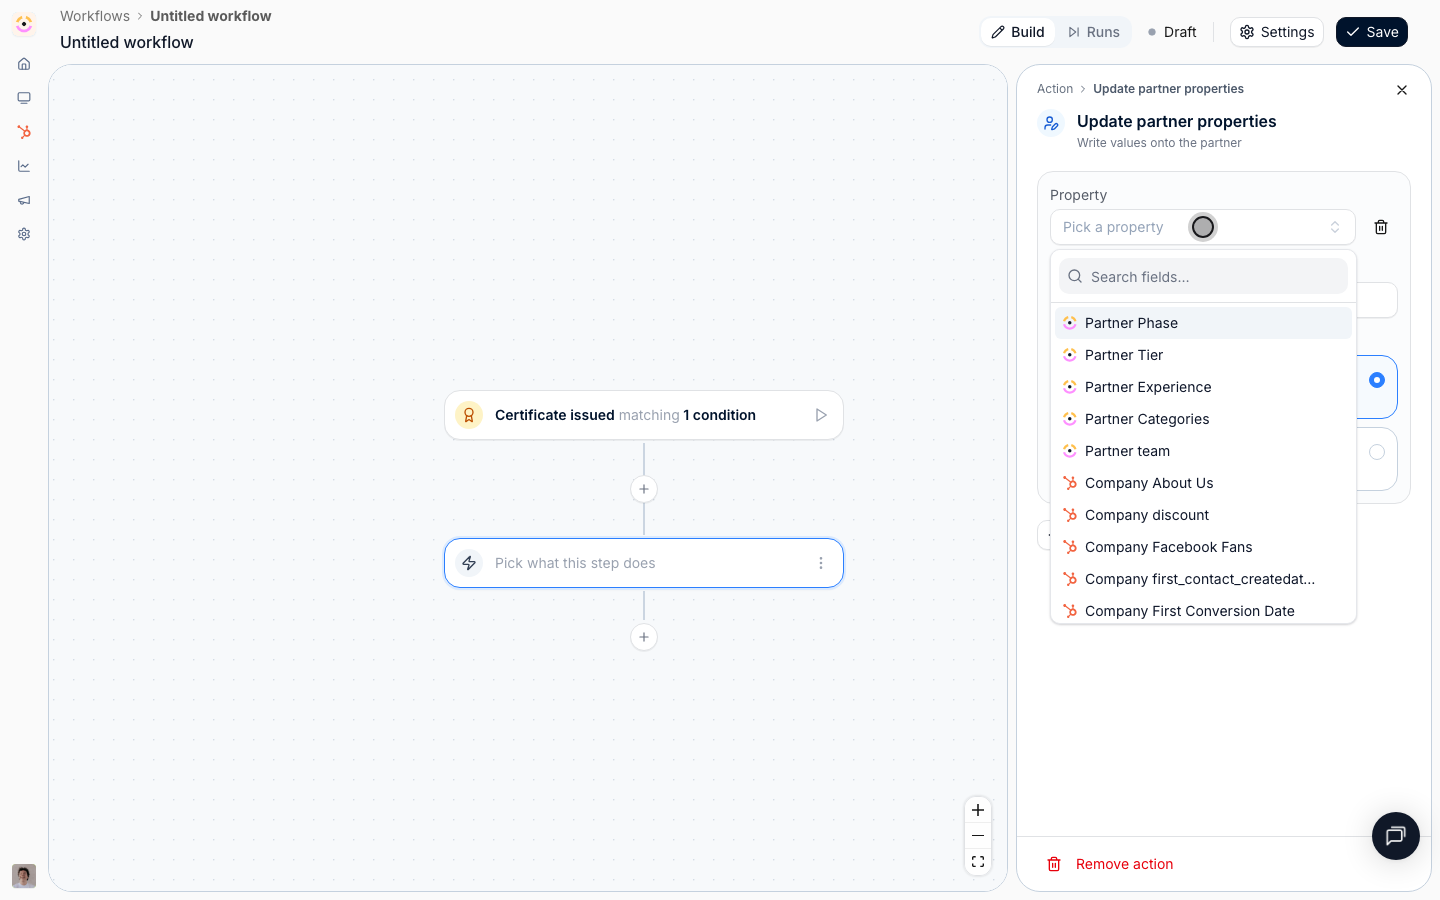
Select the **+** under the trigger and choose **Action**, then **Update partner properties** from the **Partner** group. Each row is one property:
* **Property** - a searchable list of everything a workflow can write: **Partner tier**, **Partner phase**, **Partner categories**, **Partner owner**, the partner's **Experience**, and every writable CRM property on their company or custom partner object. Each is marked with Introw's logo or your CRM's, so two same-named fields are distinguishable. Pick **Partner tier**.
* **Value** - the tier to set, from your tier program's own list.
* **Write mode** - **Overwrite** always replaces what is there; **Fill in if not known** leaves an existing value alone. This is the most consequential setting on the panel. For a promotion, **Overwrite** is right: the point is to move a partner who already has a tier. For anything a partner manager sets by hand and would not want an automation undoing, choose **Fill in if not known**.
Select **Add property** to write a second field in the same step, with its own write mode. **Partner phase** on **Fill in if not known** is a good second row: a partner who already has a phase keeps it, and one who has none gets set. Every writable CRM property on the partner's company or custom partner object is in the same list too, so the same step can stamp the promotion onto the record your sales team is already looking at.
### Add the actions
Select the **+** under the trigger and choose **Action**, then **Update partner properties** from the **Partner** group. Each row is one property:
* **Property** - a searchable list of everything a workflow can write: **Partner tier**, **Partner phase**, **Partner categories**, **Partner owner**, the partner's **Experience**, and every writable CRM property on their company or custom partner object. Each is marked with Introw's logo or your CRM's, so two same-named fields are distinguishable. Pick **Partner tier**.
* **Value** - the tier to set, from your tier program's own list.
* **Write mode** - **Overwrite** always replaces what is there; **Fill in if not known** leaves an existing value alone. This is the most consequential setting on the panel. For a promotion, **Overwrite** is right: the point is to move a partner who already has a tier. For anything a partner manager sets by hand and would not want an automation undoing, choose **Fill in if not known**.
Select **Add property** to write a second field in the same step, with its own write mode. **Partner phase** on **Fill in if not known** is a good second row: a partner who already has a phase keeps it, and one who has none gets set. Every writable CRM property on the partner's company or custom partner object is in the same list too, so the same step can stamp the promotion onto the record your sales team is already looking at.
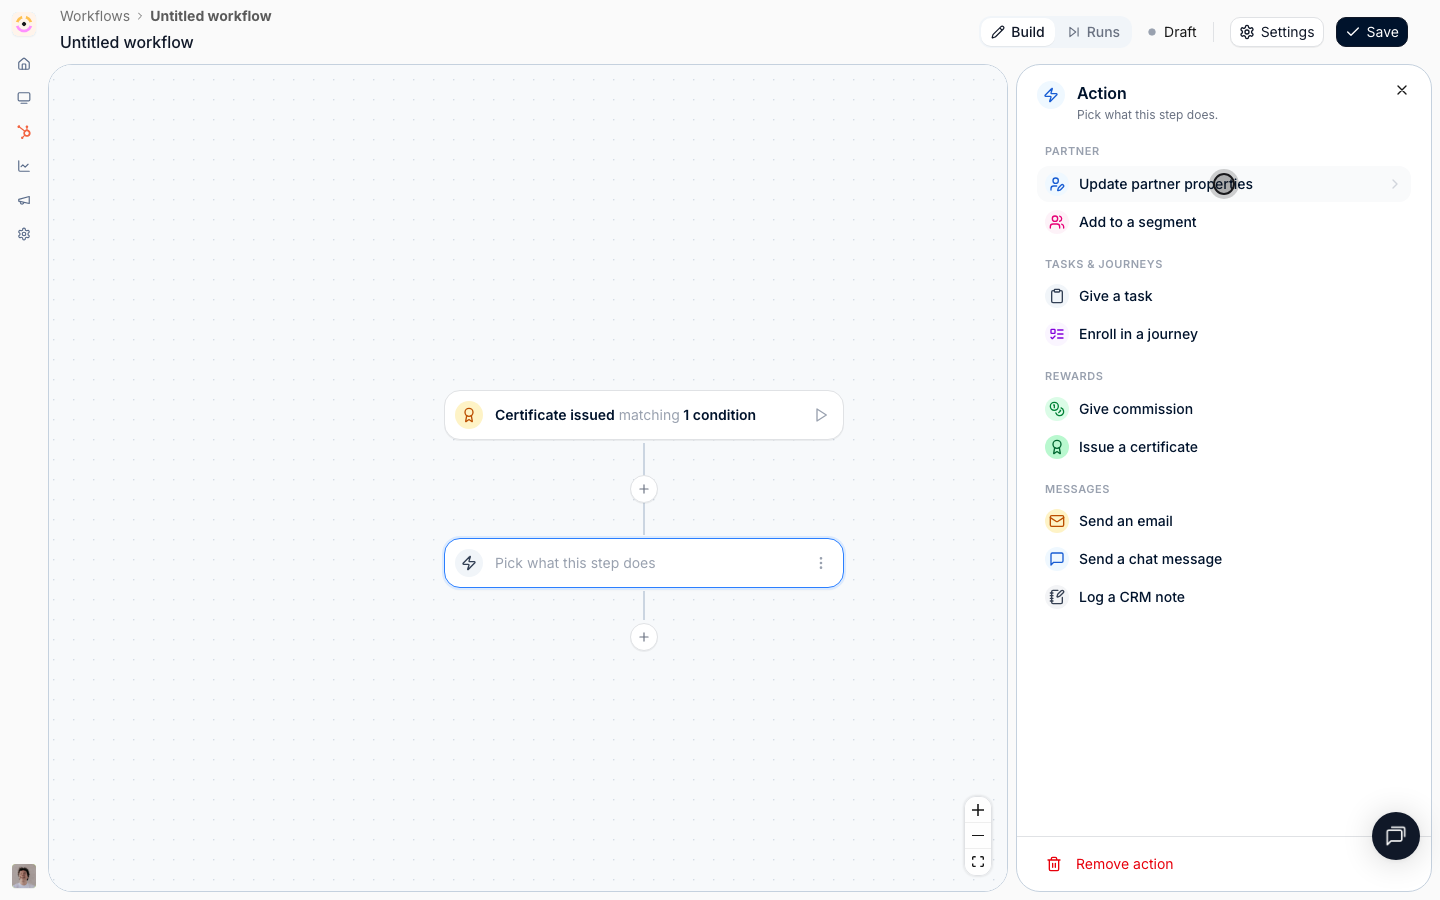 Select the **+** under the action, choose **Action**, then **Send an email** from the **Messages** group.
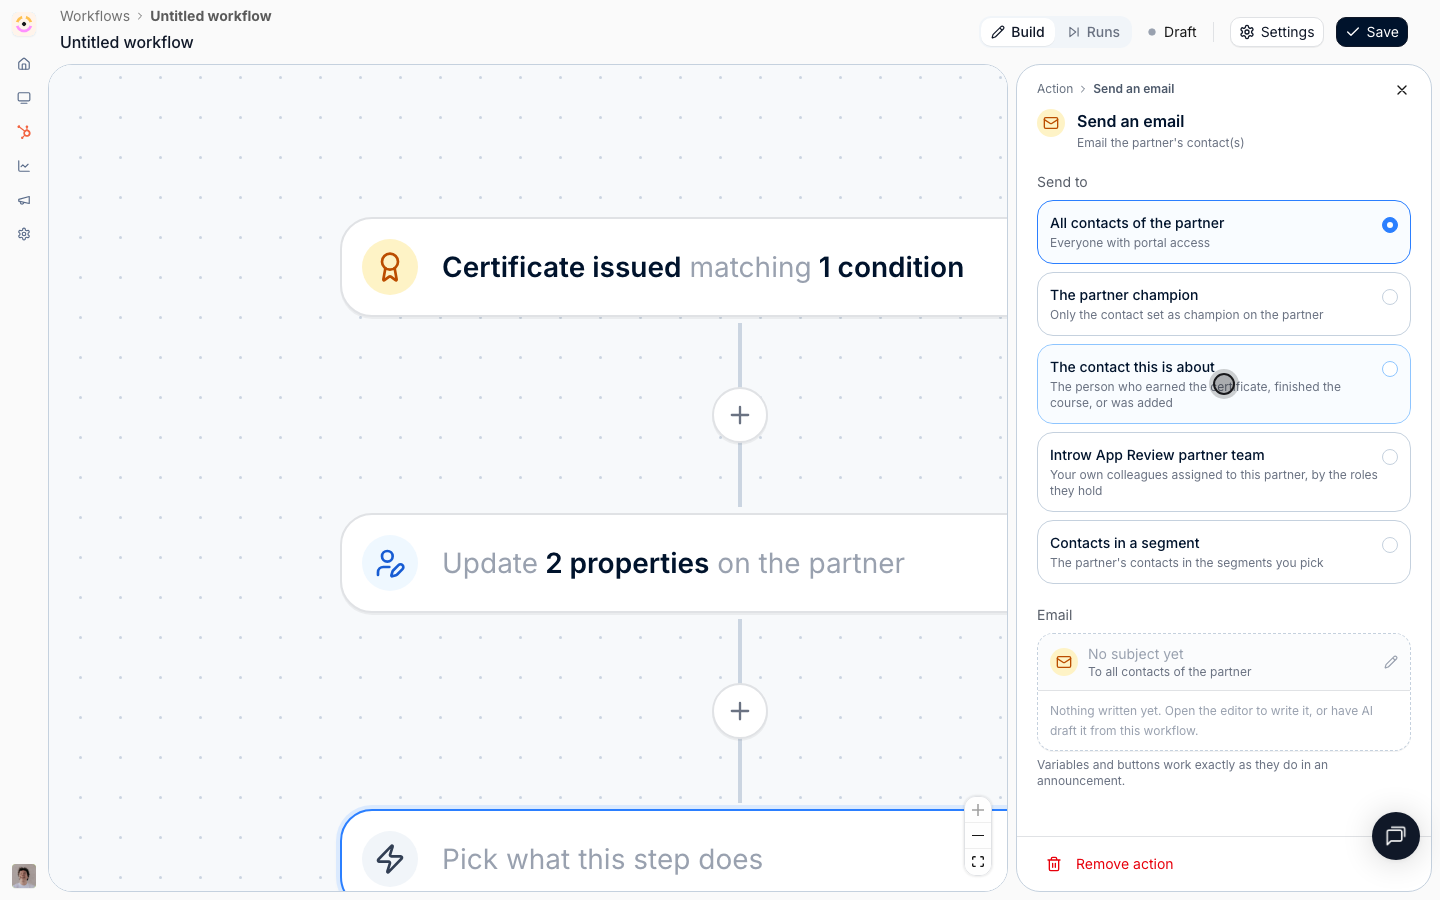
* **Send to** - because this trigger names a contact, the list includes **The contact this is about**, which reaches exactly the person who earned the certificate. The other options are **All contacts of the partner**, **The partner champion**, **Contacts in a segment**, and **Your partner team**, which is your own colleagues assigned to this partner rather than anyone at the partner. Choose **The contact this is about**.
* **Email** - select the card to open the editor. It is the same editor announcements use, so variables resolve per recipient and CTA buttons point at that partner's portal. Give it a **Subject**, which stays plain text, and write the body. **Generate with AI** drafts a subject and two or three paragraphs from where this step sits in the flow, with the greeting and sign-off added for you, so you can start there and edit.
Save the email and you are back on the canvas with a card showing the subject, who it goes to, and its opening lines.
Select the **+** under the action, choose **Action**, then **Send an email** from the **Messages** group.
* **Send to** - because this trigger names a contact, the list includes **The contact this is about**, which reaches exactly the person who earned the certificate. The other options are **All contacts of the partner**, **The partner champion**, **Contacts in a segment**, and **Your partner team**, which is your own colleagues assigned to this partner rather than anyone at the partner. Choose **The contact this is about**.
* **Email** - select the card to open the editor. It is the same editor announcements use, so variables resolve per recipient and CTA buttons point at that partner's portal. Give it a **Subject**, which stays plain text, and write the body. **Generate with AI** drafts a subject and two or three paragraphs from where this step sits in the flow, with the greeting and sign-off added for you, so you can start there and edit.
Save the email and you are back on the canvas with a card showing the subject, who it goes to, and its opening lines.
 ### Rehearse it
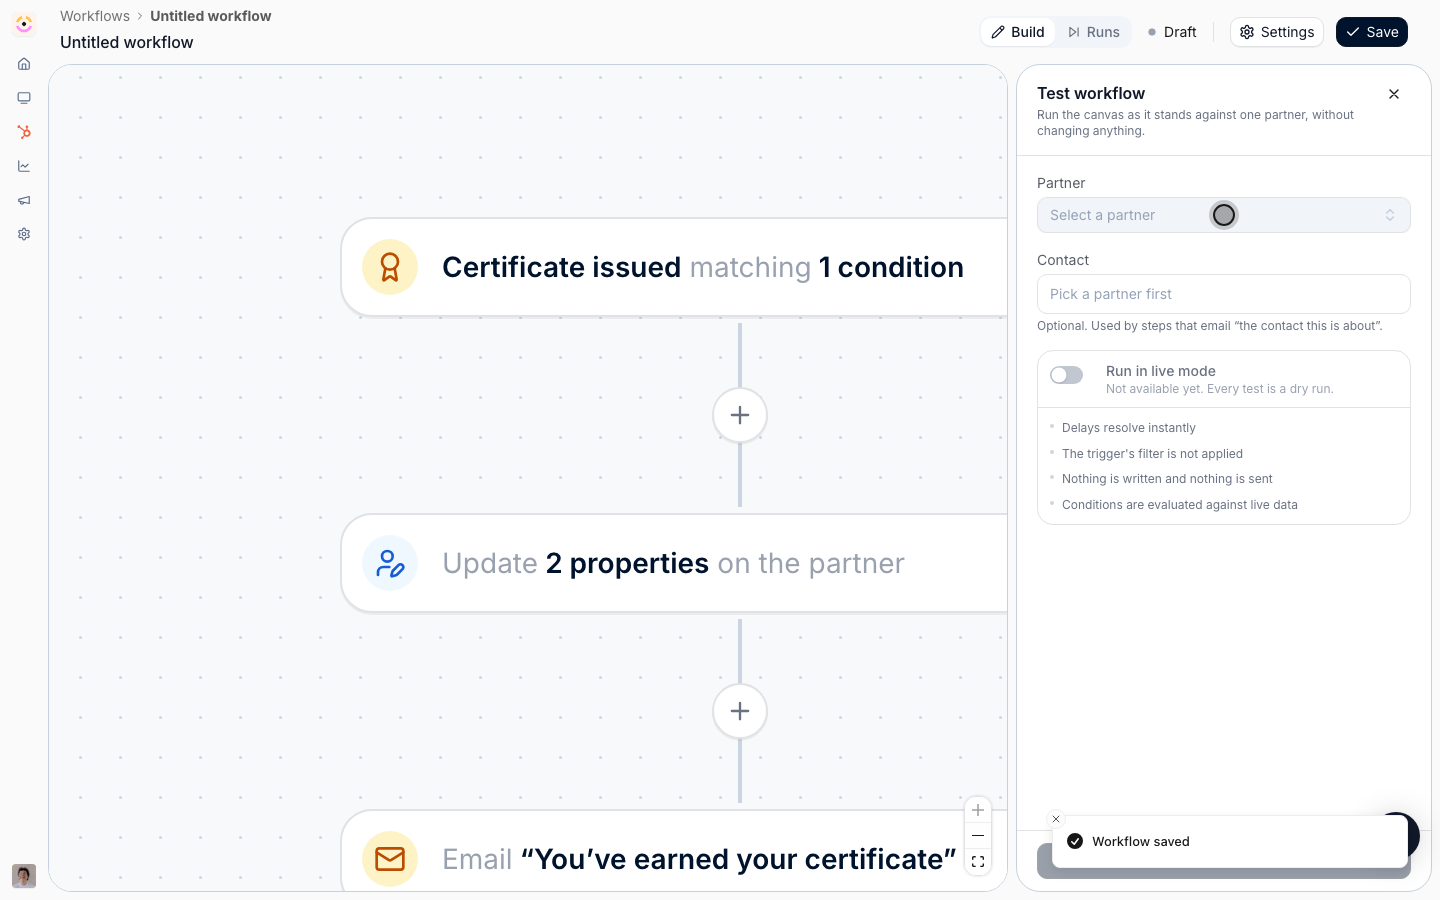
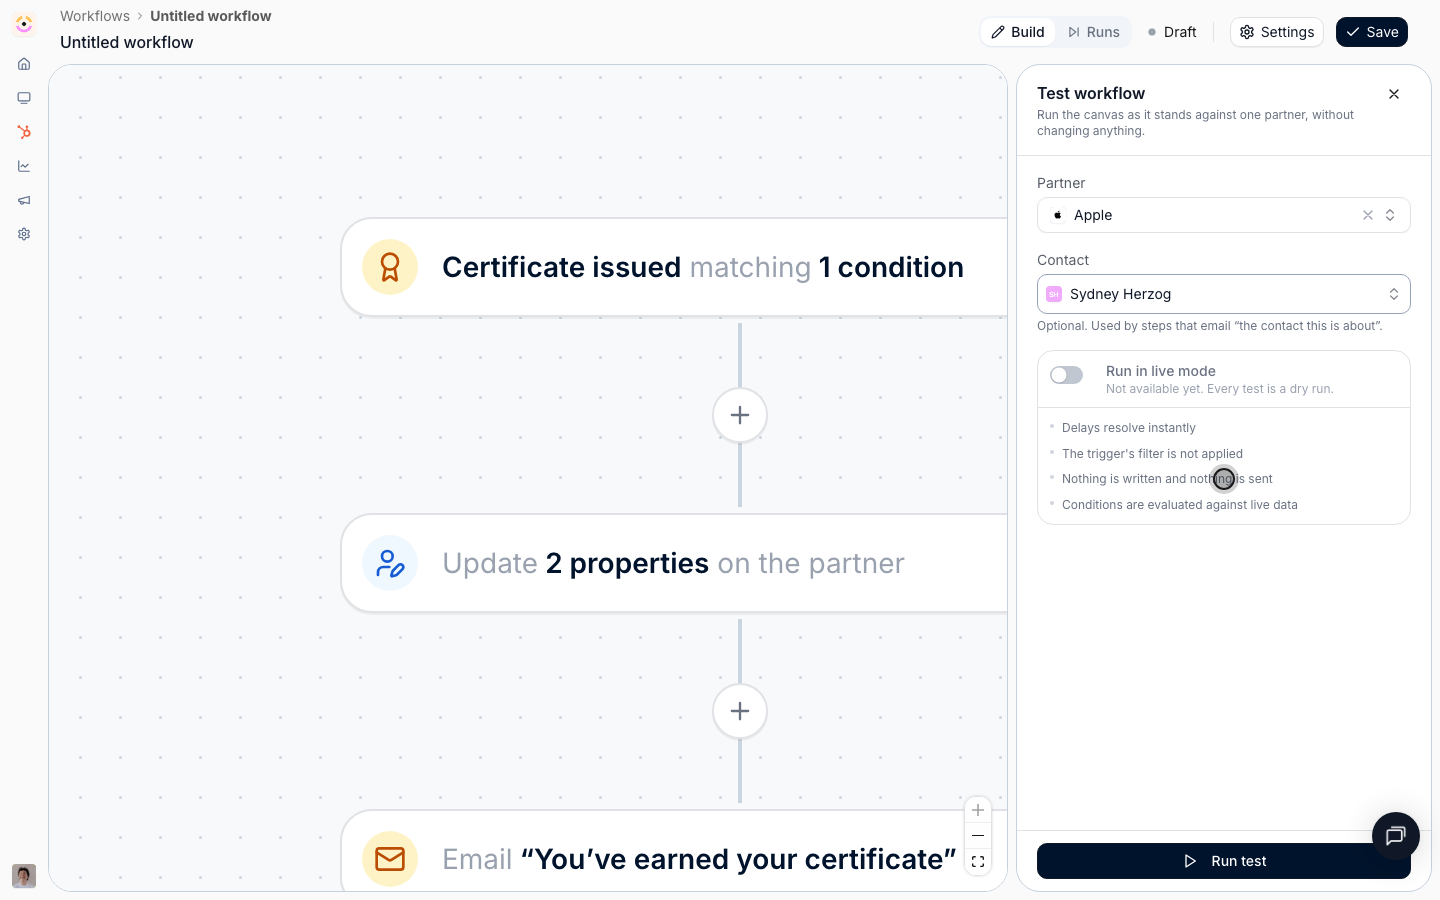
Select the play button beside the trigger node. In **Test workflow**, pick a **Partner** and, since this flow emails the contact the trigger is about, a **Contact** as well.
Read the card before you run it. Every test is a dry run: delays resolve instantly, nothing is written and nothing is sent, conditions are evaluated against live data, and the trigger's filter is not applied, because you chose the partner by hand. That last point matters: a test proves the shape of the flow, not the audience.
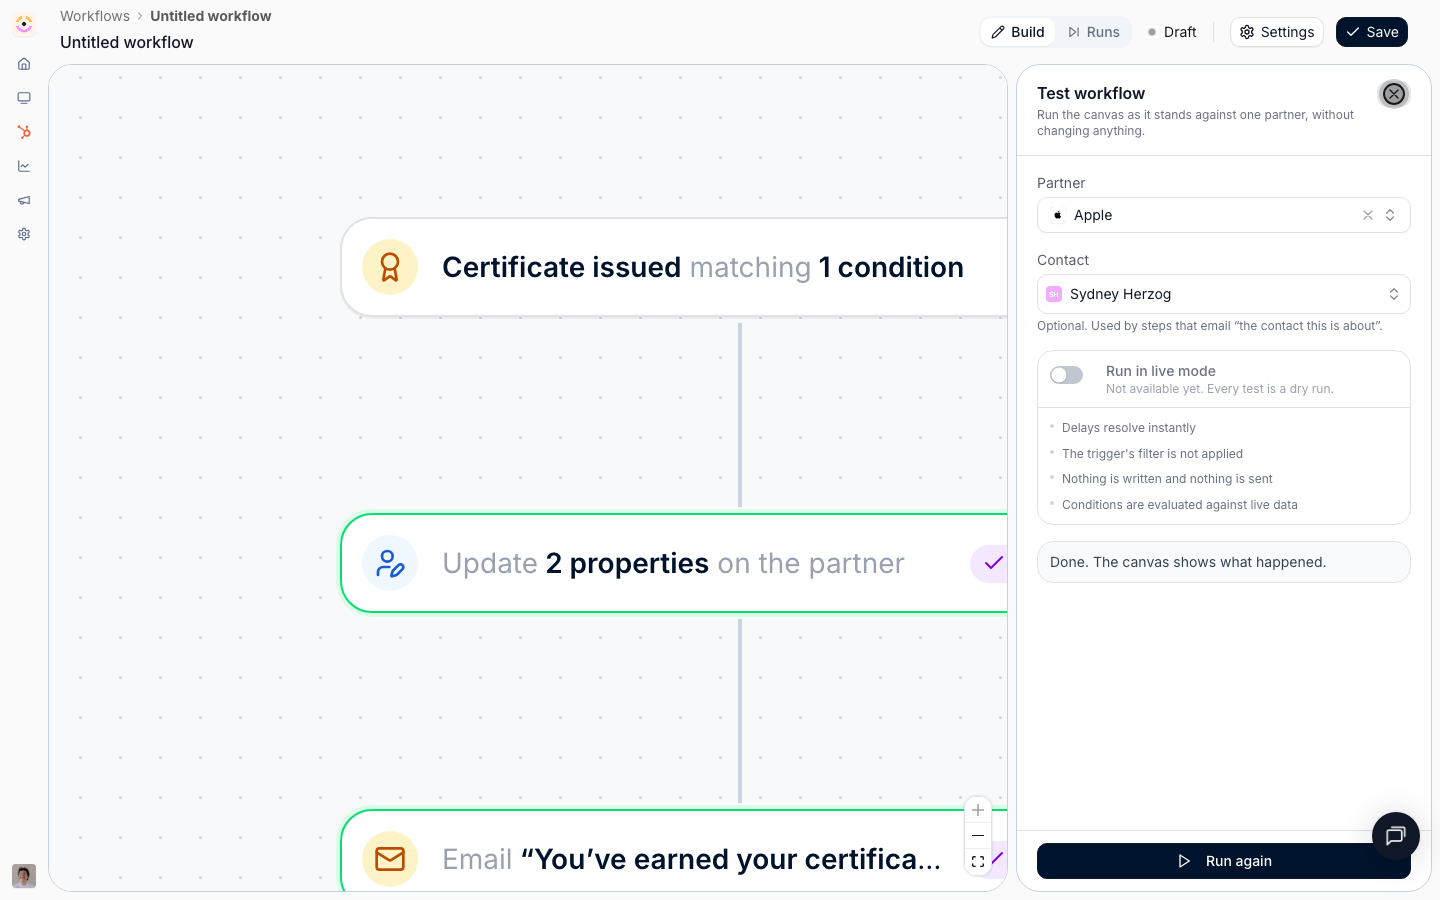
Select **Run test**. The canvas updates as each step resolves, and nodes the run touched are badged **Simulated**.
### Rehearse it
Select the play button beside the trigger node. In **Test workflow**, pick a **Partner** and, since this flow emails the contact the trigger is about, a **Contact** as well.
Read the card before you run it. Every test is a dry run: delays resolve instantly, nothing is written and nothing is sent, conditions are evaluated against live data, and the trigger's filter is not applied, because you chose the partner by hand. That last point matters: a test proves the shape of the flow, not the audience.
Select **Run test**. The canvas updates as each step resolves, and nodes the run touched are badged **Simulated**.
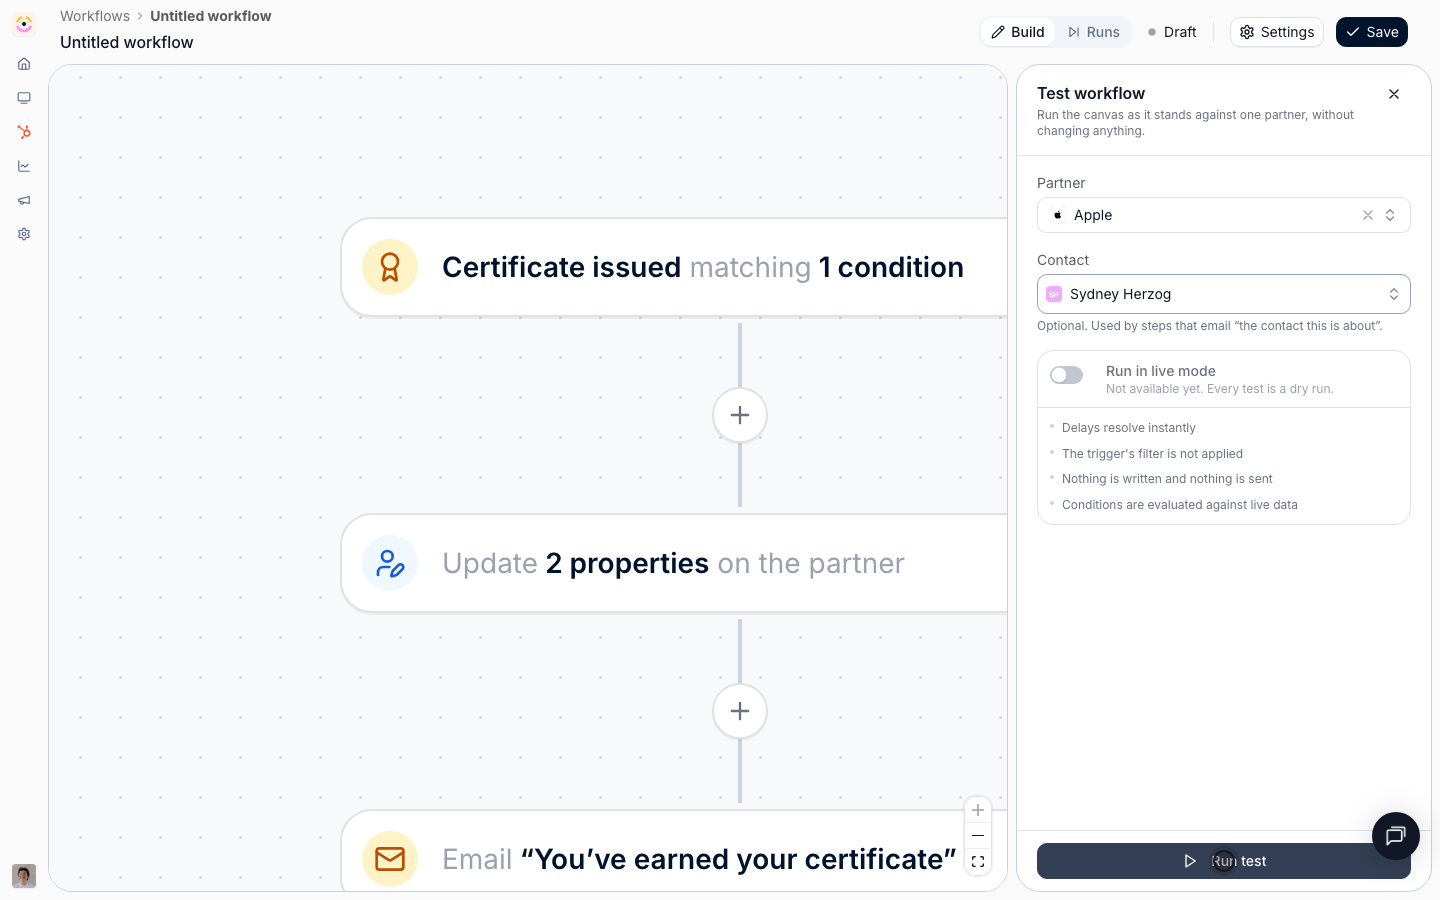 Every node should read **Simulated**. A node badged **Failed** carries its reason, and a node that stopped the run short says why, for example that the partner has no portal contacts for the email to reach. Fix what you find and run the test again.
 ### Name it and switch it on
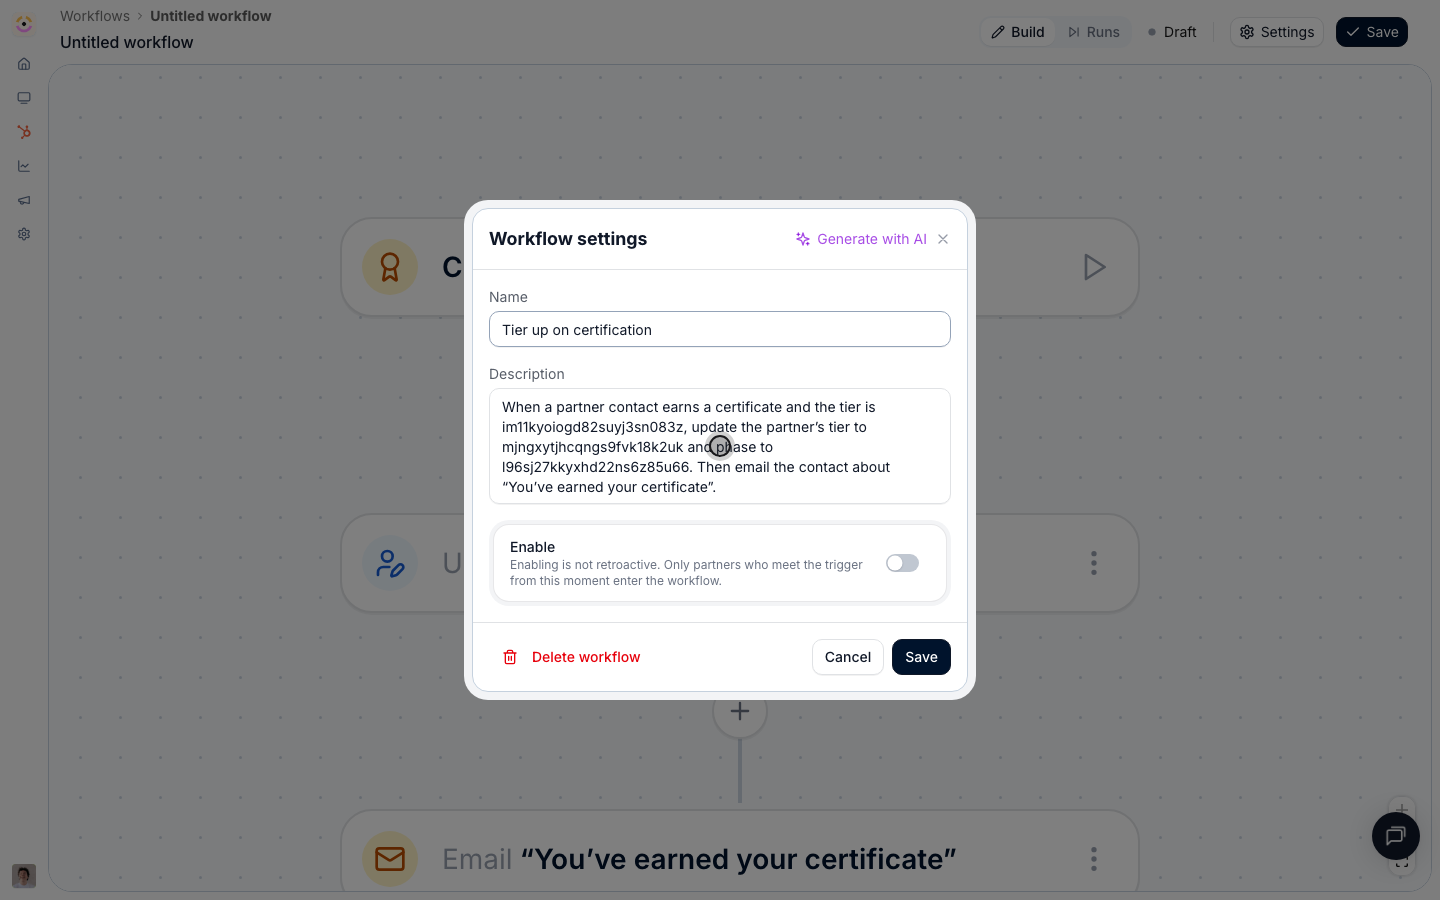
Open **Settings**. Select **Generate with AI** to write both fields from the canvas, then edit them.
* **Name** - what the workflow does, in a few words. It is the column your colleagues scan on the workflows list.
* **Description** - one or two sentences for whoever reads this workflow next, including you in six months.
### Name it and switch it on
Open **Settings**. Select **Generate with AI** to write both fields from the canvas, then edit them.
* **Name** - what the workflow does, in a few words. It is the column your colleagues scan on the workflows list.
* **Description** - one or two sentences for whoever reads this workflow next, including you in six months.
 Switch **Enable** on and select **Save**.
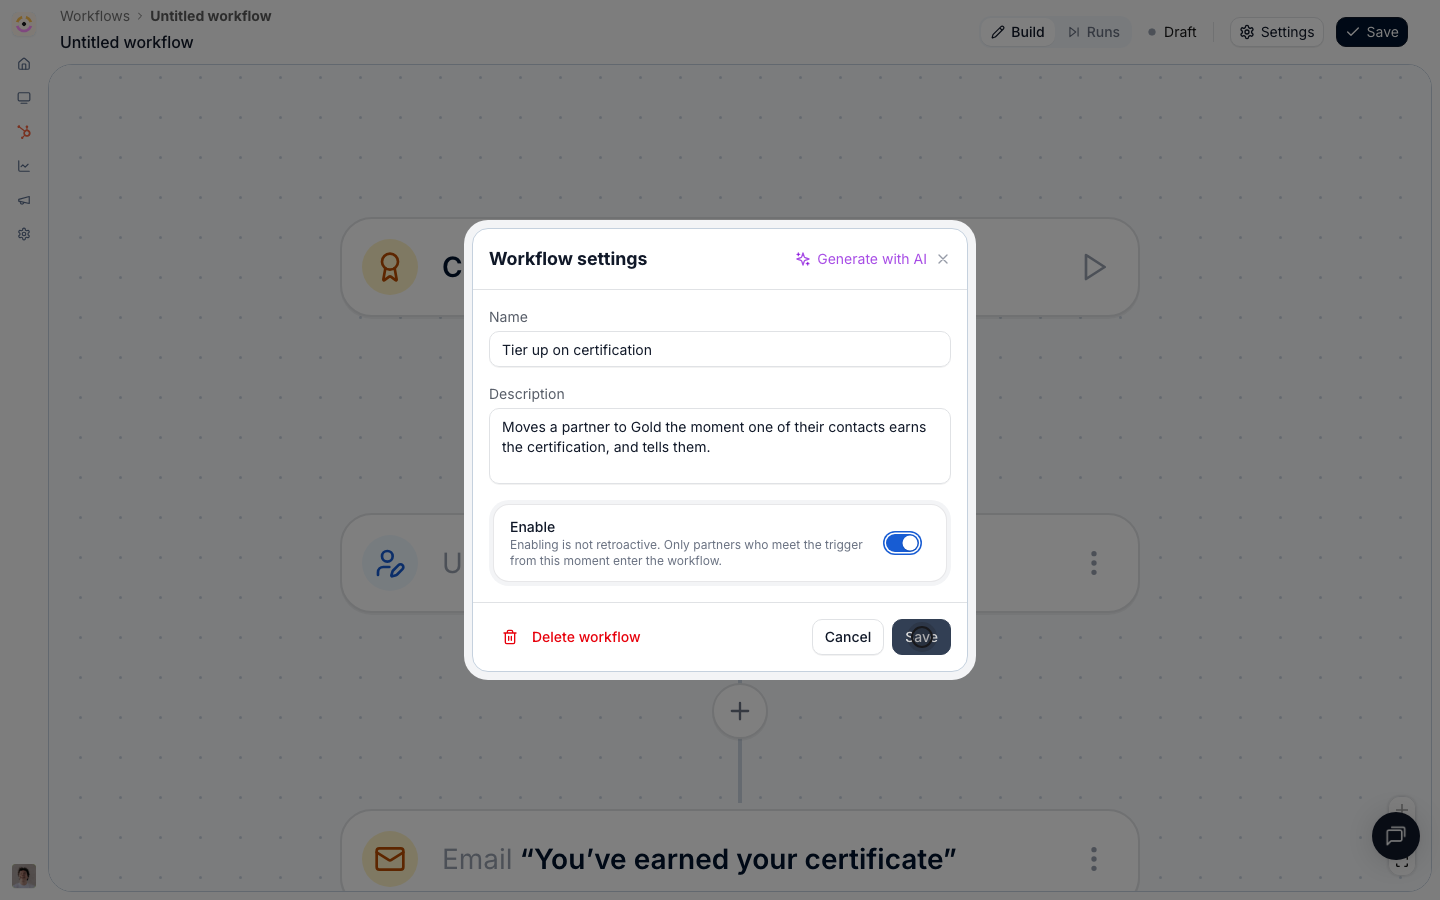
If **Enable** is unavailable, **Not ready to enable yet** lists exactly what is missing: a trigger, at least one action, a value left unset on a step, or a pairing that cannot work. Clear the list and the switch becomes available.
Enabling is not retroactive. Only partners who earn the certificate from this moment on enter the workflow; nothing replays history. If you need to catch up the partners who already certified, do that once by hand or with a bulk update.
Switch **Enable** on and select **Save**.
If **Enable** is unavailable, **Not ready to enable yet** lists exactly what is missing: a trigger, at least one action, a value left unset on a step, or a pairing that cannot work. Clear the list and the switch becomes available.
Enabling is not retroactive. Only partners who earn the certificate from this moment on enter the workflow; nothing replays history. If you need to catch up the partners who already certified, do that once by hand or with a bulk update.
 ## Verify it worked
The workflows list shows the workflow as **Active** with its trigger, its step count, and you as the owner. Issue the certificate to a test contact, then switch the canvas header to **Runs**: a run appears named after that partner, its nodes read **Ran**, and the partner's tier has moved. The contact has the email in their inbox, and the property you wrote is on the partner's record in HubSpot or Salesforce.
## Related
Add delays and conditions to build a nudge chain that escalates.
What a rehearsal proves, and how to read every node outcome.
Check what already runs before building the next one.
Every trigger, action, condition, and delay option.
## Verify it worked
The workflows list shows the workflow as **Active** with its trigger, its step count, and you as the owner. Issue the certificate to a test contact, then switch the canvas header to **Runs**: a run appears named after that partner, its nodes read **Ran**, and the partner's tier has moved. The contact has the email in their inbox, and the property you wrote is on the partner's record in HubSpot or Salesforce.
## Related
Add delays and conditions to build a nudge chain that escalates.
What a rehearsal proves, and how to read every node outcome.
Check what already runs before building the next one.
Every trigger, action, condition, and delay option.