> ## Documentation Index
> Fetch the complete documentation index at: https://docs.introw.io/llms.txt
> Use this file to discover all available pages before exploring further.
# Launch an affiliate campaign
> Create a campaign, set attribution and commission, enroll partners with tracked links, install conversion tracking, and surface it to partners in Introw.
{/* An affiliate campaign gives each partner a unique tracked link, attributes the conversions
those links drive, and rewards the right partner automatically. Reach for this when you want
affiliates to promote you on their own sites, newsletters, or socials and be paid for the
business they bring. Done once, it runs itself: partners share, conversions attribute, and
commission accrues without your team chasing spreadsheets. */}
## What you'll achieve
A live affiliate campaign where every enrolled partner has their own tracked referral link, clicks and conversions are attributed inside your chosen window, the attributed partner earns a fixed amount or a commission plan reward per conversion, and partners watch their own clicks, conversions, and earnings from their portal. This guide covers the whole job: creating the campaign, setting attribution, choosing the reward, enrolling partners, installing tracking, and publishing the partner view.
## Before you start
Affiliate campaigns require the campaigns module to be enabled on your plan. If the **Affiliate campaigns** area is locked, ask your admin to enable it.
A campaign needs a conversion form. This form is submitted automatically when a conversion is recorded, with the partner attributed, so the record lands in your CRM. Build it in Forms first if you do not have one.
Know whether partners earn a flat amount per conversion or rewards governed by a commission plan. If you want a plan, create it first so you can link it.
You will install a small tracking snippet on the site partners send traffic to, or record conversions from your backend or a HubSpot form. Confirm you can edit the site or its tag manager.
## Watch it
## Steps
### Create the campaign
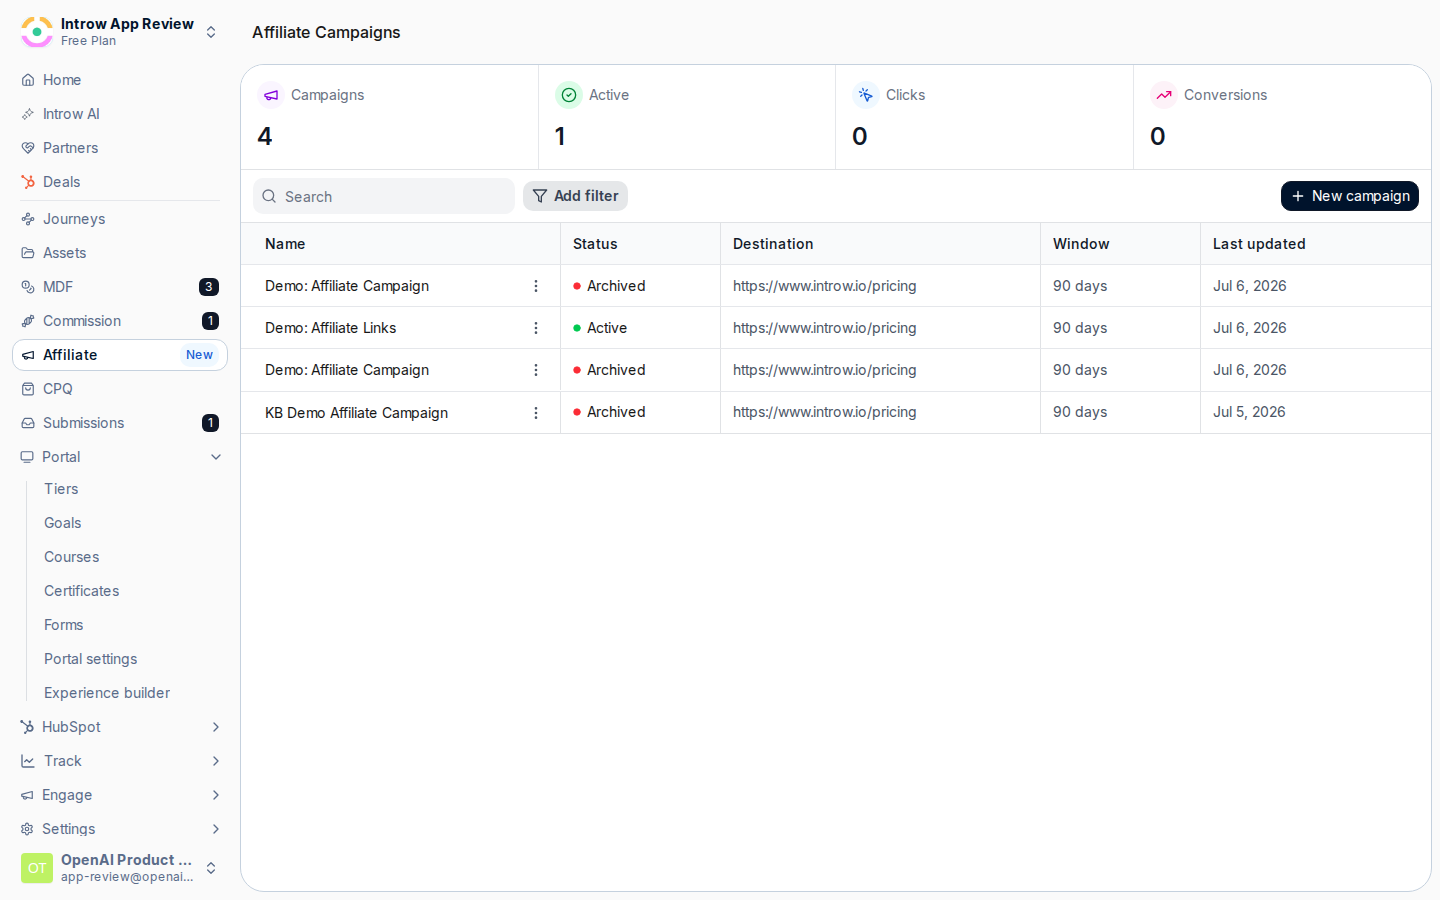
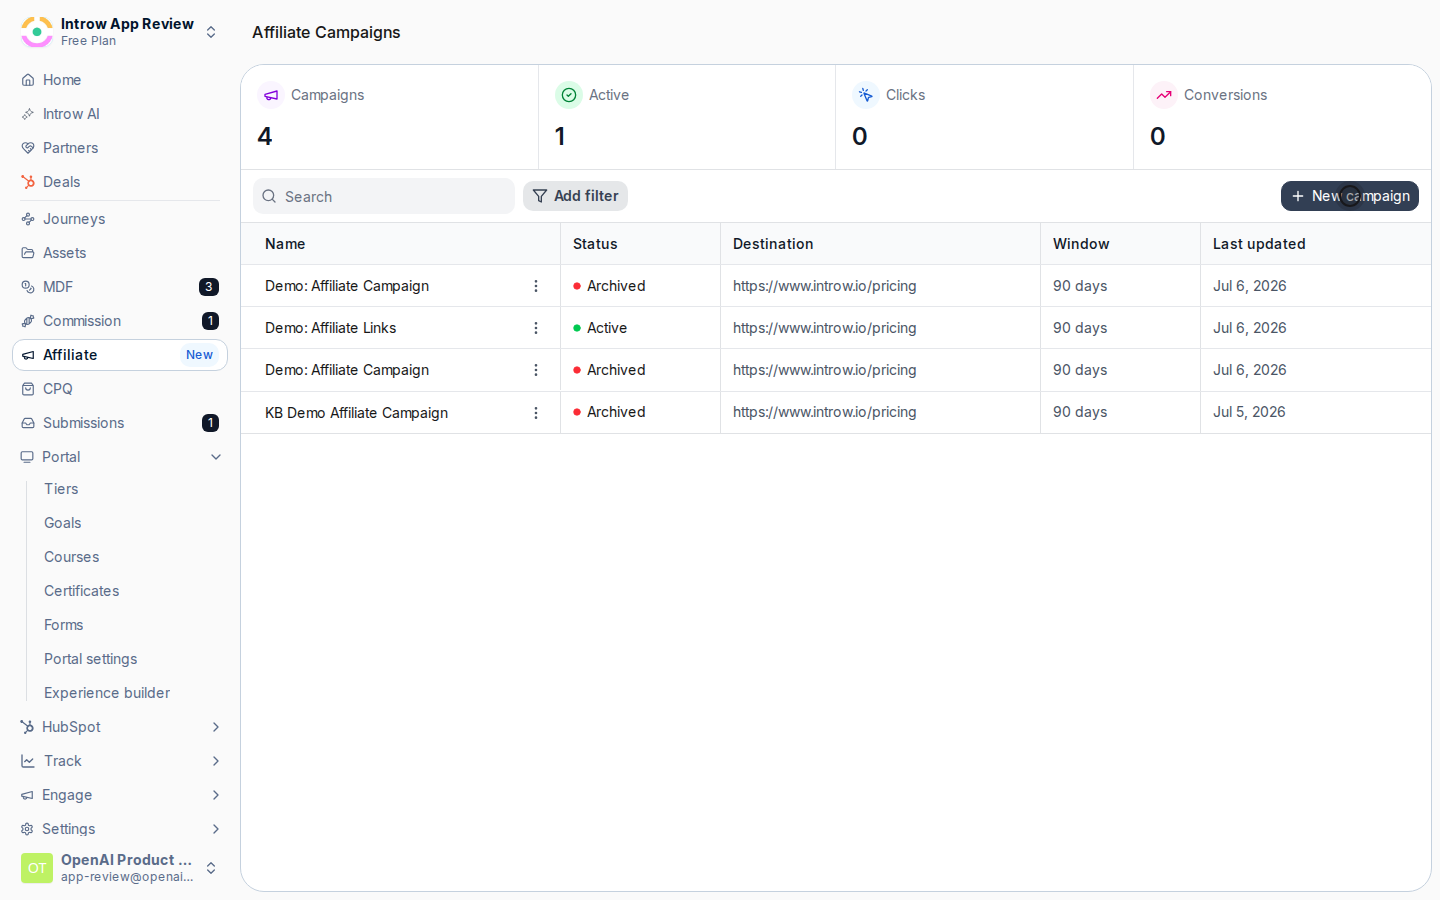
Go to [Affiliate campaigns](https://app.introw.io/campaigns) and select **New campaign**. The campaign is where the whole referral program lives, so everything below hangs off this one record.
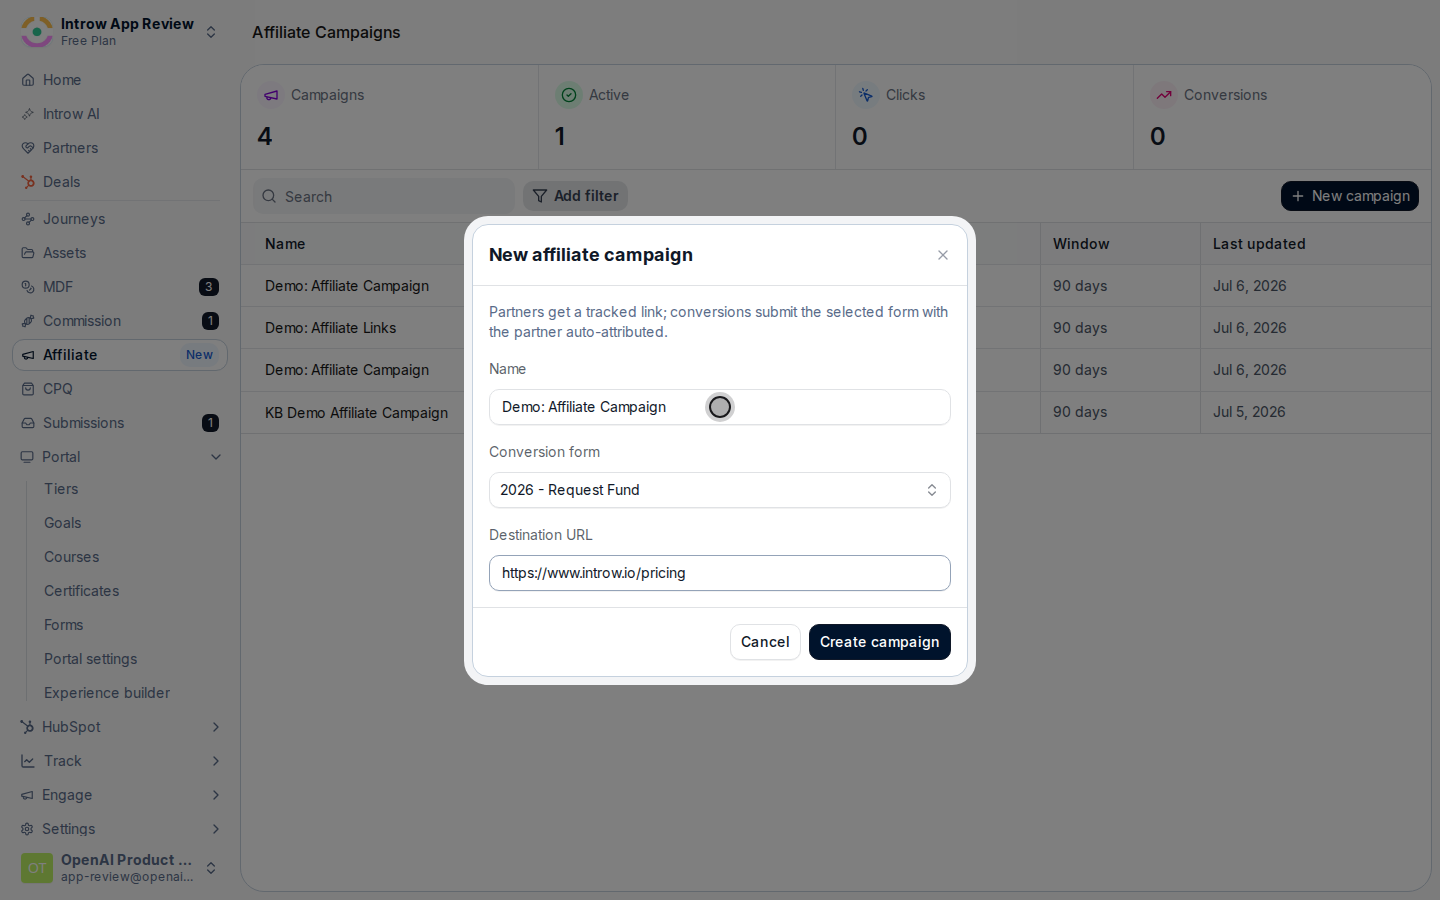
 In the **New affiliate campaign** dialog, set the three basics that define what is being tracked:
* **Name** - the campaign's internal label (for example, "Q3 Affiliate Program"). It is how you and your team find the campaign in the list, so make it descriptive.
* **Conversion form** - the form submitted automatically when a conversion is recorded, with the partner attributed. This is what writes the conversion into your CRM, so pick the form that represents the goal you are paying for (a demo request, a signup, a purchase).
* **Destination URL** - the page a visitor lands on after clicking a partner's link (for example, your pricing or signup page). Every partner link redirects here, carrying the tracking that ties the click to the partner.
Select **Create campaign**. The campaign opens to its configuration tabs, ready to set up.
In the **New affiliate campaign** dialog, set the three basics that define what is being tracked:
* **Name** - the campaign's internal label (for example, "Q3 Affiliate Program"). It is how you and your team find the campaign in the list, so make it descriptive.
* **Conversion form** - the form submitted automatically when a conversion is recorded, with the partner attributed. This is what writes the conversion into your CRM, so pick the form that represents the goal you are paying for (a demo request, a signup, a purchase).
* **Destination URL** - the page a visitor lands on after clicking a partner's link (for example, your pricing or signup page). Every partner link redirects here, carrying the tracking that ties the click to the partner.
Select **Create campaign**. The campaign opens to its configuration tabs, ready to set up.
 ### Set attribution
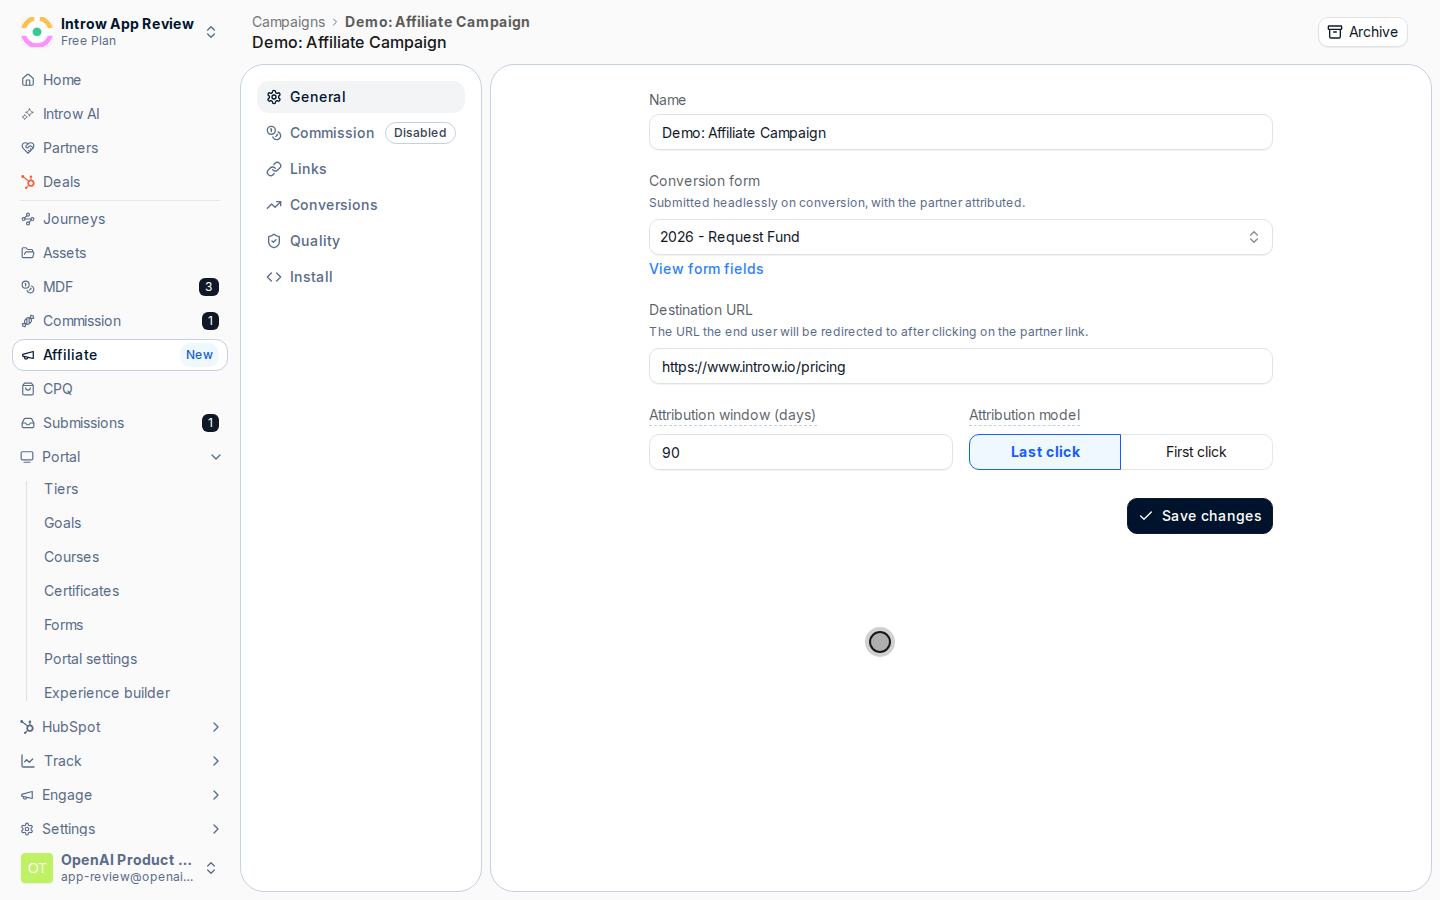
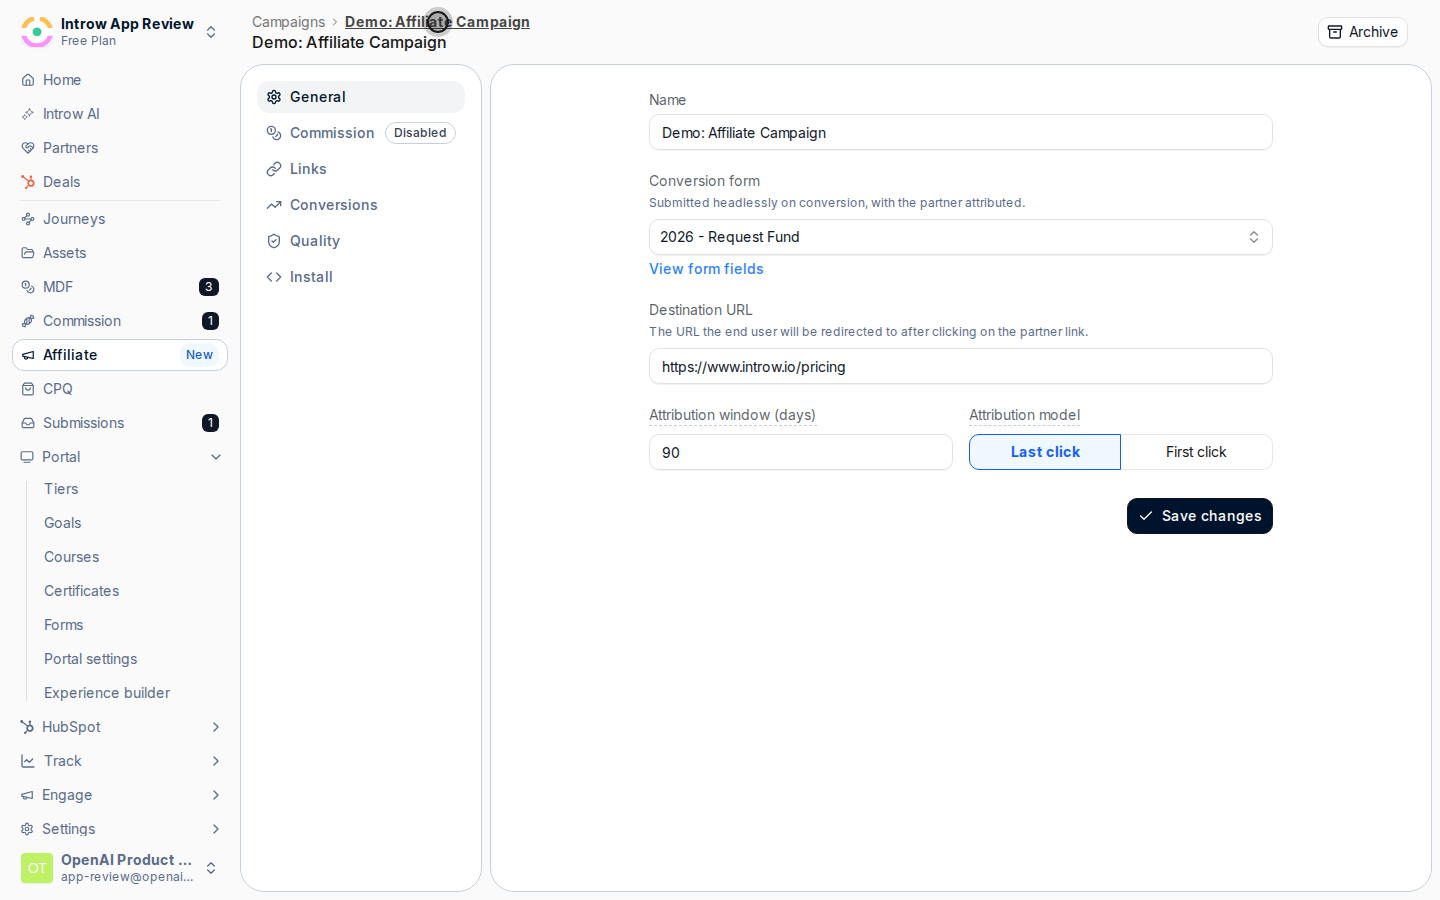
On the campaign, open the **General** tab. This is where you confirm the basics and define how credit is assigned. The **Name**, **Conversion form**, and **Destination URL** you just set appear here and can be edited any time.
### Set attribution
On the campaign, open the **General** tab. This is where you confirm the basics and define how credit is assigned. The **Name**, **Conversion form**, and **Destination URL** you just set appear here and can be edited any time.
 Attribution decides which partner earns credit, and for how long after a click:
* **Attribution window (days)** - how many days a click stays valid for attribution. A conversion that arrives after the window closes is not credited to the partner. Accepts 1 to 365 days; choose a window that matches how long your buying cycle realistically takes (a short window for impulse signups, a longer one for considered B2B purchases).
* **Attribution model** - which click wins when a visitor clicks more than one affiliate link before converting. **Last click** credits the most recent partner (the one who closed the visit); **First click** credits the partner who first introduced the visitor. Last click is the common default for affiliate programs.
Select **Save changes** to store the General tab.
Attribution decides which partner earns credit, and for how long after a click:
* **Attribution window (days)** - how many days a click stays valid for attribution. A conversion that arrives after the window closes is not credited to the partner. Accepts 1 to 365 days; choose a window that matches how long your buying cycle realistically takes (a short window for impulse signups, a longer one for considered B2B purchases).
* **Attribution model** - which click wins when a visitor clicks more than one affiliate link before converting. **Last click** credits the most recent partner (the one who closed the visit); **First click** credits the partner who first introduced the visitor. Last click is the common default for affiliate programs.
Select **Save changes** to store the General tab.
 ### Set commission
Open the **Commission** tab and turn on the **Commissions** switch. The reward is what motivates affiliates, so this connects each conversion to a payout. With commissions off, conversions are still tracked but no reward accrues.
### Set commission
Open the **Commission** tab and turn on the **Commissions** switch. The reward is what motivates affiliates, so this connects each conversion to a payout. With commissions off, conversions are still tracked but no reward accrues.
 Under **Reward type**, pick the model that fits your program. The two options are mutually exclusive, so a campaign pays one way or the other:
* **Fixed amount per conversion** - a flat amount credited to the attributed partner on every conversion. Choose this for a simple bounty (for example, a set amount per qualified signup), then enter the value in **Commission per conversion** in your organization's currency.
* **Commission plan** - rewards governed by a commission plan (for example, a percentage of invoiced revenue). Choose this for indirect or revenue-based commissions and for stronger protection against conversion fraud, then select the plan from **Commission plan**. If you have no plans yet, create one first, then return here to link it.
Select **Save changes**. The Commission tab now reflects your model and conversions will accrue accordingly.
### Enroll partners and generate links
Open the **Links** tab. Partners can only drive tracked referrals once they have a link, so this step activates the campaign for the partners you choose. Each partner gets exactly one tracked link.
Select **Generate links**, choose the partners to enroll in the **Generate affiliate links** picker, and confirm. Introw creates a unique, signed referral link for each selected partner. Partners who already have a link are skipped, so it is safe to run again as you add more affiliates. The table then lists each partner with their link, clicks, conversions, and quality counts.
### Install conversion tracking
Open the **Install** tab. Clicks and conversions only record once tracking is in place, so this is what makes the whole campaign measurable.
Copy the snippet under **Add the tracking snippet** and paste it once into the `` of every page on your destination site. One snippet covers every campaign in your organization; the click cookie decides which campaign and partner a conversion belongs to. The snippet looks like this:
```html theme={"theme":{"light":"github-light","dark":"github-dark"}}
```
Once it is live, the install status pill shows **Installed** when Introw detects the snippet on your destination URL. Use **Re-check** after you deploy.
Under **Track conversions**, pick the method that matches where your conversion happens. For full setup of each, see the conversion tracking guides; in short:
* **Client-side** - recommended when conversions happen on your website. Call the browser tracking function when a visitor converts.
* **Server-to-Server** - recommended when conversions happen on your backend. Post to the conversions API with a secret API key that has the **affiliate:write** scope. Most reliable.
* **HubSpot forms** - recommended when conversions happen on a HubSpot form. Nothing else to do: once the snippet is installed, every HubSpot form submission on an allowed origin is attributed automatically.
Under **Allowed origins**, list the sites permitted to record browser conversions for this campaign, comma-separated, so only your own sites can submit conversions. This applies to HubSpot forms and client-side tracking. Leave it empty to allow any origin, but setting it is recommended to prevent spoofed conversions. Select **Save**.
### Show the campaign in the portal
Affiliates stay engaged when they can self-serve, so give them their own view. In **Experience builder**, open the partner experience and add a campaign section, then select this campaign. Each partner sees their own link, clicks, conversions, and earnings, and can add their own vanity alias.
Publish the experience so the section goes live for partners. For the full builder workflow, see [Build and publish a portal experience](/features/portal/experiences/guides/build-and-publish-a-portal-experience).
## Verify it worked
Open the campaign's **Conversions** tab and confirm a test conversion appears with the right partner, value, and status. Open the **Links** tab to confirm each enrolled partner has a link with clicks and conversions counting up. Finally, open the portal as a partner and confirm the campaign section shows their own link and live stats. At that point the program is self-running: partners share, conversions attribute inside your window, and the attributed partner earns the reward you configured.
## Related
Install the snippet and verify conversions land.
Turn on the Quality-tab fraud controls.
Give partners a cleaner link to share.
Full configuration options.
Under **Reward type**, pick the model that fits your program. The two options are mutually exclusive, so a campaign pays one way or the other:
* **Fixed amount per conversion** - a flat amount credited to the attributed partner on every conversion. Choose this for a simple bounty (for example, a set amount per qualified signup), then enter the value in **Commission per conversion** in your organization's currency.
* **Commission plan** - rewards governed by a commission plan (for example, a percentage of invoiced revenue). Choose this for indirect or revenue-based commissions and for stronger protection against conversion fraud, then select the plan from **Commission plan**. If you have no plans yet, create one first, then return here to link it.
Select **Save changes**. The Commission tab now reflects your model and conversions will accrue accordingly.
### Enroll partners and generate links
Open the **Links** tab. Partners can only drive tracked referrals once they have a link, so this step activates the campaign for the partners you choose. Each partner gets exactly one tracked link.
Select **Generate links**, choose the partners to enroll in the **Generate affiliate links** picker, and confirm. Introw creates a unique, signed referral link for each selected partner. Partners who already have a link are skipped, so it is safe to run again as you add more affiliates. The table then lists each partner with their link, clicks, conversions, and quality counts.
### Install conversion tracking
Open the **Install** tab. Clicks and conversions only record once tracking is in place, so this is what makes the whole campaign measurable.
Copy the snippet under **Add the tracking snippet** and paste it once into the `` of every page on your destination site. One snippet covers every campaign in your organization; the click cookie decides which campaign and partner a conversion belongs to. The snippet looks like this:
```html theme={"theme":{"light":"github-light","dark":"github-dark"}}
```
Once it is live, the install status pill shows **Installed** when Introw detects the snippet on your destination URL. Use **Re-check** after you deploy.
Under **Track conversions**, pick the method that matches where your conversion happens. For full setup of each, see the conversion tracking guides; in short:
* **Client-side** - recommended when conversions happen on your website. Call the browser tracking function when a visitor converts.
* **Server-to-Server** - recommended when conversions happen on your backend. Post to the conversions API with a secret API key that has the **affiliate:write** scope. Most reliable.
* **HubSpot forms** - recommended when conversions happen on a HubSpot form. Nothing else to do: once the snippet is installed, every HubSpot form submission on an allowed origin is attributed automatically.
Under **Allowed origins**, list the sites permitted to record browser conversions for this campaign, comma-separated, so only your own sites can submit conversions. This applies to HubSpot forms and client-side tracking. Leave it empty to allow any origin, but setting it is recommended to prevent spoofed conversions. Select **Save**.
### Show the campaign in the portal
Affiliates stay engaged when they can self-serve, so give them their own view. In **Experience builder**, open the partner experience and add a campaign section, then select this campaign. Each partner sees their own link, clicks, conversions, and earnings, and can add their own vanity alias.
Publish the experience so the section goes live for partners. For the full builder workflow, see [Build and publish a portal experience](/features/portal/experiences/guides/build-and-publish-a-portal-experience).
## Verify it worked
Open the campaign's **Conversions** tab and confirm a test conversion appears with the right partner, value, and status. Open the **Links** tab to confirm each enrolled partner has a link with clicks and conversions counting up. Finally, open the portal as a partner and confirm the campaign section shows their own link and live stats. At that point the program is self-running: partners share, conversions attribute inside your window, and the attributed partner earns the reward you configured.
## Related
Install the snippet and verify conversions land.
Turn on the Quality-tab fraud controls.
Give partners a cleaner link to share.
Full configuration options.