> ## Documentation Index
> Fetch the complete documentation index at: https://docs.introw.io/llms.txt
> Use this file to discover all available pages before exploring further.
# Set up portal SSO for partners
> Let partners sign in to your portal through their own identity provider with SAML, using your portal's service provider URLs and the SSO-only login switch.
Some partners require their people to sign in through their own identity provider. Portal SSO lets you offer exactly that, so partner access follows their security policy and your largest partners can adopt the portal without a password exception. This guide covers registering your portal as a service provider, saving the partner-facing identity provider metadata, and switching the portal over to SSO, including the side effects you need to plan for first.
## What you'll achieve
Partners sign in to your portal through the configured identity provider. Because portal SSO is the portal's sign-in method once enabled, every partner uses single sign-on instead of email or social login.
## Before you start
Single sign-on is a paid add-on and must be enabled for your organisation. If the Portal SSO page shows an upgrade prompt instead of the configuration, it is not yet on your plan.
You need the Single sign-on permission on your role to open and edit the Portal SSO page.
Portal SSO uses the partner's identity provider, so you need someone on their side with admin access to create the SAML application and provide the metadata URL.
The service provider URLs are built from your portal's address (your custom domain if you have one, otherwise your Introw subdomain). Set your custom domain before configuring SSO so the URLs you hand the partner do not change afterwards.
## Watch it
## Steps
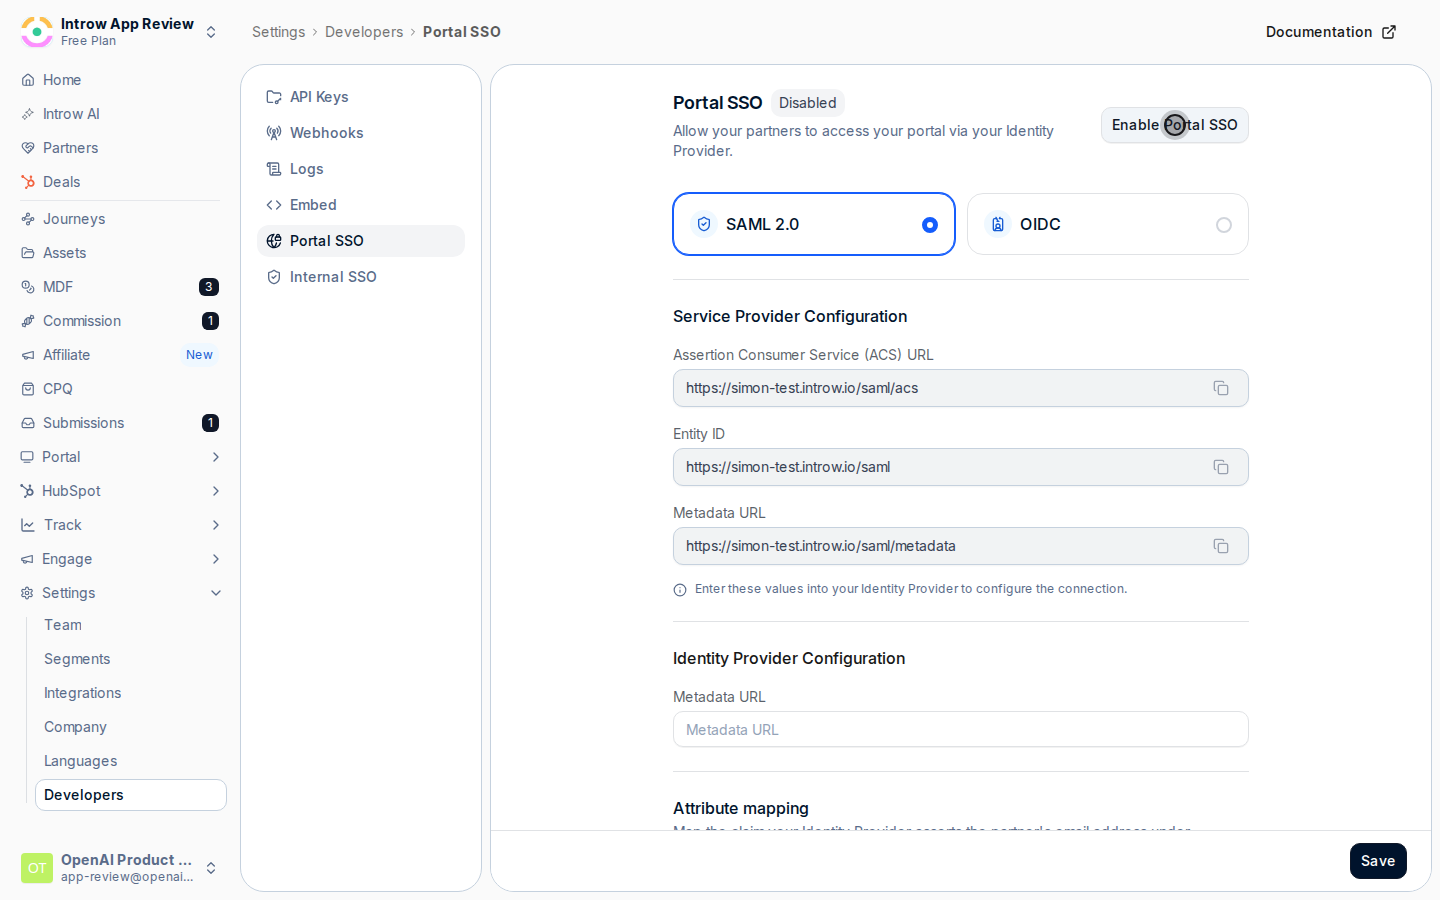
Go to [Portal SSO](https://app.introw.io/settings/developers/portal-sso). The **Enable Portal SSO** switch sits in the header, and the service provider and identity provider configuration are below it.
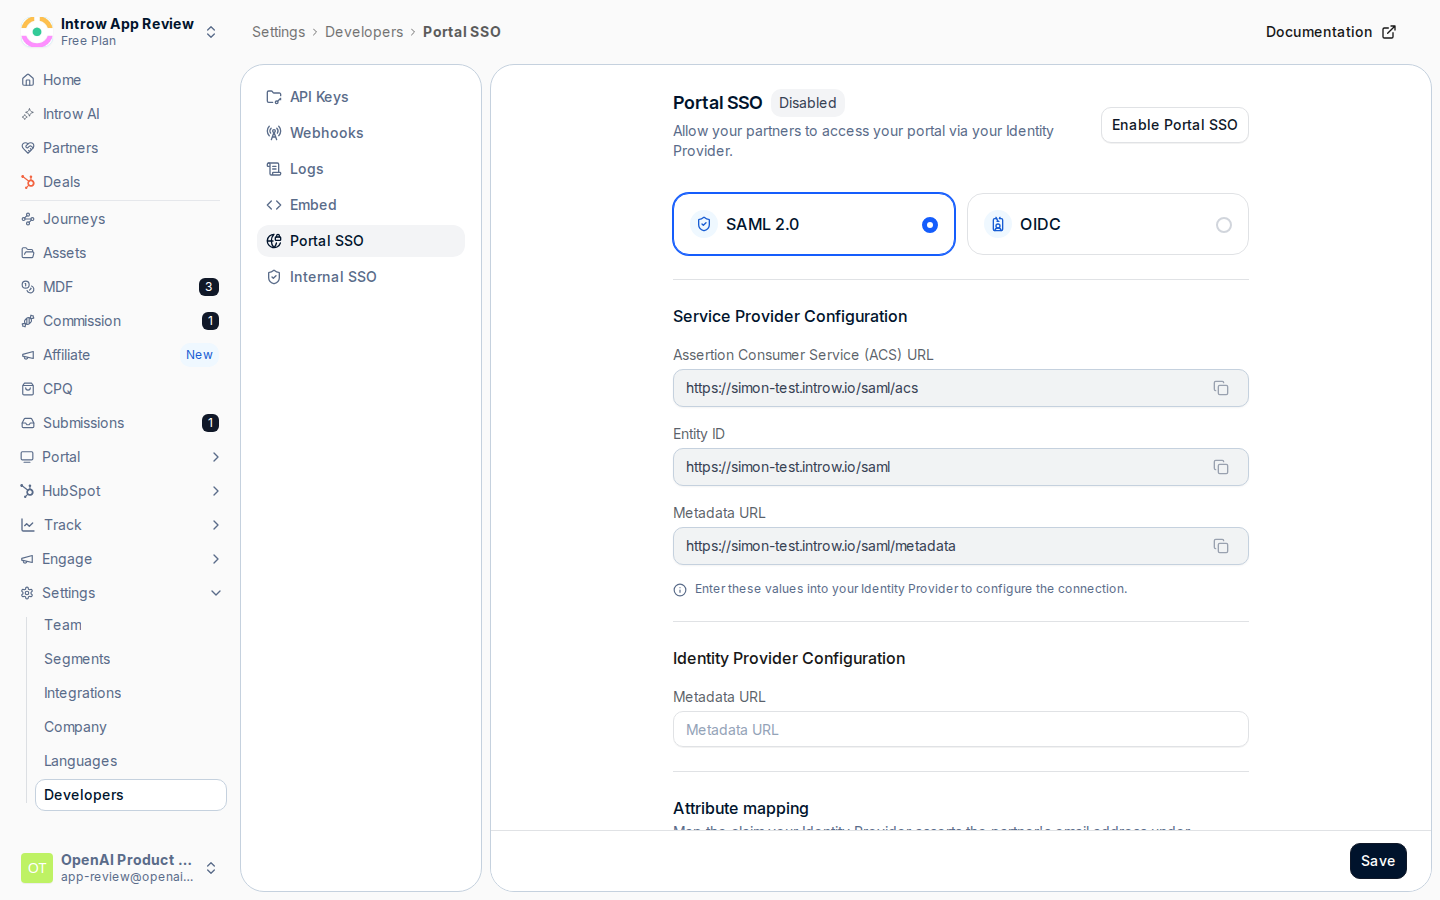 Have the partner create a SAML application in their identity provider using the three values under **Service Provider Configuration**, each with a copy button.
* **Assertion Consumer Service (ACS) URL** - where the partner's provider posts the SAML response. Unlike internal SSO, this URL points at your portal's address, so it reflects your custom domain if one is set.
* **Entity ID** - the identifier the partner's provider uses to recognise your portal as the service provider.
* **Metadata URL** - your portal's service provider metadata, if their provider prefers to import the configuration from a URL.
Because these URLs are derived from your portal address, changing your custom domain later changes them: re-share the updated URLs with the partner and have them update the application if you move domains.
Have the partner create a SAML application in their identity provider using the three values under **Service Provider Configuration**, each with a copy button.
* **Assertion Consumer Service (ACS) URL** - where the partner's provider posts the SAML response. Unlike internal SSO, this URL points at your portal's address, so it reflects your custom domain if one is set.
* **Entity ID** - the identifier the partner's provider uses to recognise your portal as the service provider.
* **Metadata URL** - your portal's service provider metadata, if their provider prefers to import the configuration from a URL.
Because these URLs are derived from your portal address, changing your custom domain later changes them: re-share the updated URLs with the partner and have them update the application if you move domains.
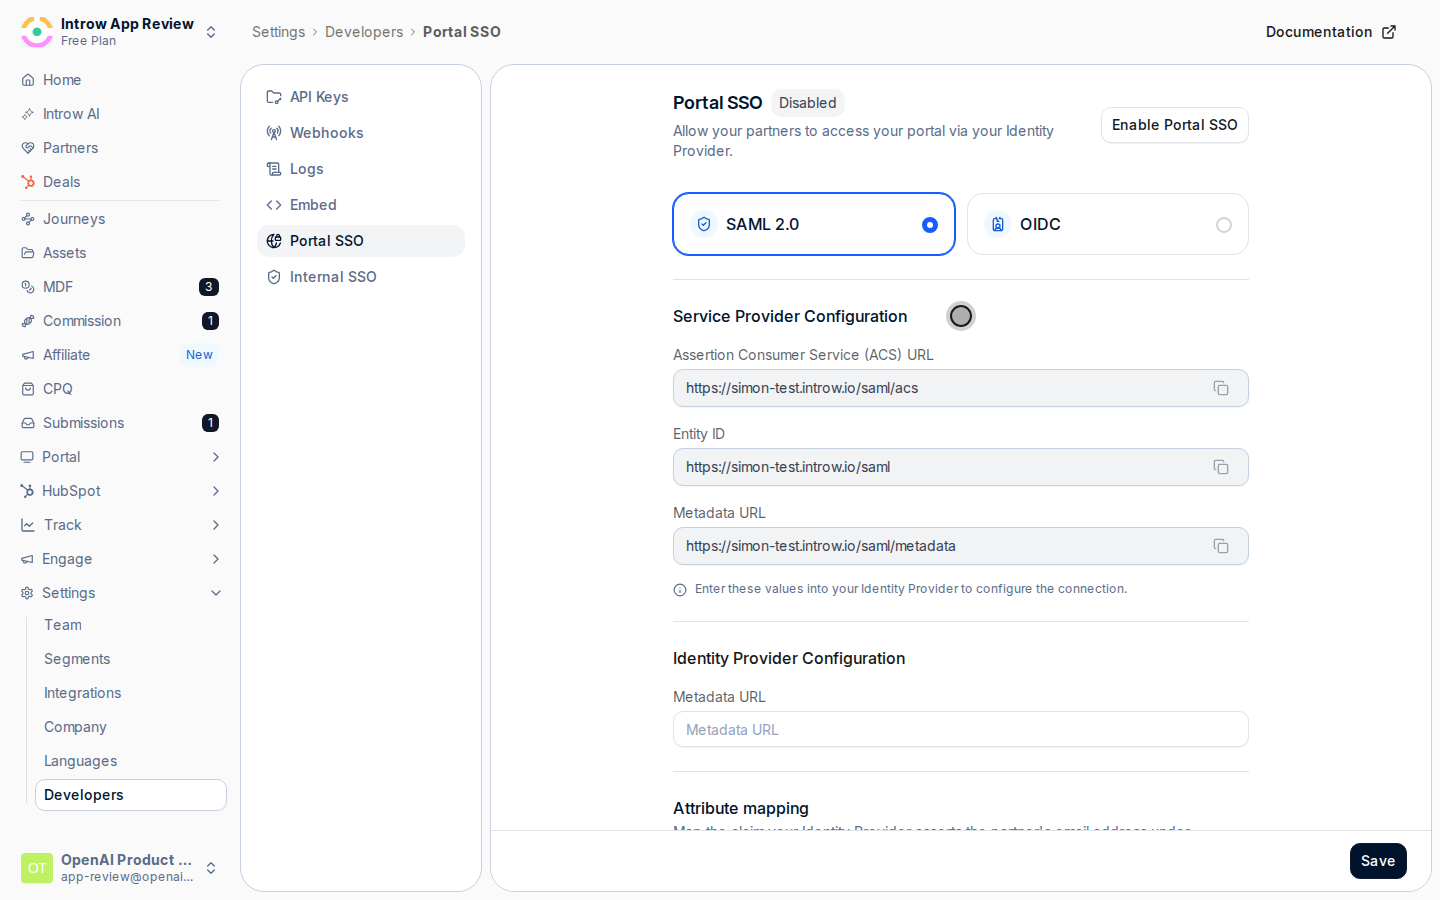 Under **Identity Provider Configuration**, paste the partner's identity provider **Metadata URL** and select **Save**. Introw fetches and validates the document is real SAML identity provider metadata, so the URL must be reachable; if it cannot be fetched or is not valid metadata, Introw shows an error and saves nothing.
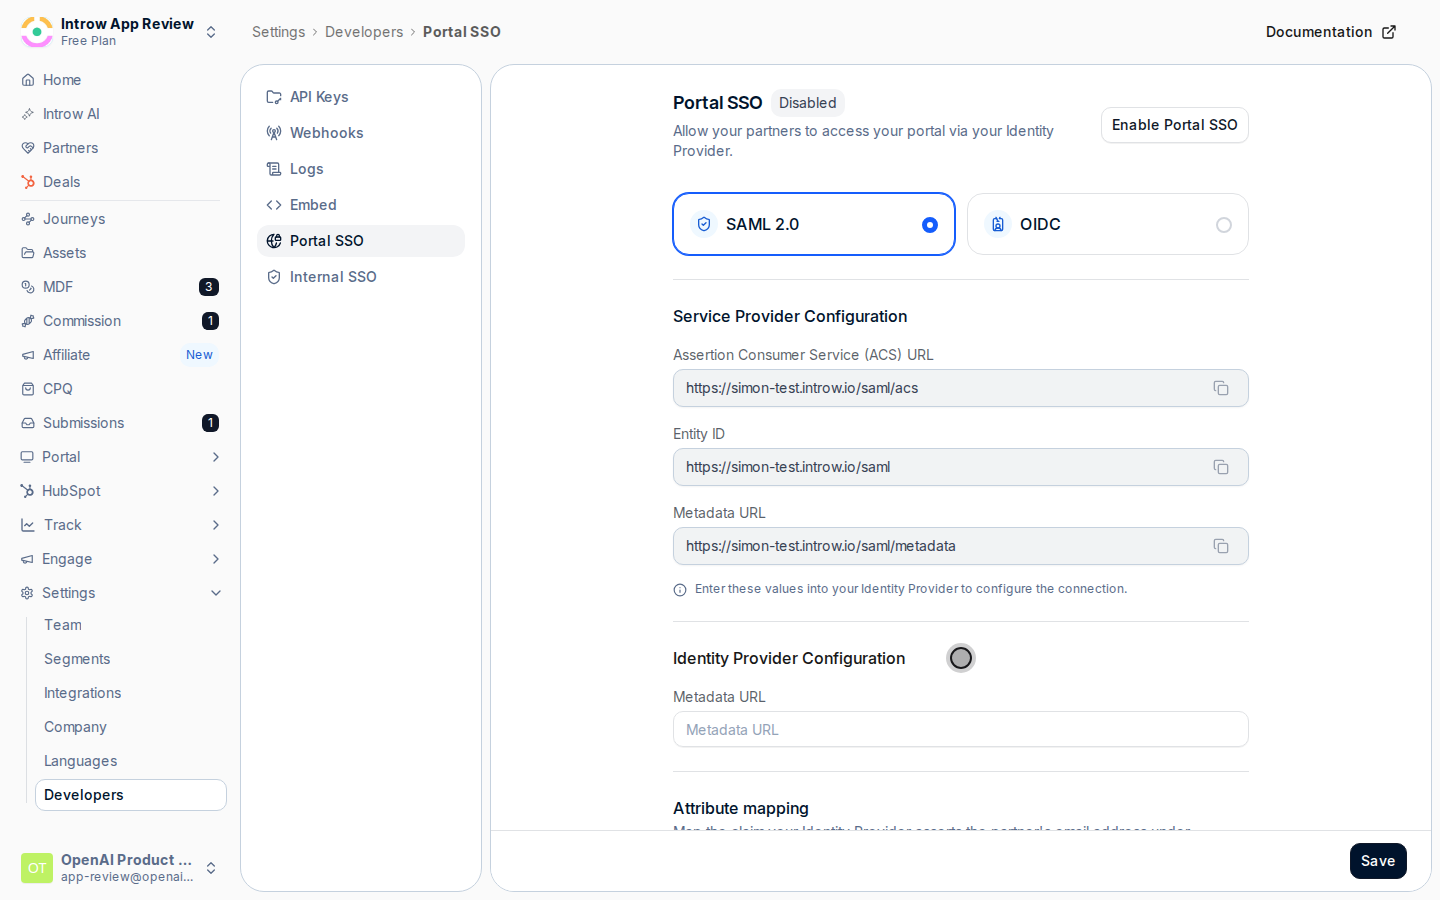 Turning on portal SSO immediately makes the partner's identity provider the portal's only sign-in method: email and social login are switched off for partners. There is no fallback once it is enabled, so confirm the metadata is saved and valid and that the partner's users are assigned to the application before you flip the switch.
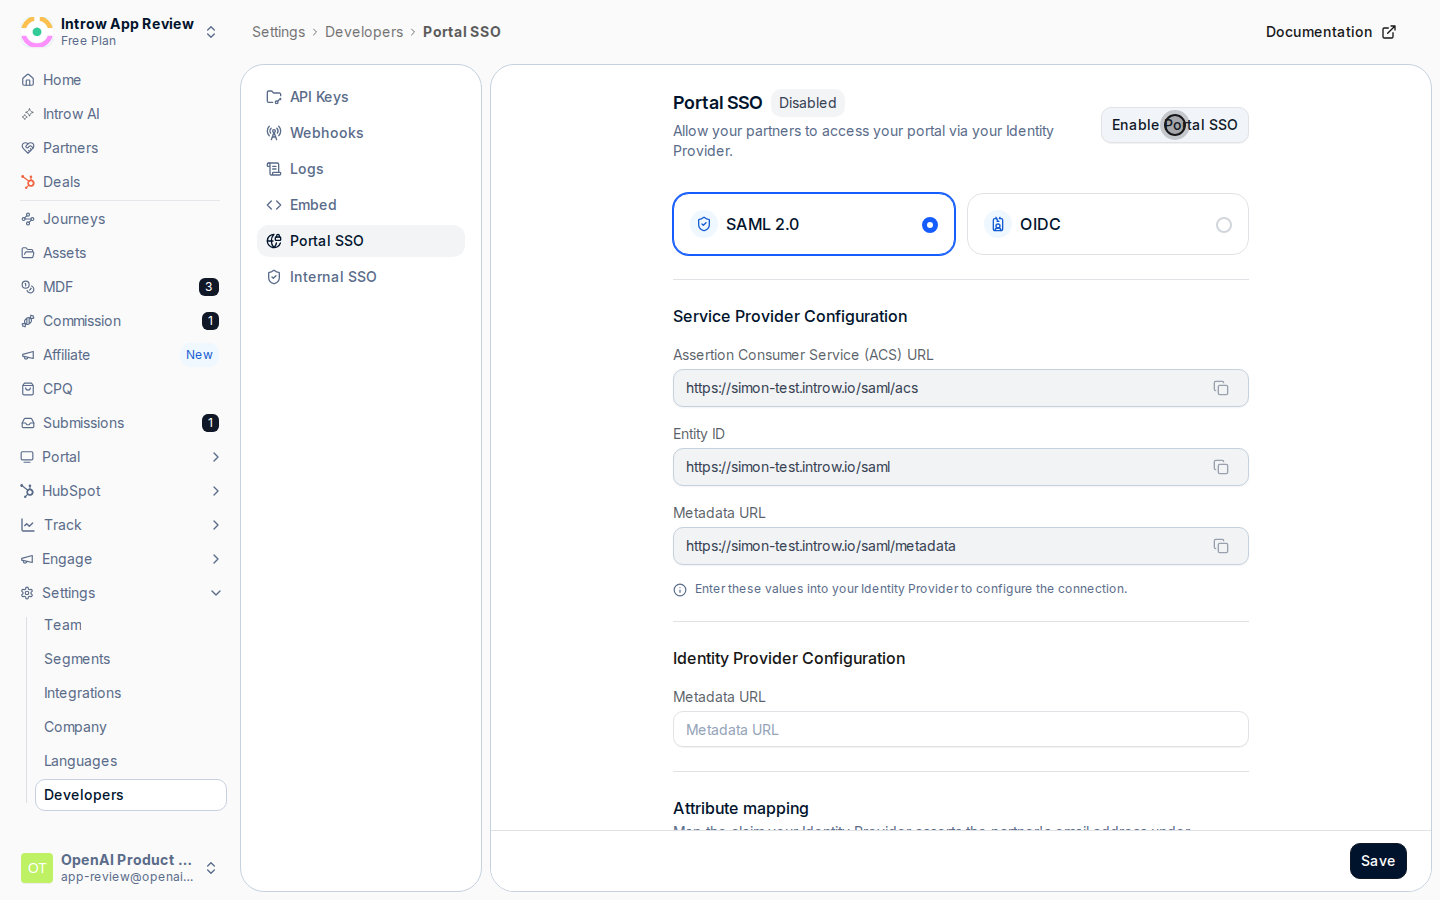 Turn on the **Enable Portal SSO** switch and confirm in the dialog, which states it will enable portal SSO using the identity provider for all your partners. The portal now signs in through SSO. To revert to email and social login, turn the switch off and confirm.
 ## Verify it worked
A partner opens your portal and is sent to the configured identity provider to sign in, then lands in the portal. The portal sign-in screen no longer offers email or social login for partners while portal SSO is enabled.
## Related
Do the same for your own team.
Full configuration options.
## Verify it worked
A partner opens your portal and is sent to the configured identity provider to sign in, then lands in the portal. The portal sign-in screen no longer offers email or social login for partners while portal SSO is enabled.
## Related
Do the same for your own team.
Full configuration options.